How do I create a sponsorship campaign in the Brand Control Center?
Sponsorship campaigns allow brands to directly monetize content and partnerships by promoting selected posts across their Community Media Network.
Why this matters:
- Launch custom monetization campaigns beyond programmatic ads
- Promote partner or internal content as sponsored media
- Control distribution, pricing, and duration
- Unlock predictable CPM-based revenue streams
Step-by-Step Guide
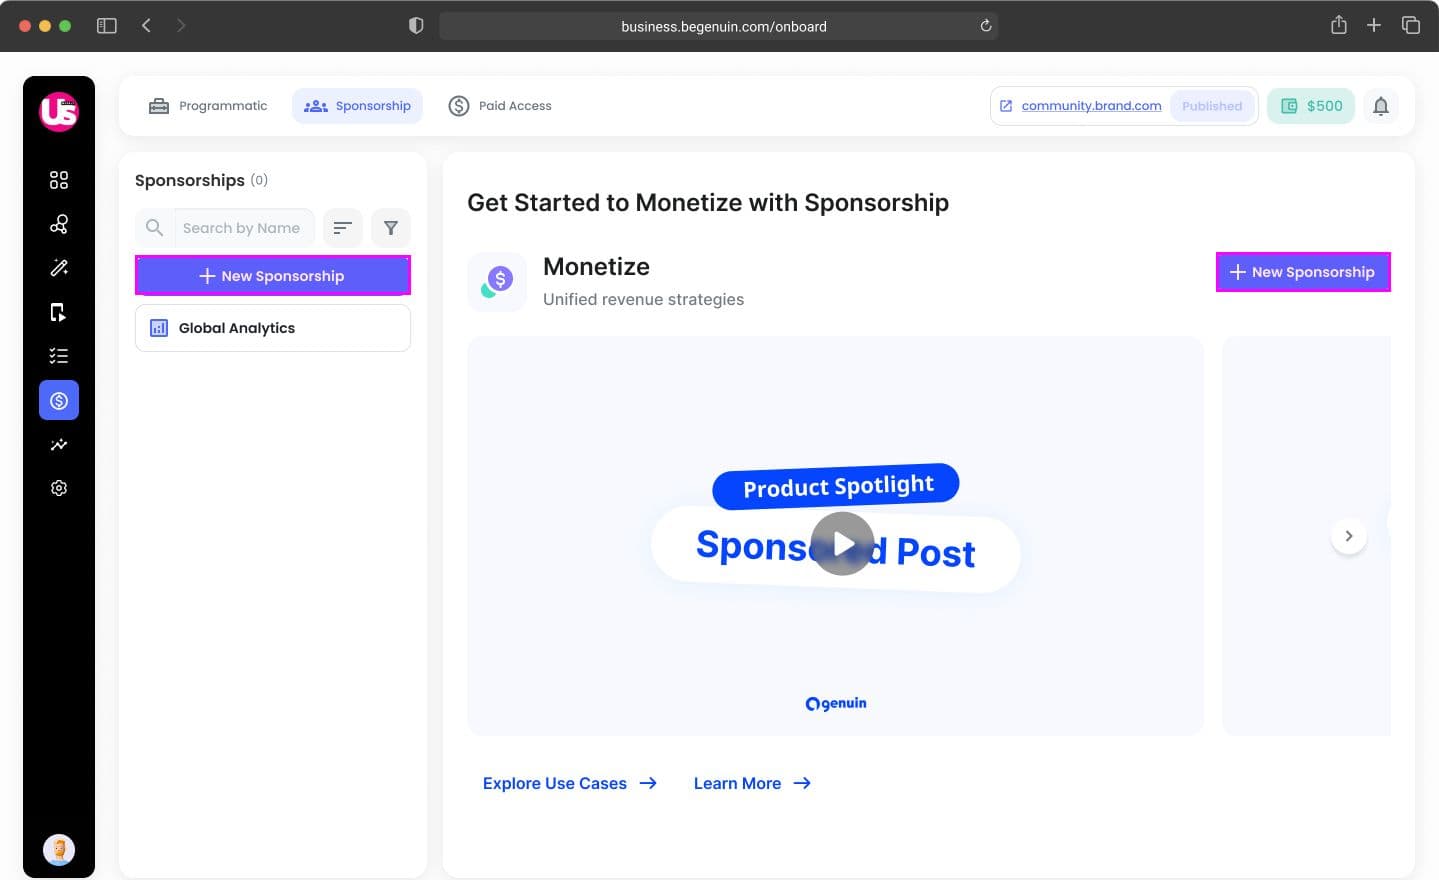
Step 1: Navigate to Sponsorships
Go to: Monetization > Sponsorship > Create New Sponsorship
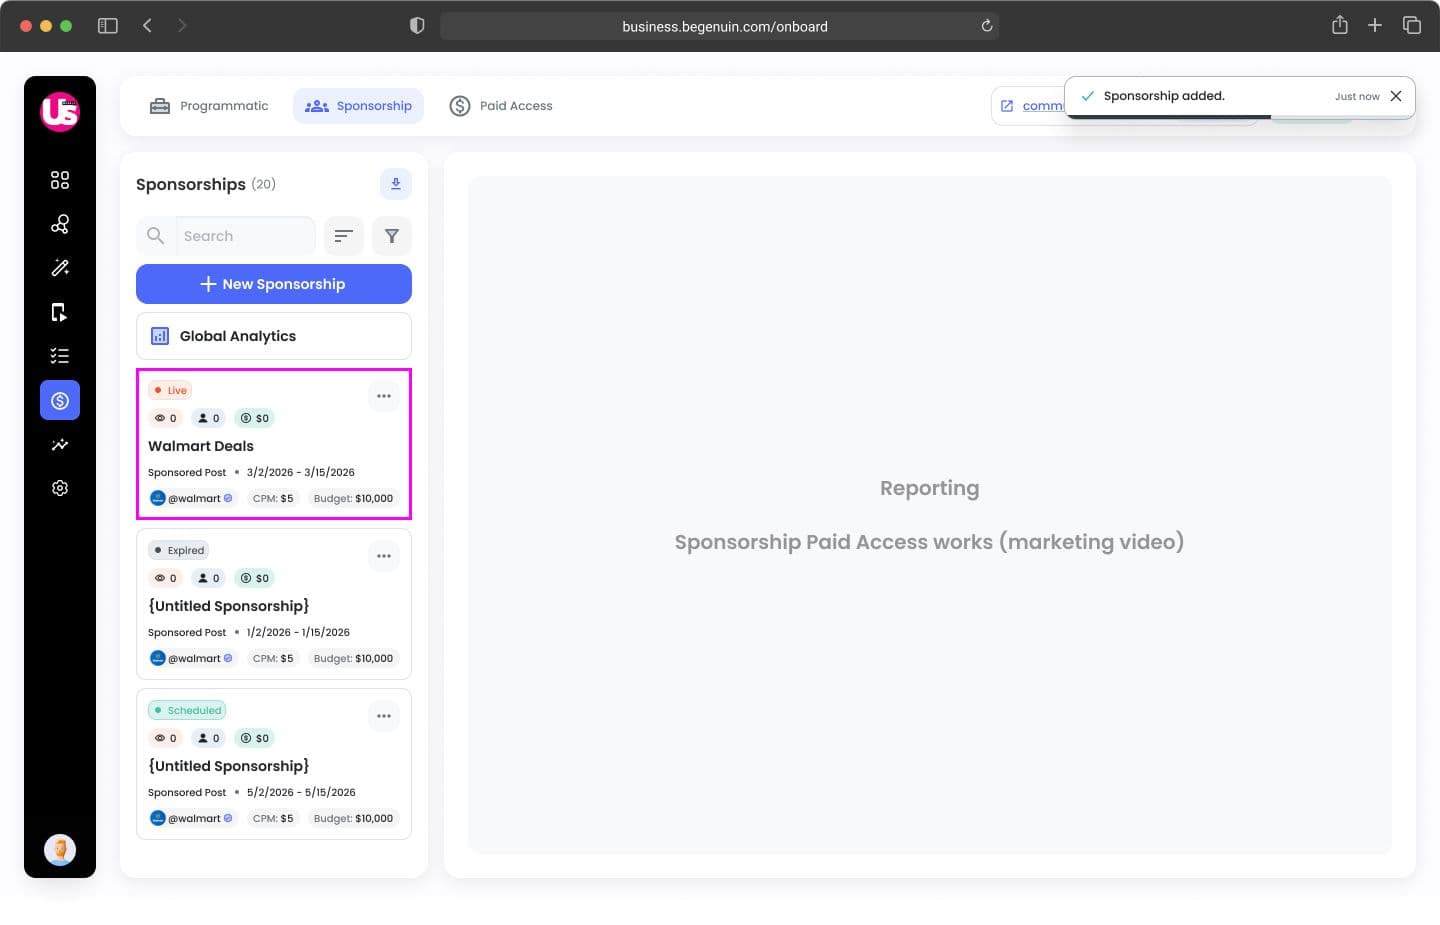
You will see:
- Empty state (if no sponsorships exist)
- List of sponsorships (with filters & CSV download)
- Analytics panel
- CTA: Create New Sponsorship
Clicking “+ New Sponsorship” will open the configuration window.
Step 2: Add Basic Campaign Details
- Sponsorship Title (mandatory)
- Sponsorship Type:
- Sponsored Post - content appears in feed placements.
- Sponsored Takeover - content dominates a placement/carousel.
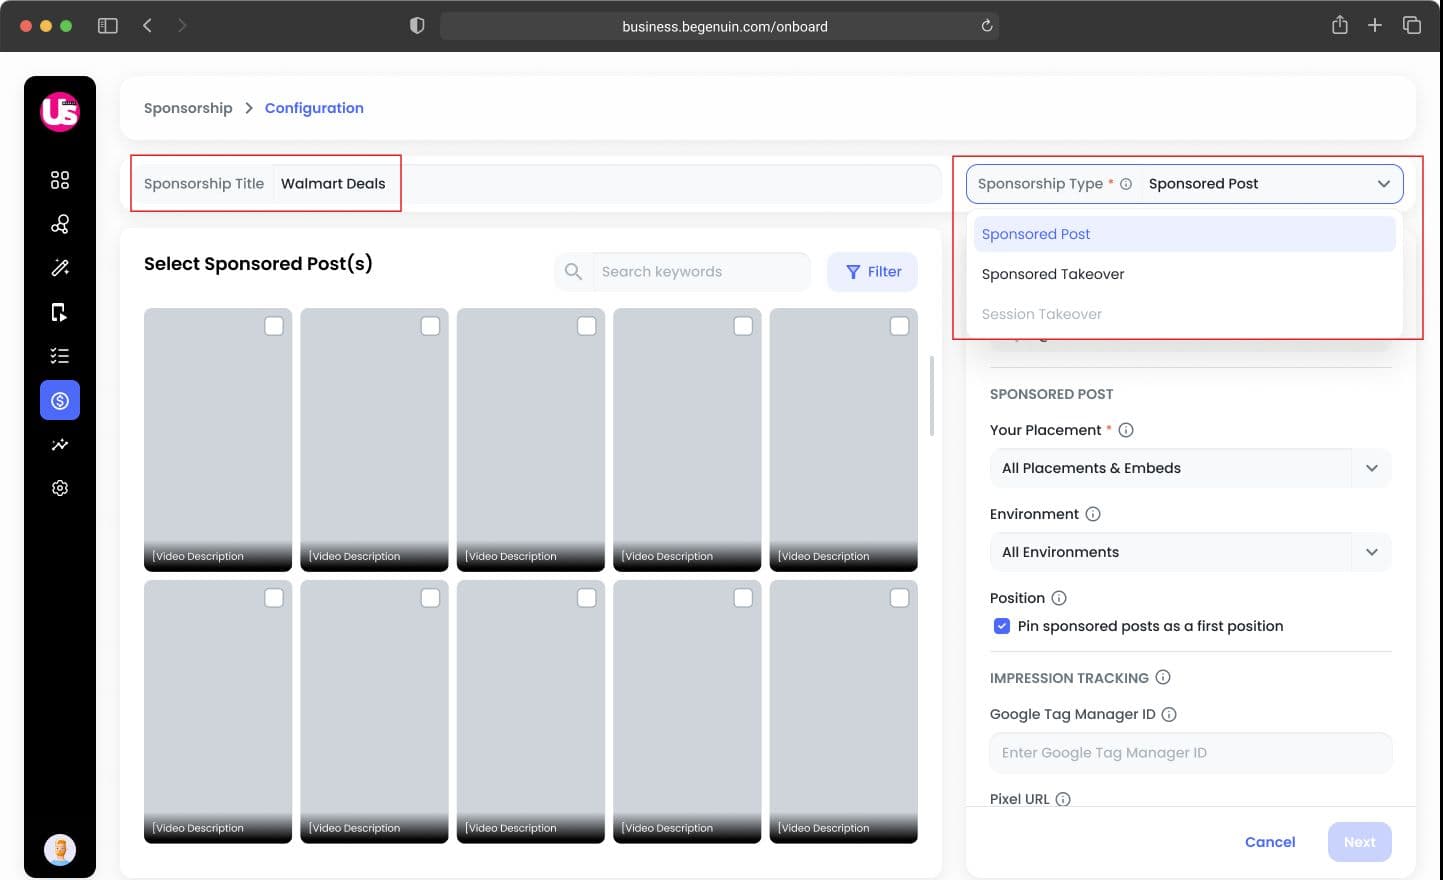
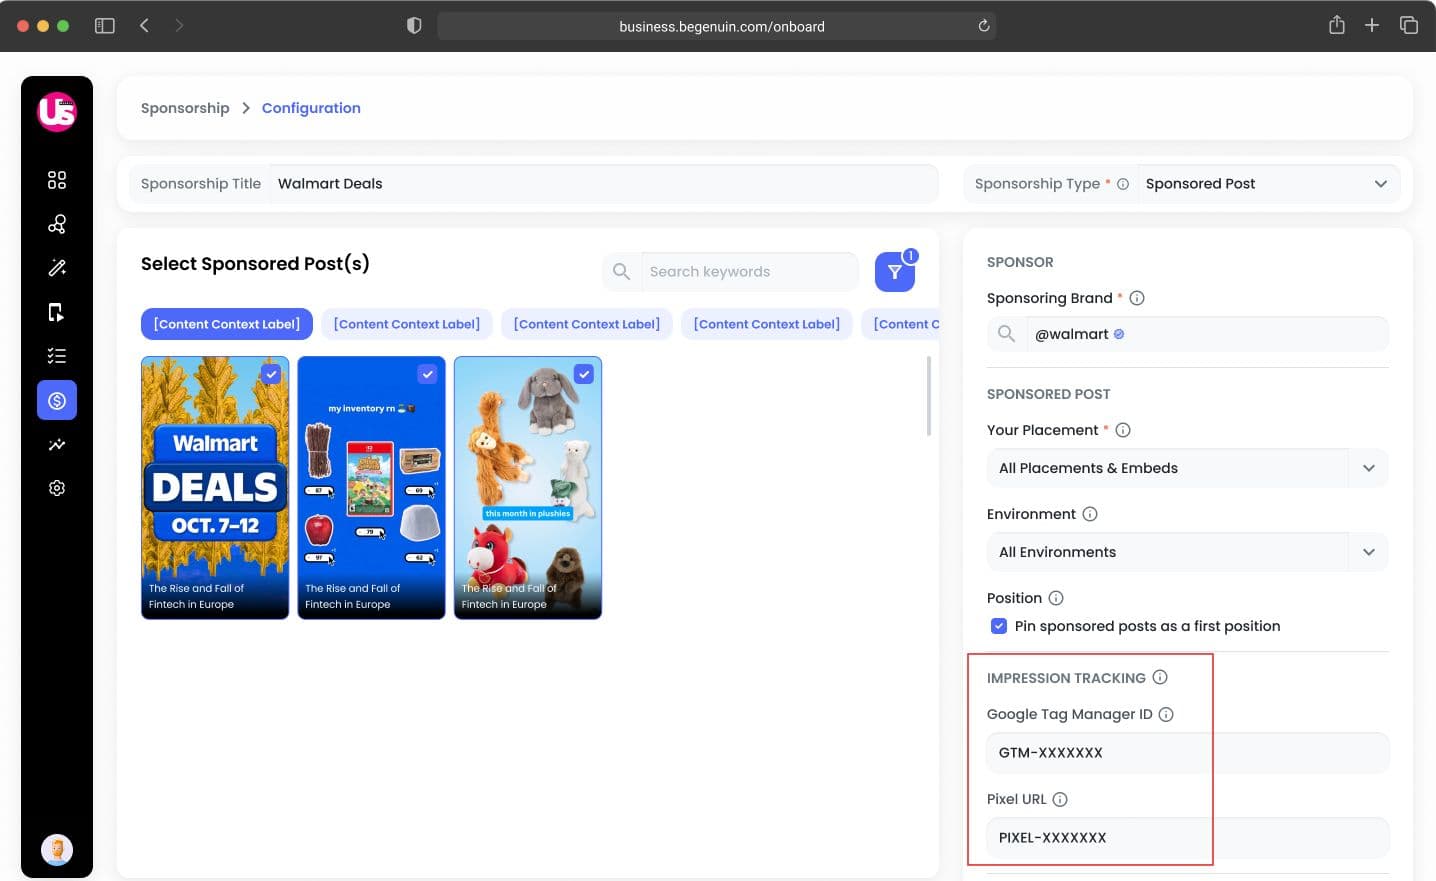
Step 3: Select Posts to Promote
Choose from approved posts in the Manage section.
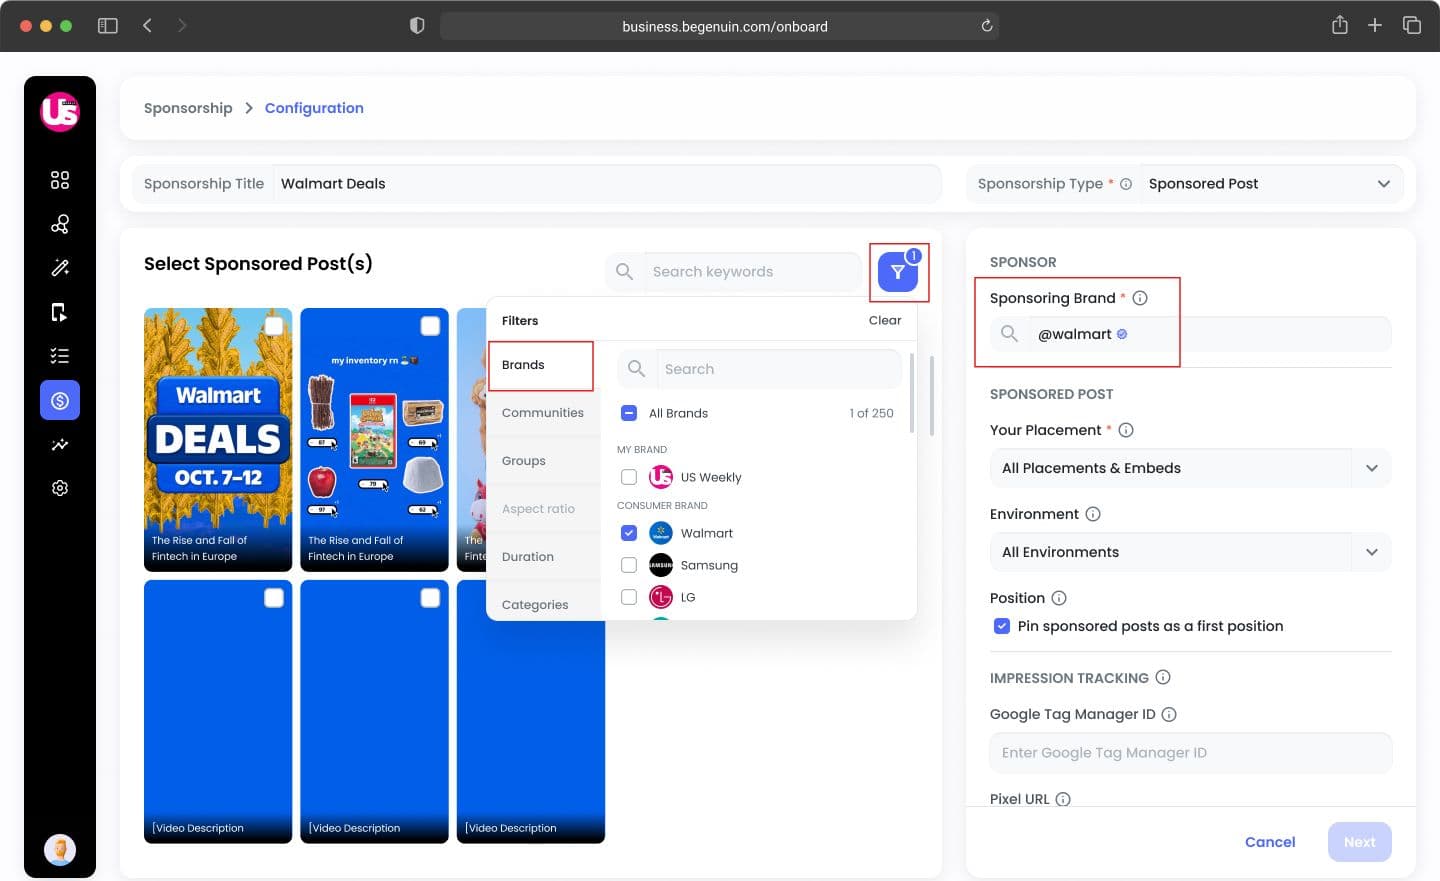
Capabilities:
- Search by keyword
- Filter by brand, community, group, duration, category, topics
Rules:
- Posts marked as House Ads are excluded
- No limit on number of posts (Phase 1)
Step 4: Add Sponsoring Brand
- Search and tag the sponsoring brand by name/handle.
- Select one brand only
- Used for tagging and attribution (not filtering in this Phase)
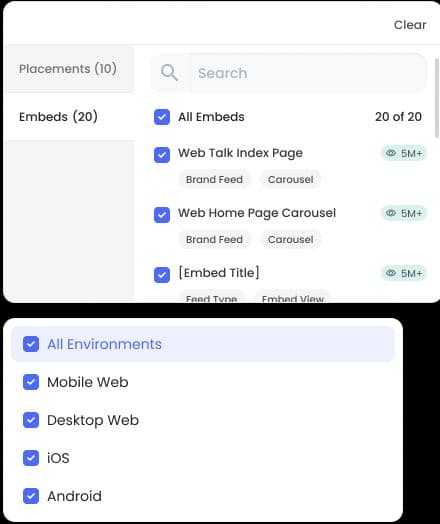
Step 5: Configure Placements & Environments
Placements:
By default, sponsorships are set to include all available placements/embeds.
The final ad delivery is determined by the intersection of two factors:
- The placements where ads are enabled in Ad Config.
- The placements specifically selected within the sponsorship campaign.
You have the flexibility to create sponsorships first and modify the included placements later in Ad Settings. However, remember that ads will only be delivered on placements that are part of an active ad preset.
Environments:
By default, All environments are selected. Available options include:
- Mobile Web
- Desktop Web
- iOS
- Android
Delivery Rule: Content appears only where Ad Config + Sponsorship selections overlap
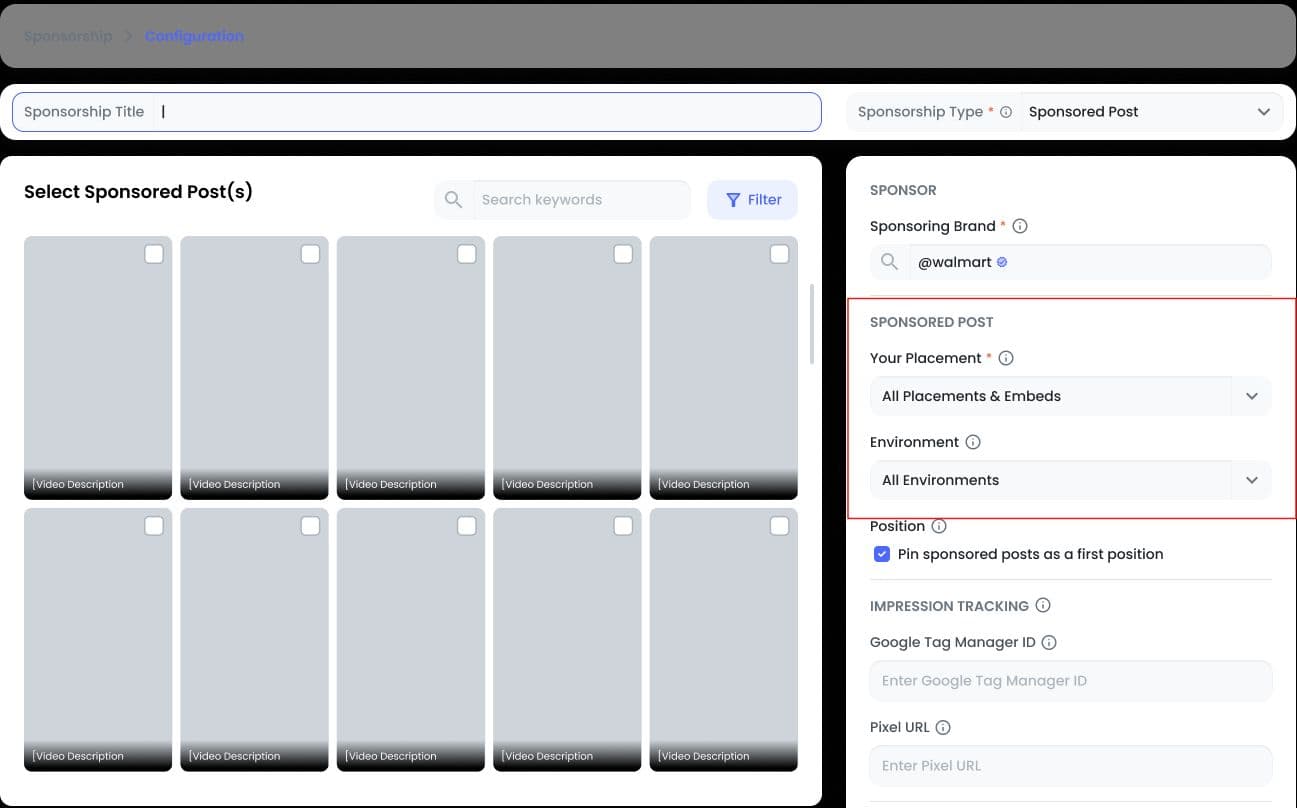
Step 6: Add Tracking (Optional)
- GTM ID: Used to integrate with your Google Tag Manager configuration.
- Pixel URL: Used to trigger your performance tracking pixels.
Available at:
- Sponsorship level
- Post level
Step 7: Configure Earnings
- CPM (mandatory): Range ($10–$1000)
- Budget (optional): The value must be an integer. Minimum and maximum limits are not yet strictly defined, but will be refined in future phases.
1 impression = 3-second video play
Step 8: Set Campaign Duration
- Start Date & Time
- End Date & Time (mandatory)
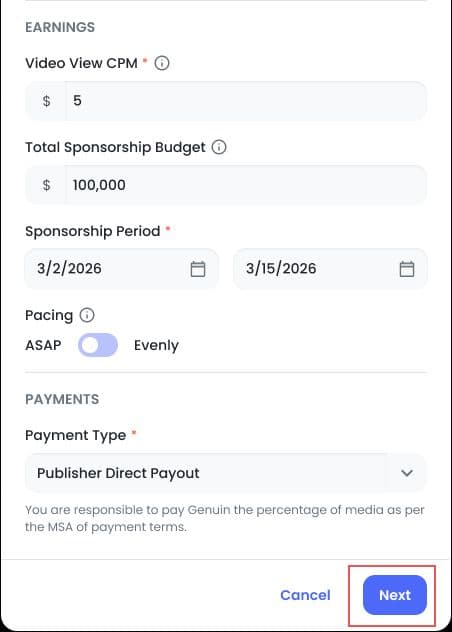
Step 9: Select Payment Type
- Publisher Direct Payout (only option): The invoicing is handled manually and divided according to the terms of the Master Service Agreement (MSA).
- The following options are currently unavailable (future functionality): Genuin Payout & Retail Media Trade

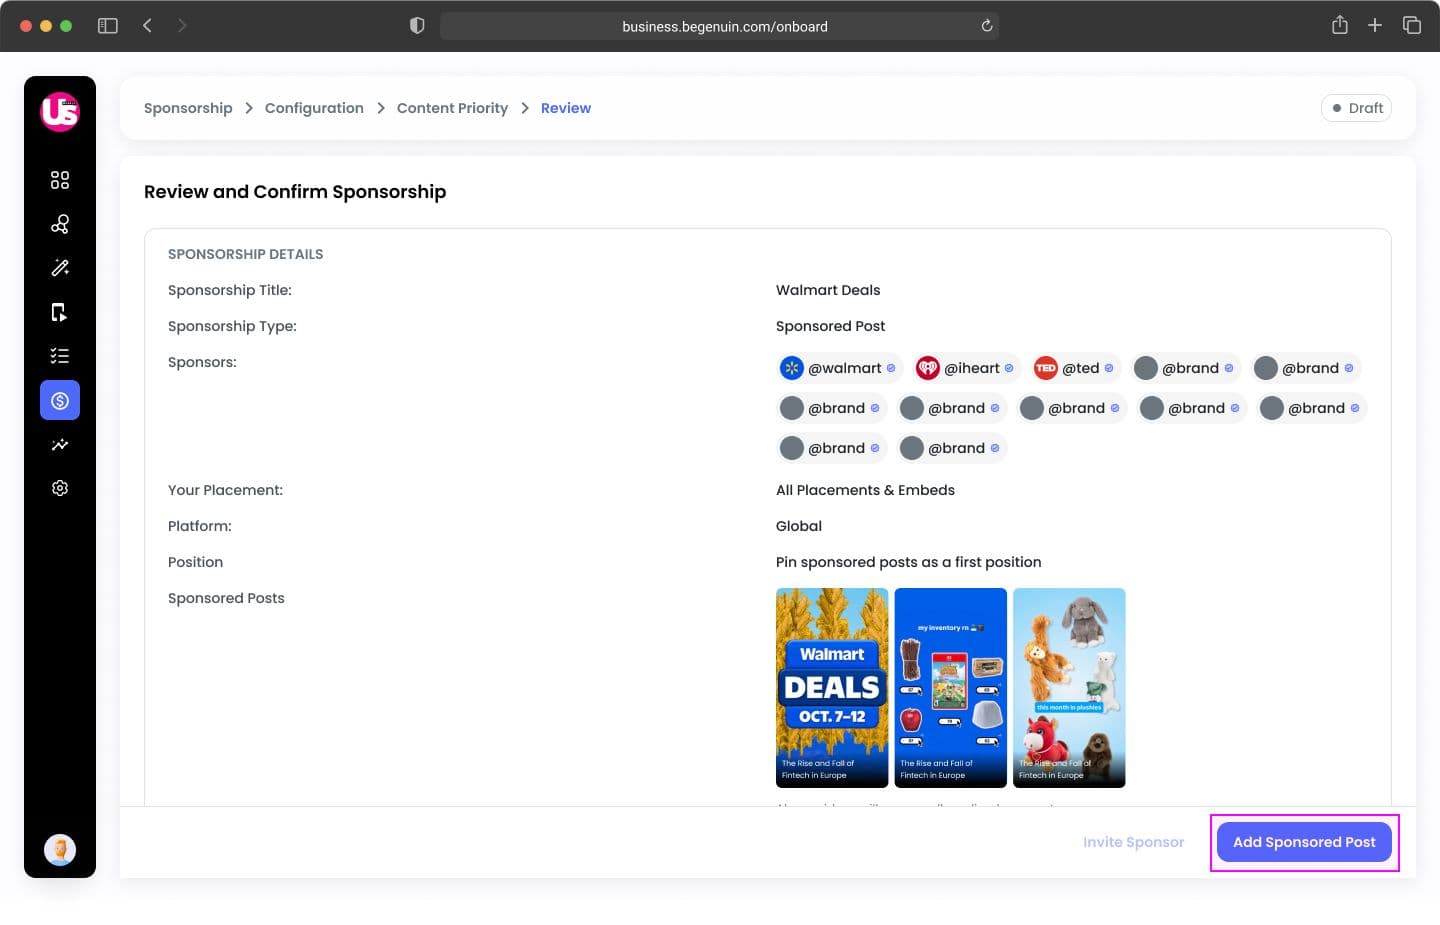
Step 10: Save Draft > Review > Confirm
Save draft: Clicking Next saves the current configuration as a Draft. A Draft retains all configuration details and can be edited before the campaign is scheduled.
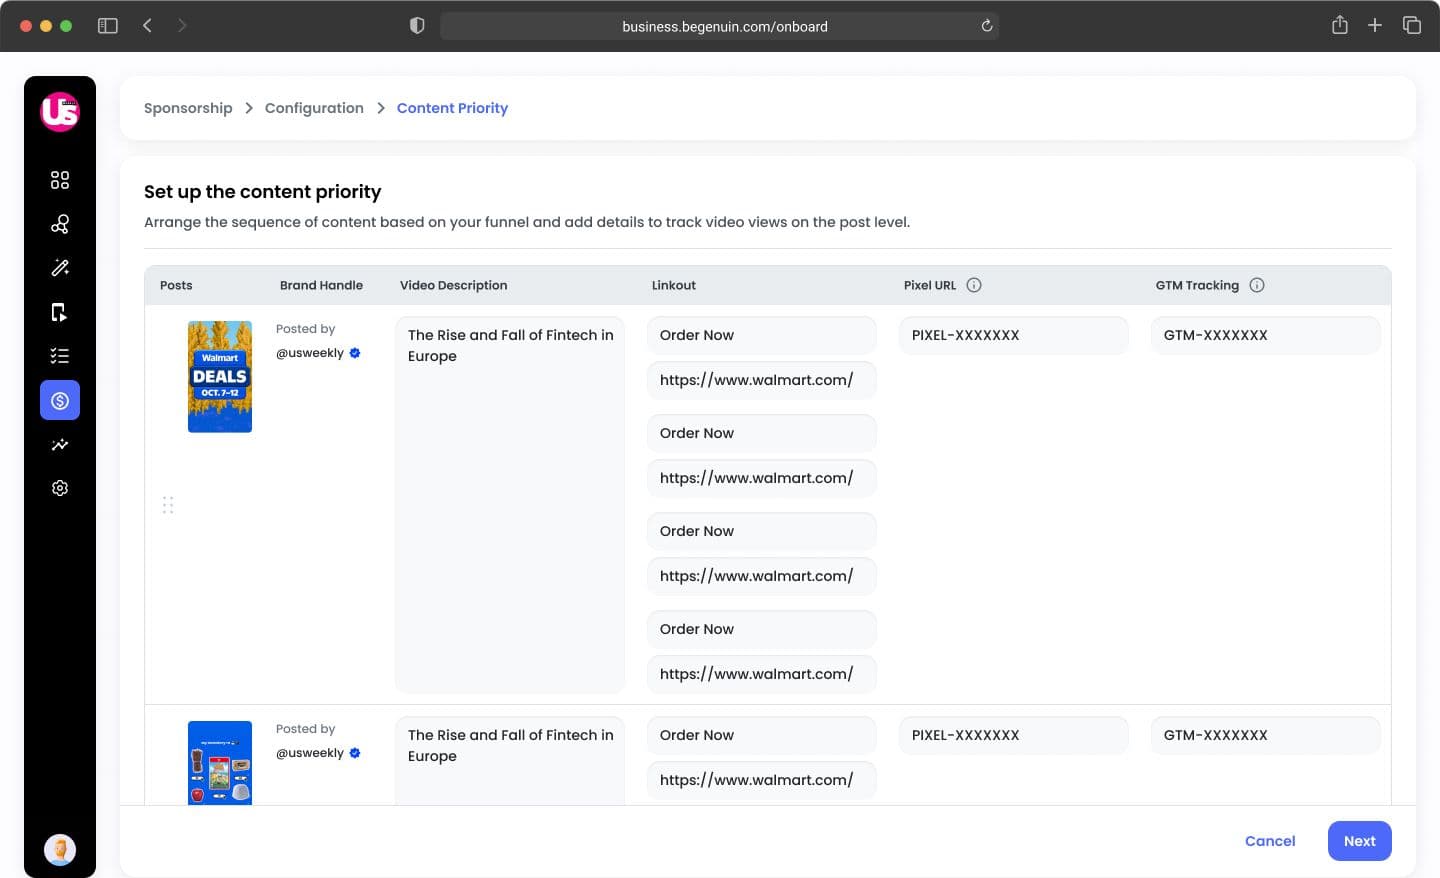
Managing Posts in Your Sponsorship Campaign
The post list provides a preview with a thumbnail and metadata. You have the following options to manage these posts:
- Edit Metadata: This creates a sponsorship-specific copy of the metadata for the post, leaving the original post unchanged.
- Reorder Posts: Use drag & drop functionality to change the order. For longer lists, you can also move items up or down.
For Posts with Linkouts:
- Linkouts follow the standard block, link, and list validation rules, including the regex used across Genuin.
- Editing a linkout opens a popup interface to manage its details (link, image, and CTAs).
- Preview configuration
The Review screen provides a comprehensive summary of the campaign configuration. It also includes a post preview, displaying the first three selected posts as thumbnails. If more posts are selected, a card indicating the additional number (e.g., "+N more") will be shown (for example, 3 thumbnails plus a "+5" card if 8 posts were chosen).
- Click Add Sponsored Post
Rules & Considerations
- Sponsorship will not go live unless all mandatory fields are completed
- Draft campaigns must be manually scheduled
- Placement selection works on intersection logic
- Metadata edits do not change original posts
- Only one sponsoring brand per campaign
Key Specifications & Restrictions
Current Limitations:
- Single Brand per Sponsorship: Only one brand can be associated with a sponsorship at this time. Multi-brand functionality is scheduled for a future update.
- Payment Type: In the current phase, only Publisher Direct Payout is available as a payment method.
- Scheduling Granularity: Detailed time-window scheduling (e.g., restricting delivery to evenings) is not yet supported, but it is planned for a future enhancement.
Important Delivery Considerations:
Sponsorship delivery is dependent on the following factors:
- The Ad Config setting must have the relevant placement enabled.
- The required placement must be selected within the sponsorship configuration.
- The sponsorship must be in a Live state.
- If a budget is set, it must not be exhausted.
Exclusions:
- House Ads are automatically excluded from the post selection process.
Date and Time Requirements:
- A valid start and end date/time must be provided.
- Only the end date is mandatory.
Example Scenarios
Scenario 1: Partner Campaign Launch
A brand collaborates with a retail partner:
- Selects 15 videos
- Tags partner brand
- Runs campaign for 10 days
- Earns based on impressions
Scenario 2: Product Promotion Burst
- Uses Sponsored Takeover
- Targets all placements
- High CPM for premium visibility
Scenario 3: Always-On Campaign
- No budget defined
- Runs until end date
- Revenue tracked via CPM
FAQs
1. Can I add multiple brands in one sponsorship?
No, only one brand is supported in Phase 1.
2. Can I select unlimited posts?
Yes, there is no limit currently.
3. What happens if I don’t configure placements?
You’ll be prompted to configure Ad Settings before proceeding.
4. Can I edit the campaign after creation?
Yes, but some fields are restricted once the campaign is live.
Future Enhancements
- Multi-brand sponsorship campaigns
- Approval workflows
- Auction & pacing logic
- Integrated payment systems
- House Ads creation & filtering
