How can brands integrate Mixpanel with Brand Control Center to push analytics data?
Integrating Mixpanel with the Brand Control Center allows brands to push user interaction and engagement data into a powerful product analytics platform. This matters because:
- Deeper user insights: Track granular user behavior across communities and content
- Event-based analytics: Analyze actions like video views, clicks, shares, and conversions
- Funnel & retention tracking: Understand drop-offs and improve user journeys
- Personalization at scale: Build cohorts for targeted engagement strategies
- Data-driven growth: Optimize content, campaigns, and monetization using real insights
Guide: Step-by-step integration flow
Step 1: Prepare your Mixpanel account
Before connecting with Brand Control Center:
- Login to your Mixpanel account

2. Navigate to Project Settings
3. Copy the following:
- Project Token (primary key required for integration)
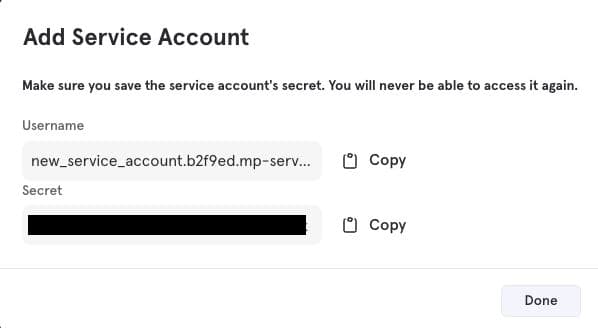
Note: Ensure you have admin-level access to configure integrations.
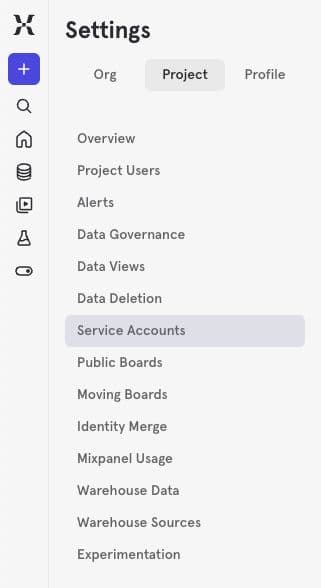
Step 2: Navigate to Mixpanel integration in Brand Control Center
- Login to Brand Control Center
- Go to: Settings > Data Sources > Mixpanel
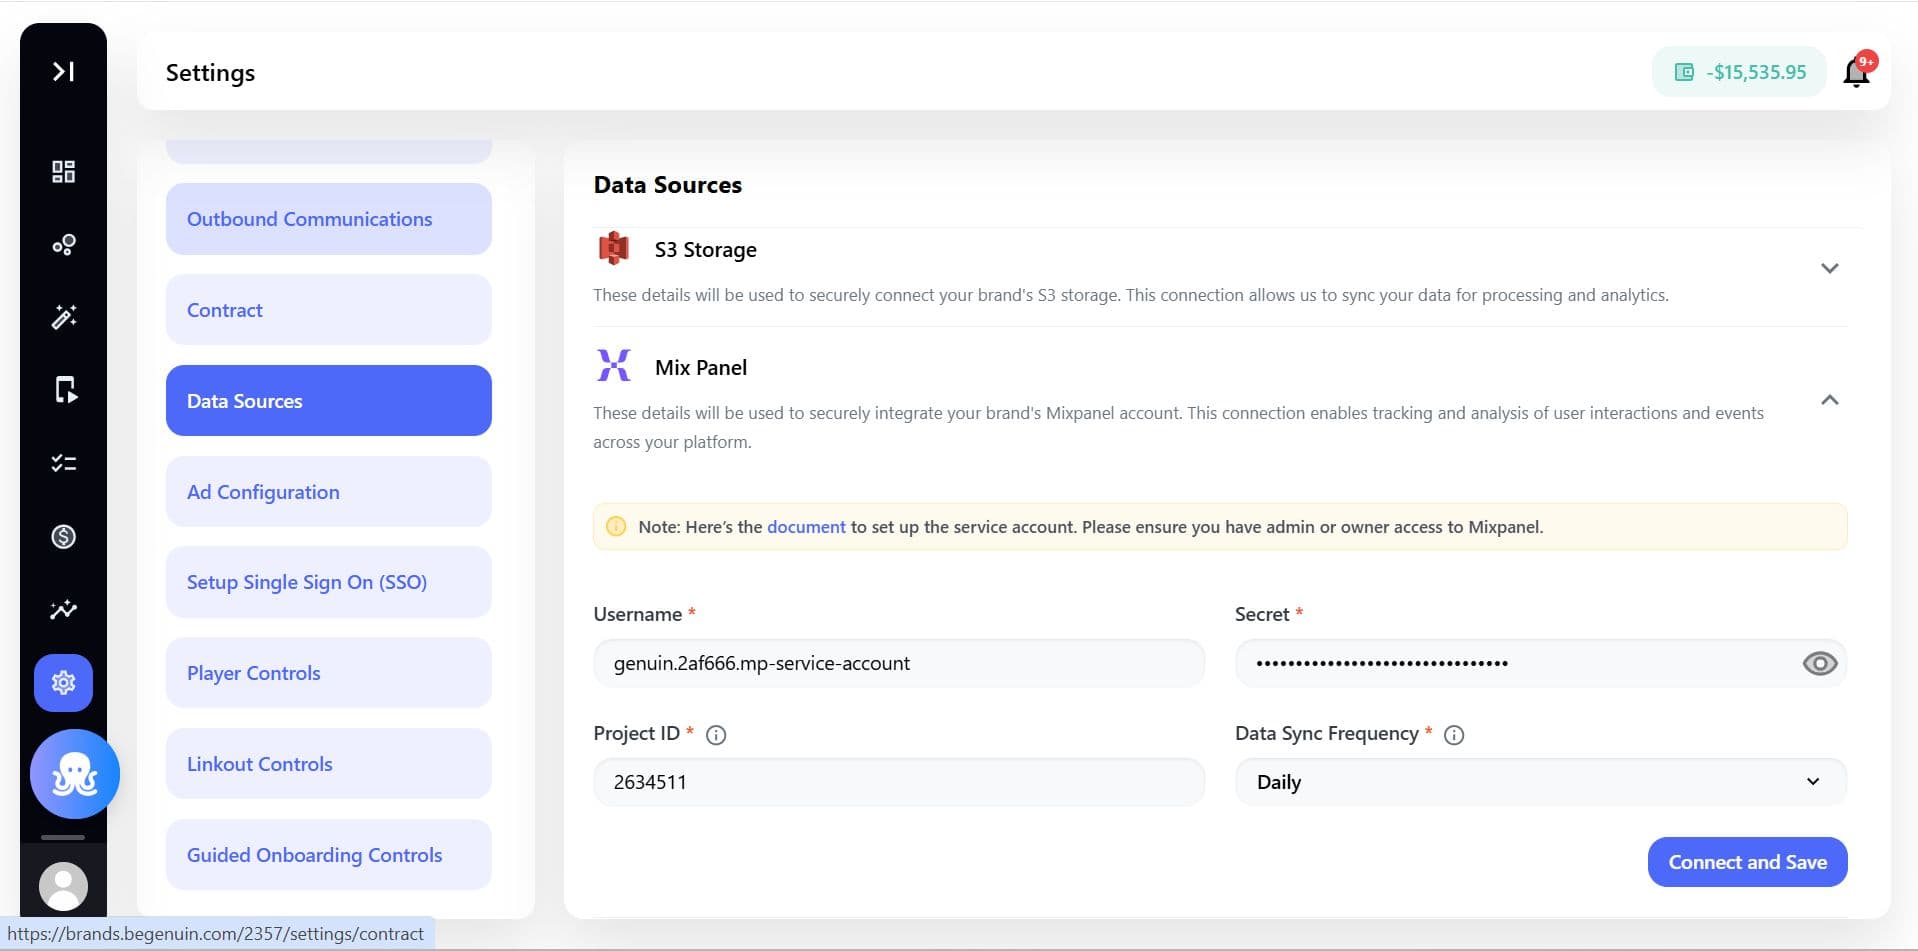
Step 3: Configure connection
- Enter the required details:
- Project Token
2. Select Data Sync Frequency:
- Daily
- Weekly
- Monthly
3. Click Connect
Step 4: Data mapping and event flow
Once connected:
- Brand Control Center starts pushing structured event data into Mixpanel
- Events may include:
- Content views (video impressions, watch time)
- User interactions (likes, shares, comments)
- Community actions (joins, participation)
- Device and session-level data
- Events are automatically mapped into Mixpanel’s event tracking structure
Step 5: Validate data in Mixpanel
- Go to your Mixpanel dashboard
- Navigate to Events or Live View
- Verify incoming events from Brand Control Center
When to use /track vs /import
| /track | /import | |
|---|---|---|
| Events per request | 2000 | 2000 |
| Authentication | Project Token, intended for untrusted clients. | Project Secret/Service Account, intended for server-side integration. |
| Compression | Gzip allowed | Gzip allowed |
| Content-Type | application/x-www-form-urlencoded | application/json or application/x-ndjson |
| Ingesting historical events | Last 5 days only. | Any time after 1971-01-01. |
Base URL: https://api.mixpanel.com/track
curl --request POST \
     --url https://api.mixpanel.com/track \
     --header 'accept: application/json' \
     --header 'content-type: application/json'
Response Overview
To view a live response, select Try It! to initiate a request, or review the status code examples below:
| Content-Type | Sample Status Codes |
|---|---|
| text/plain | 200 (Valid Data) |
| application/json | 401, 403 (Auth Errors) |
Post-integration capabilities:
- Construct conversion funnels (e.g., tracking from View to Conversion)
- Segment your audience into cohorts, such as high-engagement users
- Perform detailed analysis on user retention and identify drop-off points
System Limits & Rate Throttling
The operational limits for the /track endpoint mirror those of the /import service. Key event-level constraints include:
- Payload size: Each event must be under 1MB of uncompressed JSON
- Property count: Maximum of 255 properties per event
- Nesting depth: Max depth of 3 with fewer than 255 keys per nested object
- Array elements: Limit of 255 elements within any array property
To maintain high quality-of-service, a global rate limit of 2GB of uncompressed JSON per minute (or approximately 30k events per second) is enforced on a rolling 60-second basis.
Best practices for high-scale data ingestion:
- Concurrent clients: Use 10-20 concurrent clients sending 2K events per batch for optimal throughput
- Error handling: For 429, 502, or 503 errors, employ exponential backoff (starting at 2s, doubling to 60s) with 1-5s of jitter
- Data compression: Use gzip compression with the Content-Encoding: gzip header to optimize transfer time
- Validation avoidance: Do not retry 400 status codes as they count toward rate limits and will consistently fail
Enterprise customers requiring elevated throughput should contact their CSM with their project_id and specific use case details.
You can now:
- Create funnels (e.g., View > Click > Conversion)
- Build cohorts (e.g., highly engaged users)
- Analyze retention and drop-offs
Step 6: Disconnect (if needed)
- Go to Settings > Data Sources > Mixpanel
- Click Disconnect
- Confirm the action
Important:
- Data sync will stop after disconnection
- Historical data already pushed will remain in Mixpanel
Specs & Limitations
System Behavior
- Data is pushed in batches based on configured frequency
- Events follow a structured schema for consistency
- Integration is token-based authentication
Validation Rules
- Project Token must be valid and active
- Mixpanel project must have proper permissions enabled
- Internet connectivity required for data sync
Limitations
- No real-time streaming (batch sync only)
- Historical backfill is not supported before connection
- Event schema is predefined (limited custom mapping)
Example Scenario (Use Case)
A D2C brand runs a video-driven community using BCC and wants to understand user engagement and conversion journeys.
- They integrate Mixpanel using their Project Token
- User actions like video views, likes, and shares are pushed as events
- The growth team builds:
- Funnels to track purchase journeys
- Cohorts of highly engaged users
- Result:
- Improved content strategy
- Better retention and engagement
- Data-backed campaign optimization
