
How to Set Up & Deploy a Community Media Network
Overview
Setting up a Community Media Network is not just a technical task, it’s a foundational decision that determines how your network scales, how safely content flows, and how much control your teams retain over engagement, data, and monetization.
This guide walks through the end-to-end setup and deployment process inside Brand Control Center, from initial configuration to live deployment across your owned web and app properties.
Who This Is For
This guide is for:
- Brand Admins and Operators responsible for launching and managing the network
- Product and Engineering Teams handling integrations and deployment
- Media, Retail, and Consumer Brand Teams moving from strategy to execution
When to Use This Guide
Use this guide when you are ready to:
- Move from planning to execution in Brand Control Center
- Configure communities, content workflows, and governance
- Deploy a Community Media Network across owned websites and apps
Why This Matters
A Community Media Network only scales when structure, governance, and deployment are configured correctly from day one.
Getting this right ensures:
- Content flows safely and predictably
- AI automation supports, not replaces - human control
- Growth does not introduce operational chaos later
This setup process ensures your Community Media Network launches with clarity, safety, and technical readiness.
What Is a Community Media Network?
A Community Media Network is a brand-owned, video-powered network of communities and groups embedded directly into a brand’s digital properties.
Unlike fragmented social or third-party platforms, a Community Media Network enables brands to:
- Own distribution instead of renting reach
- Collect first-party and zero-party data
- Control monetization, placements, and user experience
Before a Community Media Network goes live, it must be:
- Structurally defined (communities, groups, governance)
- Technically configured (placements, environments, integrations)
- Operationally ready (content, moderation, reporting)
Community Media Network Setup & Deployment Lifecycle in Brand Control Center
Setup and deployment in the Brand Control Center follow a deliberate lifecycle. Each step builds on the previous one to ensure stability and scalability.
Lifecycle overview:
- Access Brand Control Center
- Define brand and network foundations
- Create communities and groups
- Configure governance and roles
- Activate content ingestion
- Prepare curation workflows
- Configure moderation
- Set up placements and environments
- Deploy across owned properties
- Validate and go live
Step-by-Step Setup & Deployment
Step 1: Access Brand Control Center
Log into Brand Control Center, the centralized operating system for your Community Media Network.
From Brand Control Center, teams can access:
- Build
- Manage
- Curate
- Grow
- Moderate
- Monetize
- Report
- Settings
Access is controlled through role-based permissions, ensuring the right teams manage the right functions.
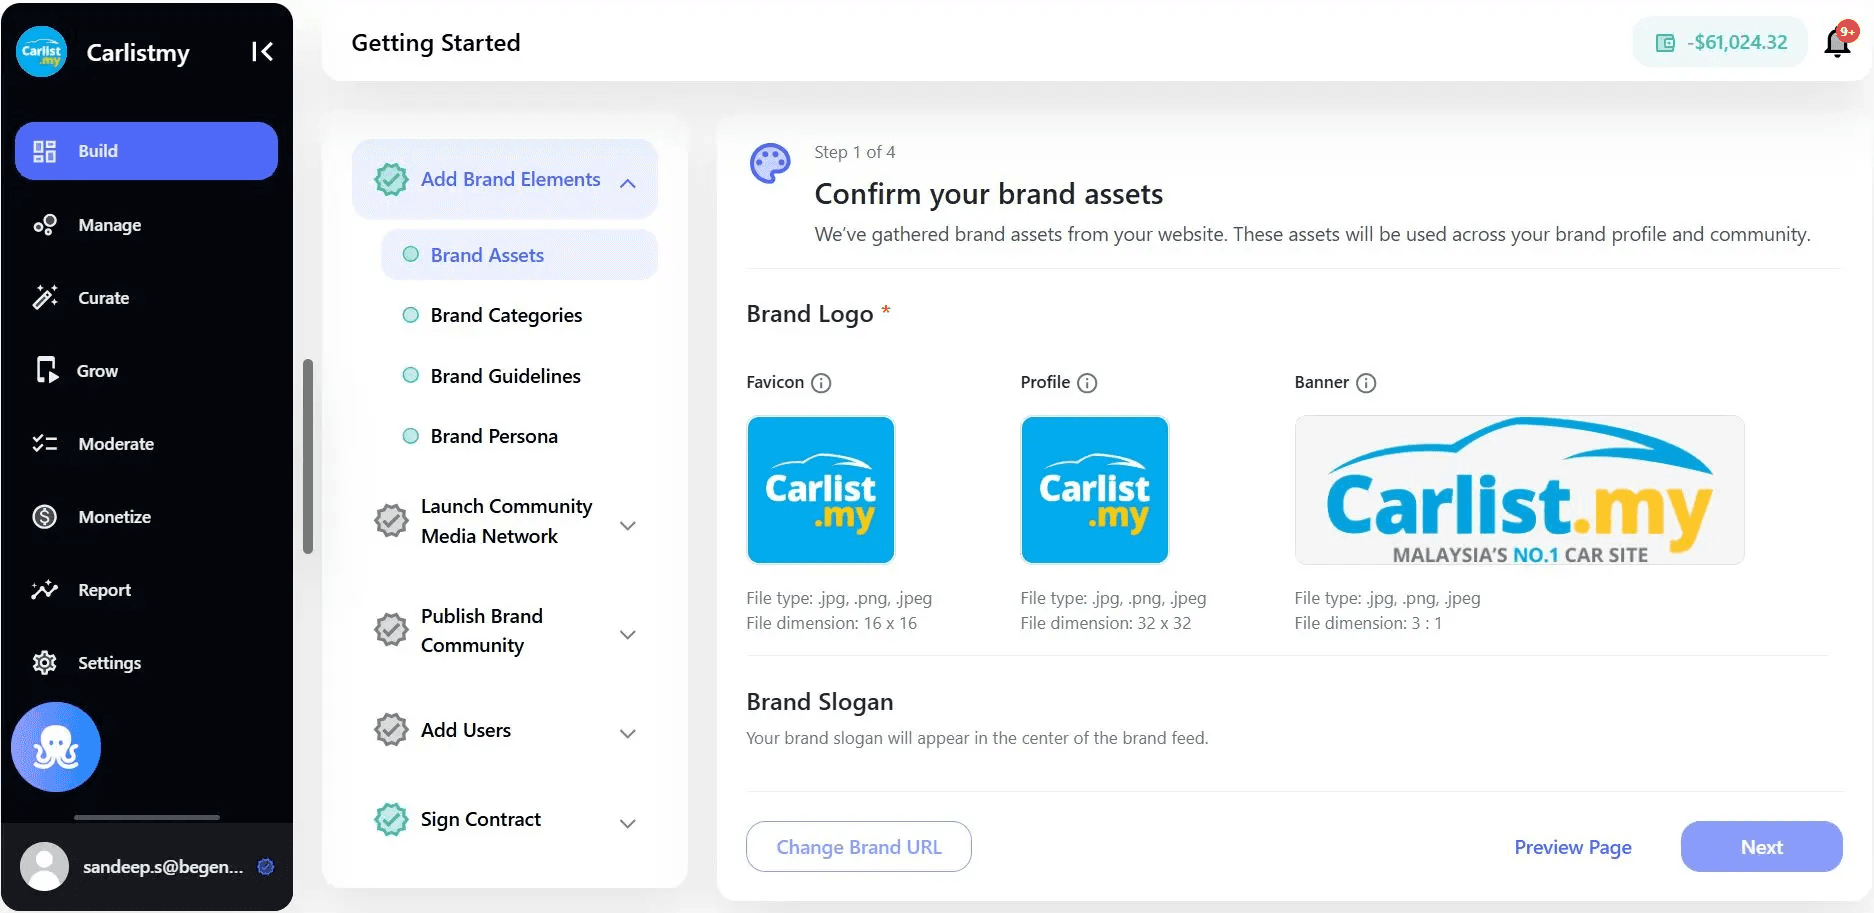
Step 2: Define Your Brand & Network Foundation (Build)
The Build section is where Community Media Network setup begins. This defines how your brand appears, operates, and governs content.
Configure:
- Brand identity and naming
- Categories and content taxonomy
- Editorial and brand guidelines
- Brand persona and tone
- Asset libraries (logos, visuals)
These elements are used by Genuin Adaptive Intelligence to support AI-driven classification, recommendations, and moderation.
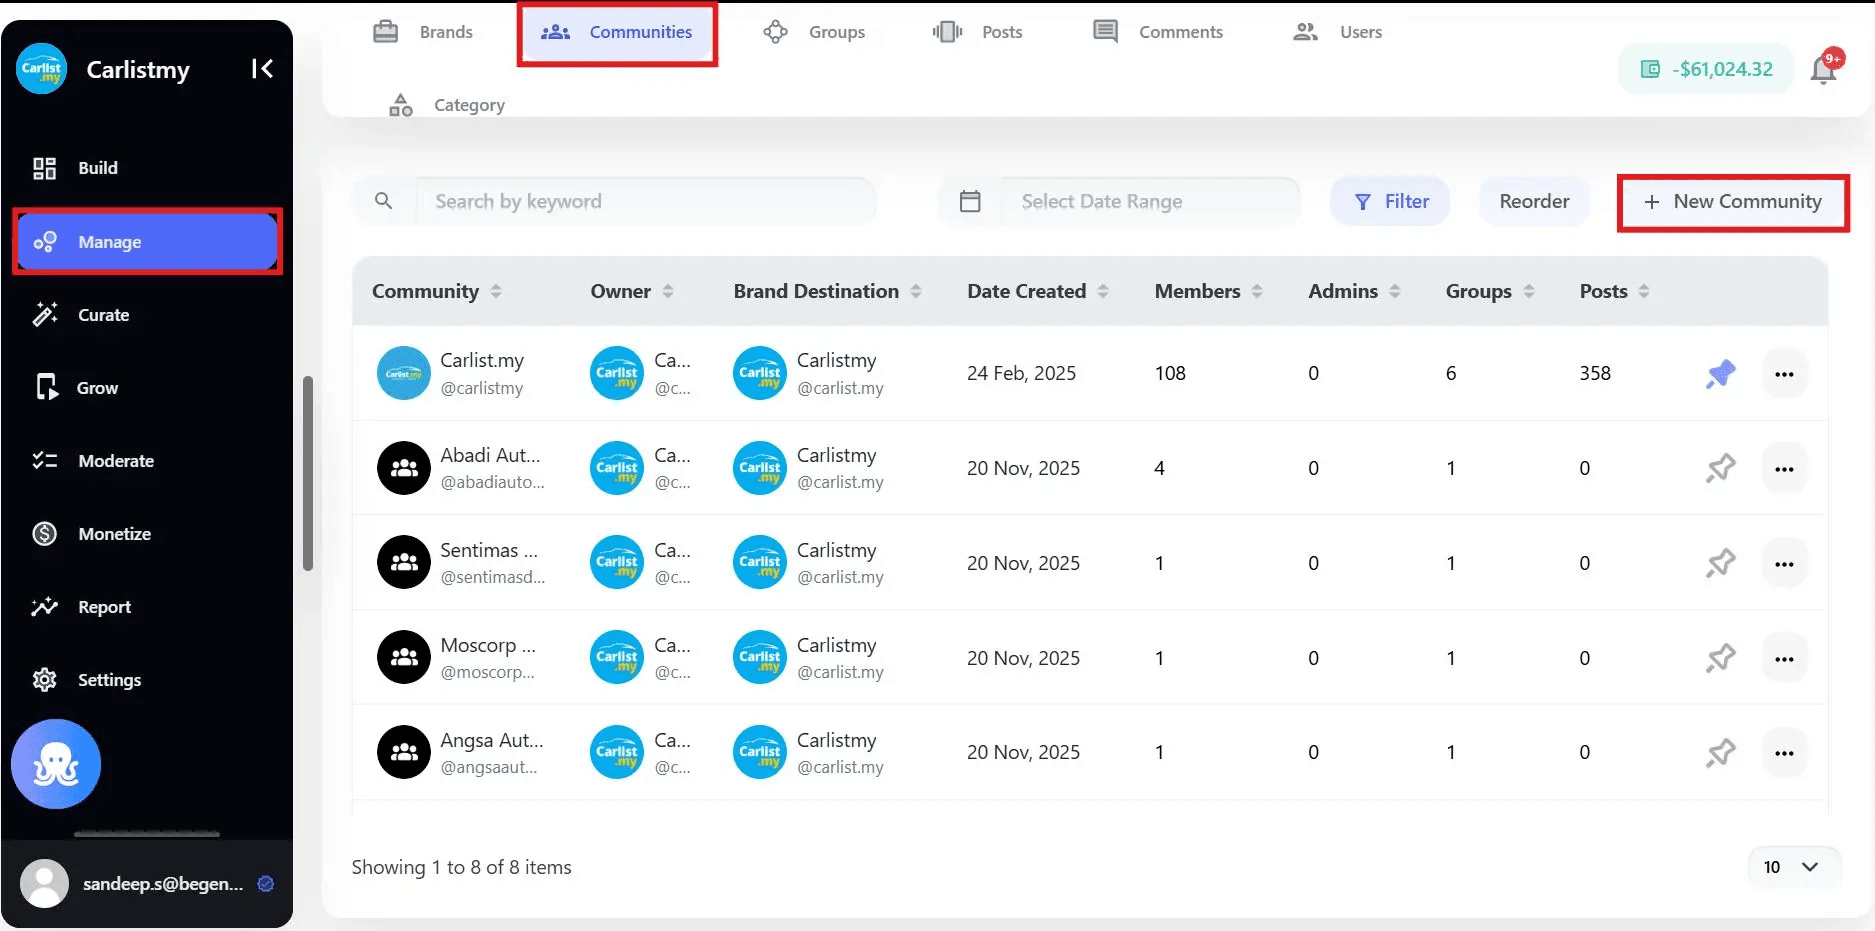
Step 3: Create Communities and Groups
Communities form the structural backbone of a Community Media Network.
Create Communities
A community represents a high-level theme aligned with your brand.
Examples:
- Media publishers: News, Sports, Entertainment
- Retailers: Electronics, Fashion, Home
- Consumer brands: Fitness, Travel, Lifestyle
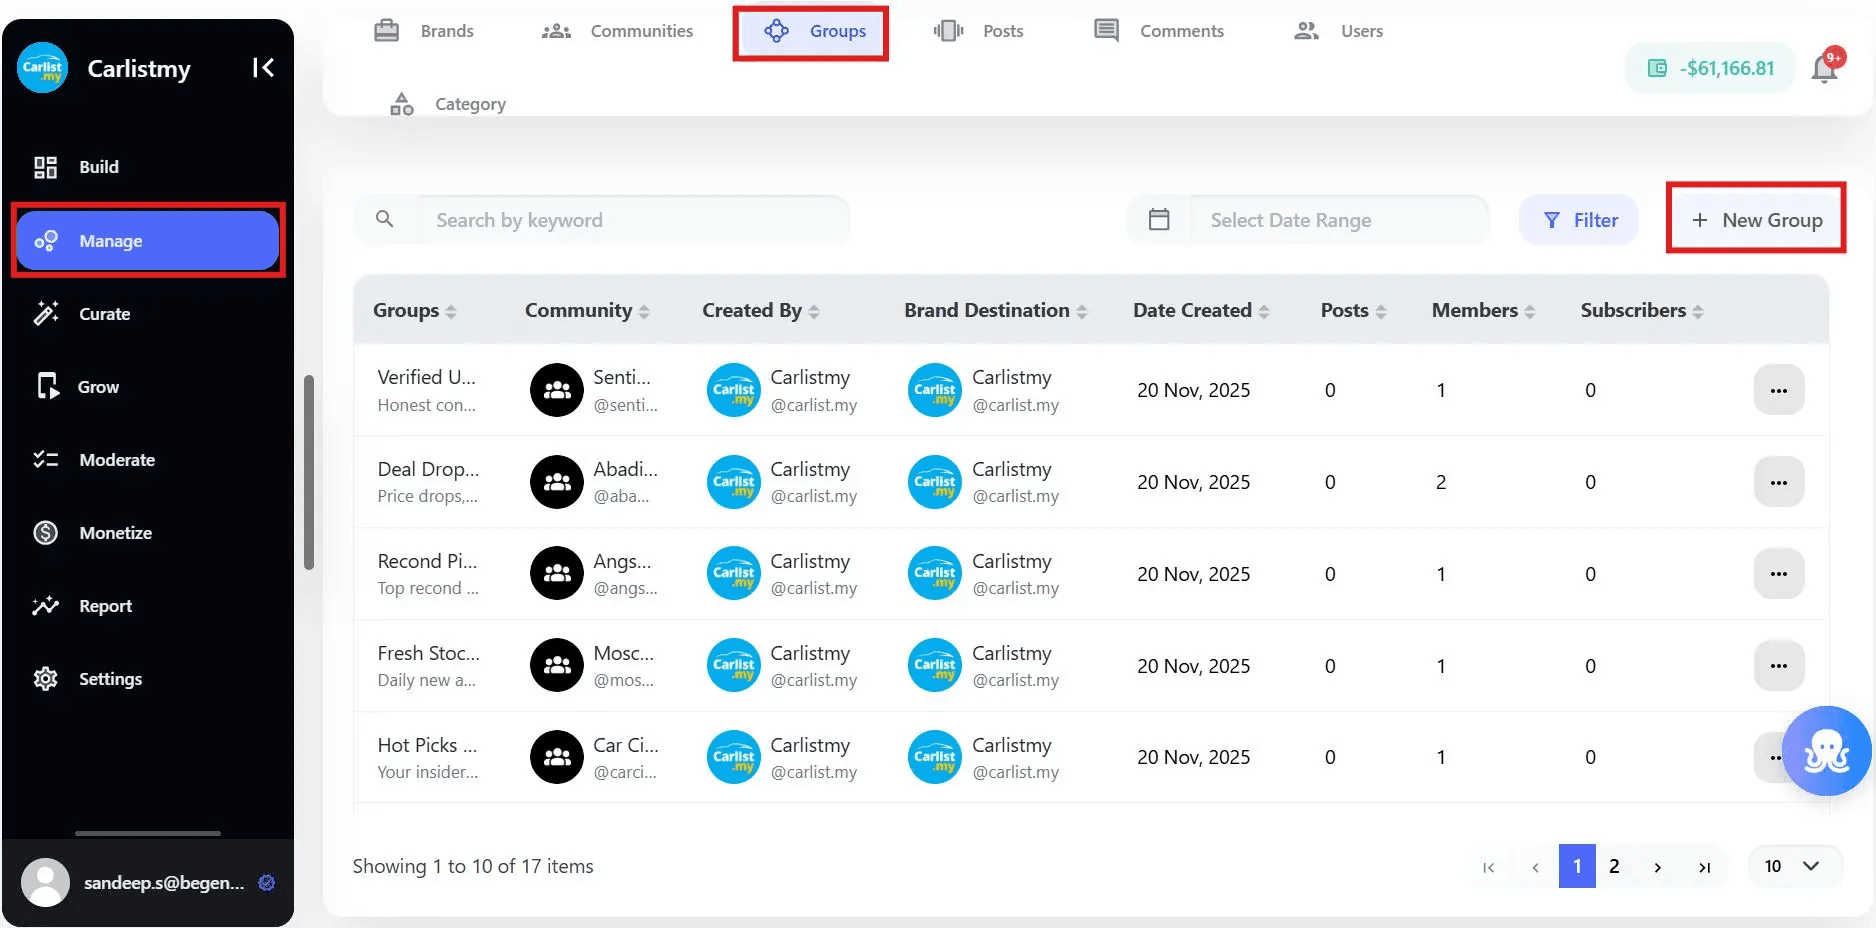
Create Groups Within Communities
Groups organize content at a more granular level, improving discovery and relevance.
Examples:
- Content formats (Short Clips, Reviews, Highlights)
- Topics (Smartphones, Sneakers, Wellness Tips)
- Campaign-based or seasonal collections
Groups can be:
- Manually created
- AI-generated based on content patterns
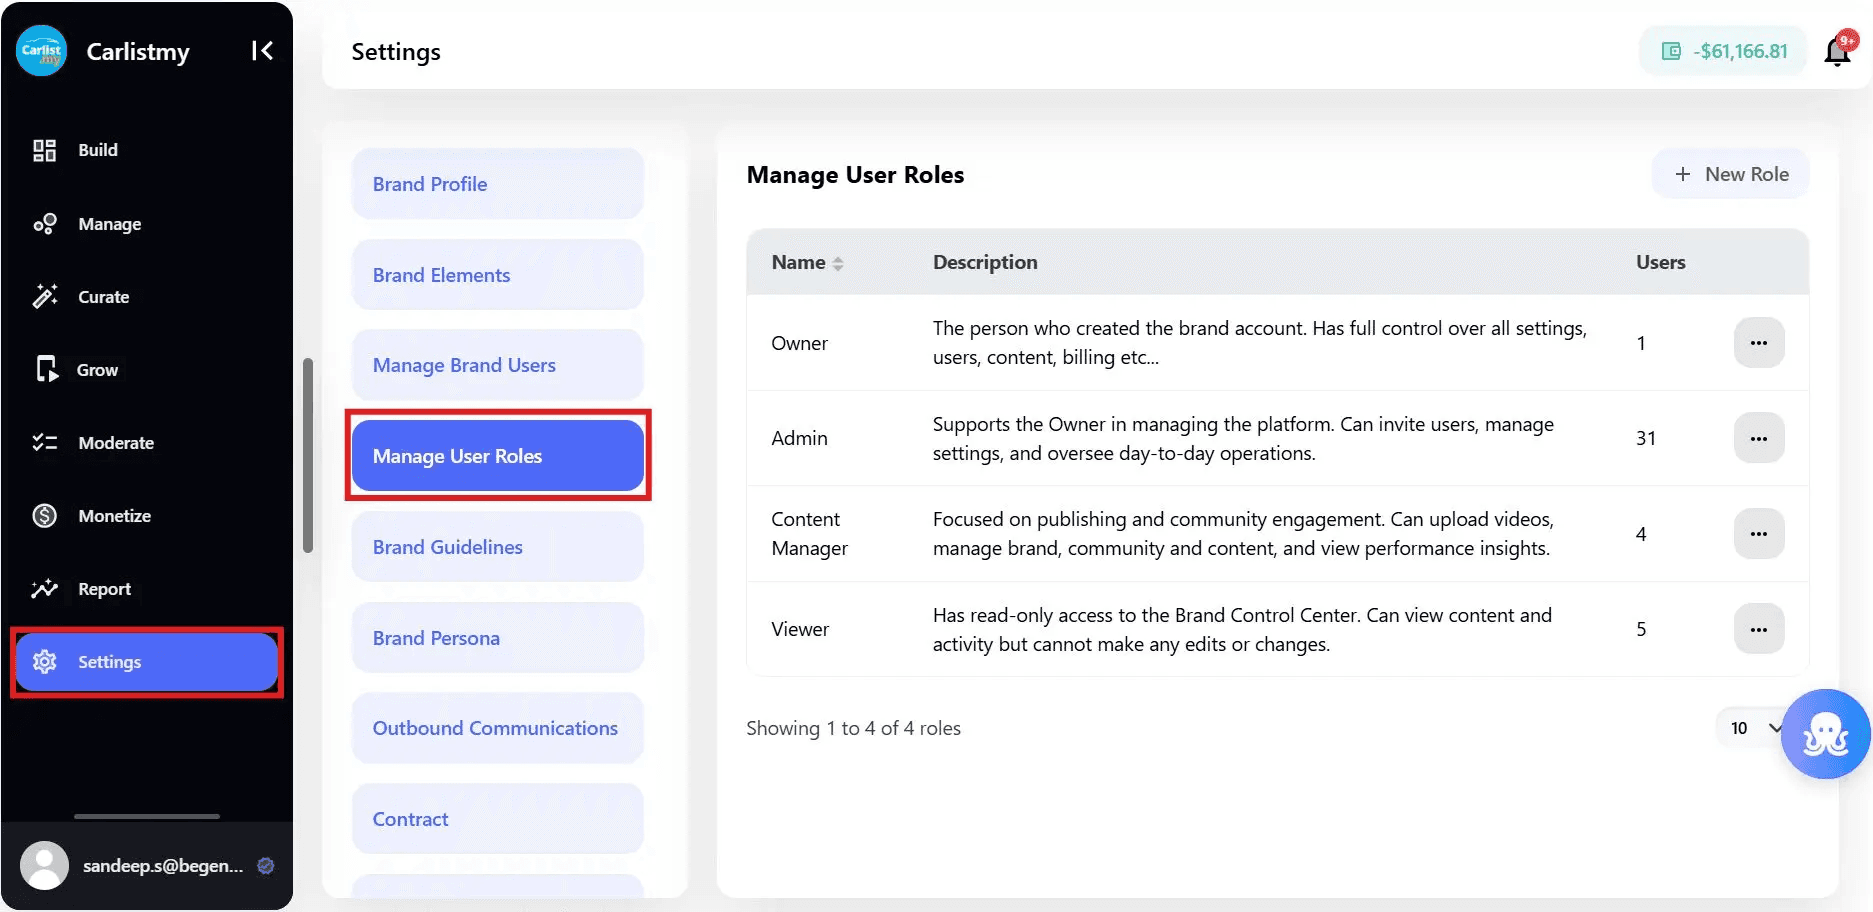
Step 4: Configure Roles, Access, and Governance
Before content flows in, governance must be clearly defined.
Using Settings, configure:
- User roles and permissions (admin, editor, moderator, viewer)
- Approval workflows
- Content ownership and escalation rules
Why this matters: Clear governance ensures Community Media Network operations remain secure, compliant, and scalable as teams and contributors grow.
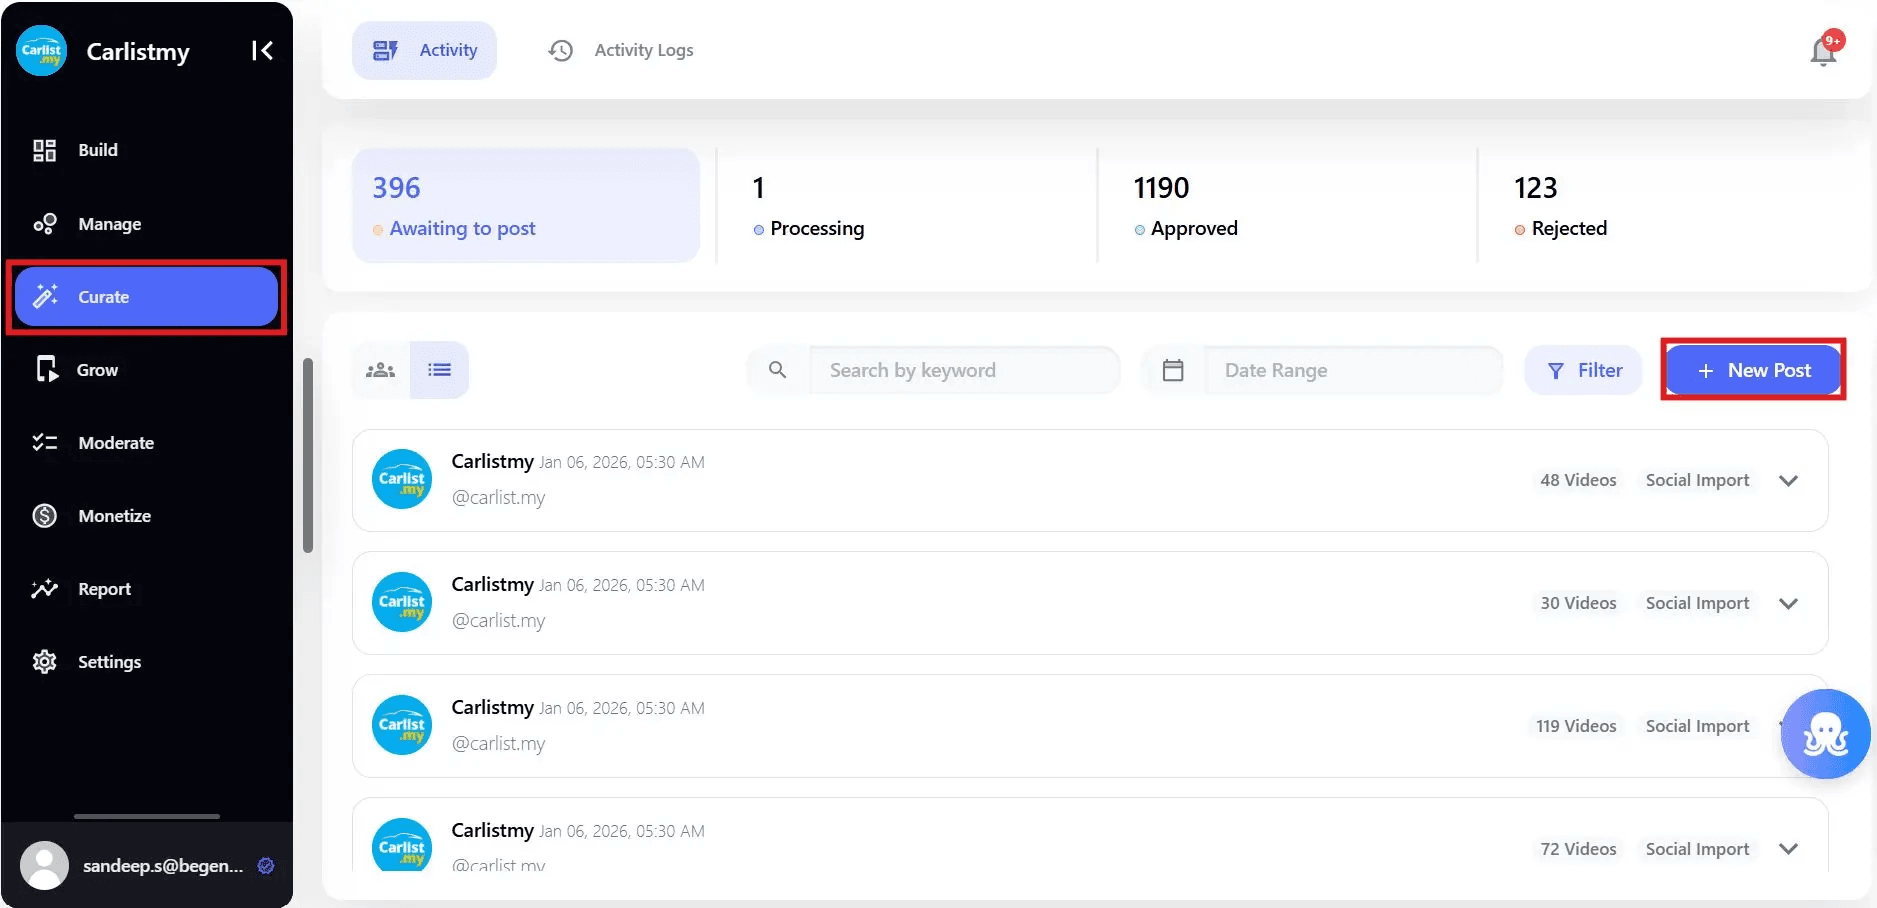
Step 5: Activate Content Ingestion
Once communities and groups are in place, content ingestion can begin.
Supported ingestion methods include:
- Uploads (local files, Drive, Dropbox, S3)
- Social imports
- Creator and partner submissions
- Long-form to short-form clipping using Clip It
All content flows into Curate, where it is:
- Processed
- Enriched with metadata
- Prepared for editorial review
This centralizes content operations that are typically fragmented across platforms.
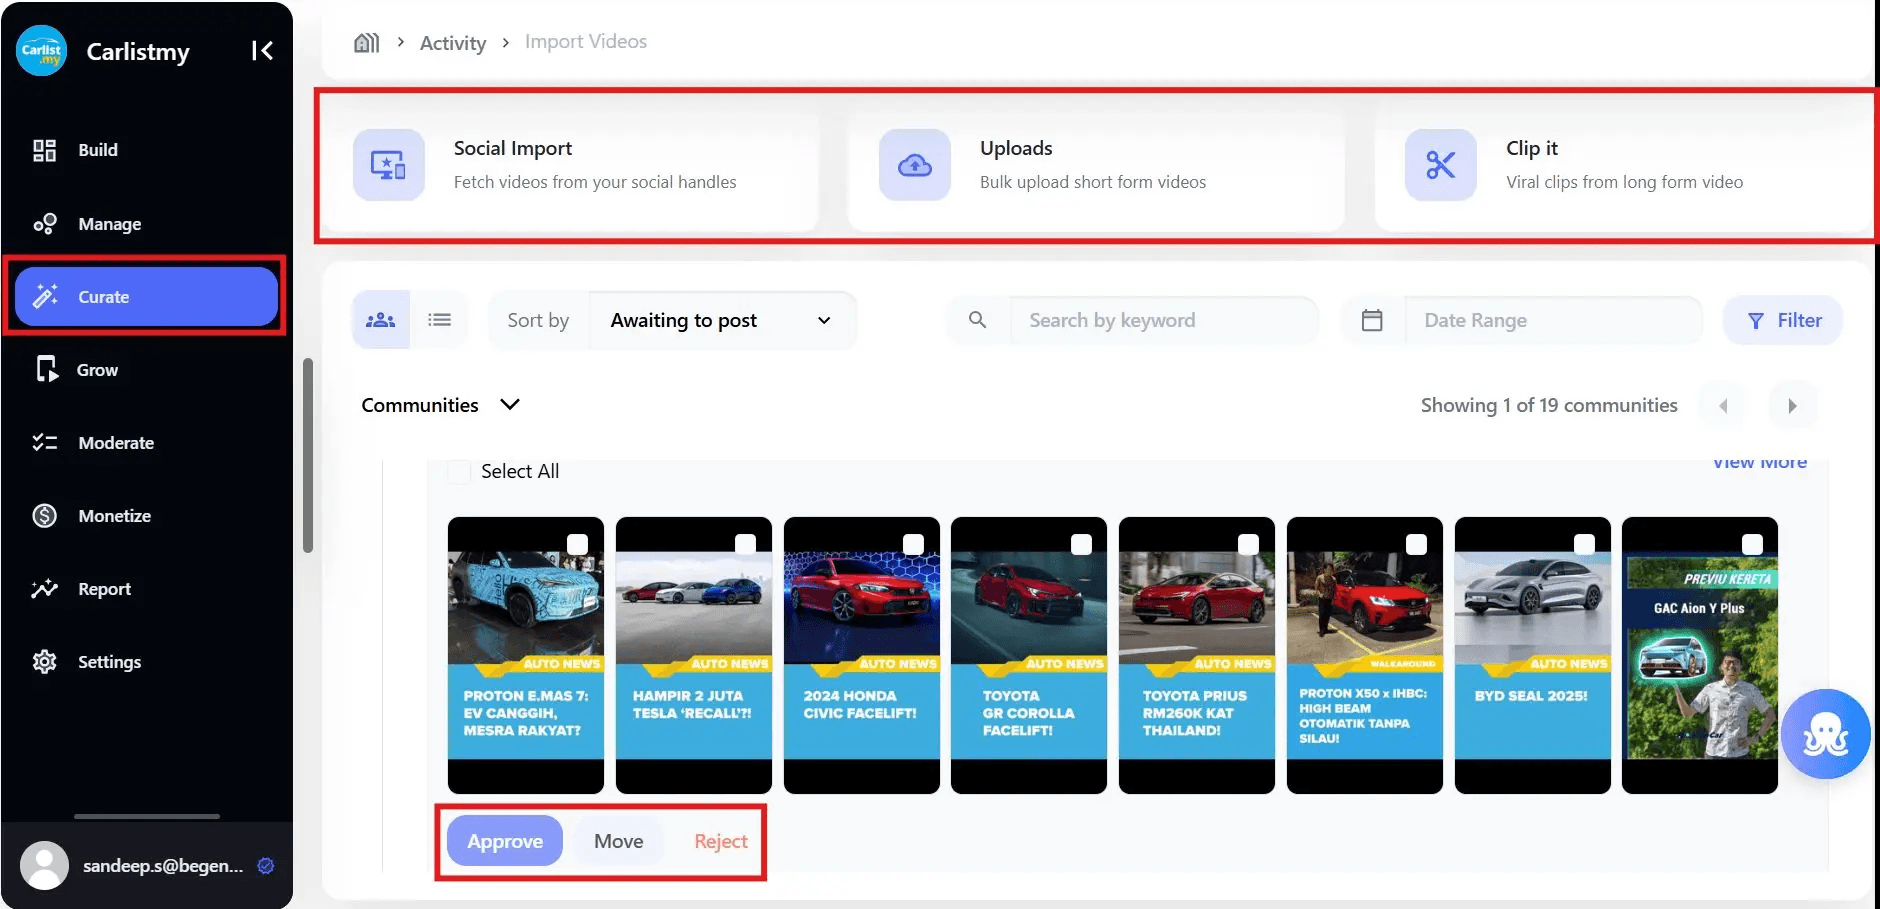
Step 6: Prepare Curation Workflows (Curate)
Curation workflows must be active before deployment.
In Curate, teams can:
- Review incoming content
- See AI-recommended community and group placement
- Approve, reject, or move content
- Bulk-approve for scale
- Track content via activity and logs
This ensures only brand-safe, relevant content reaches the live network.
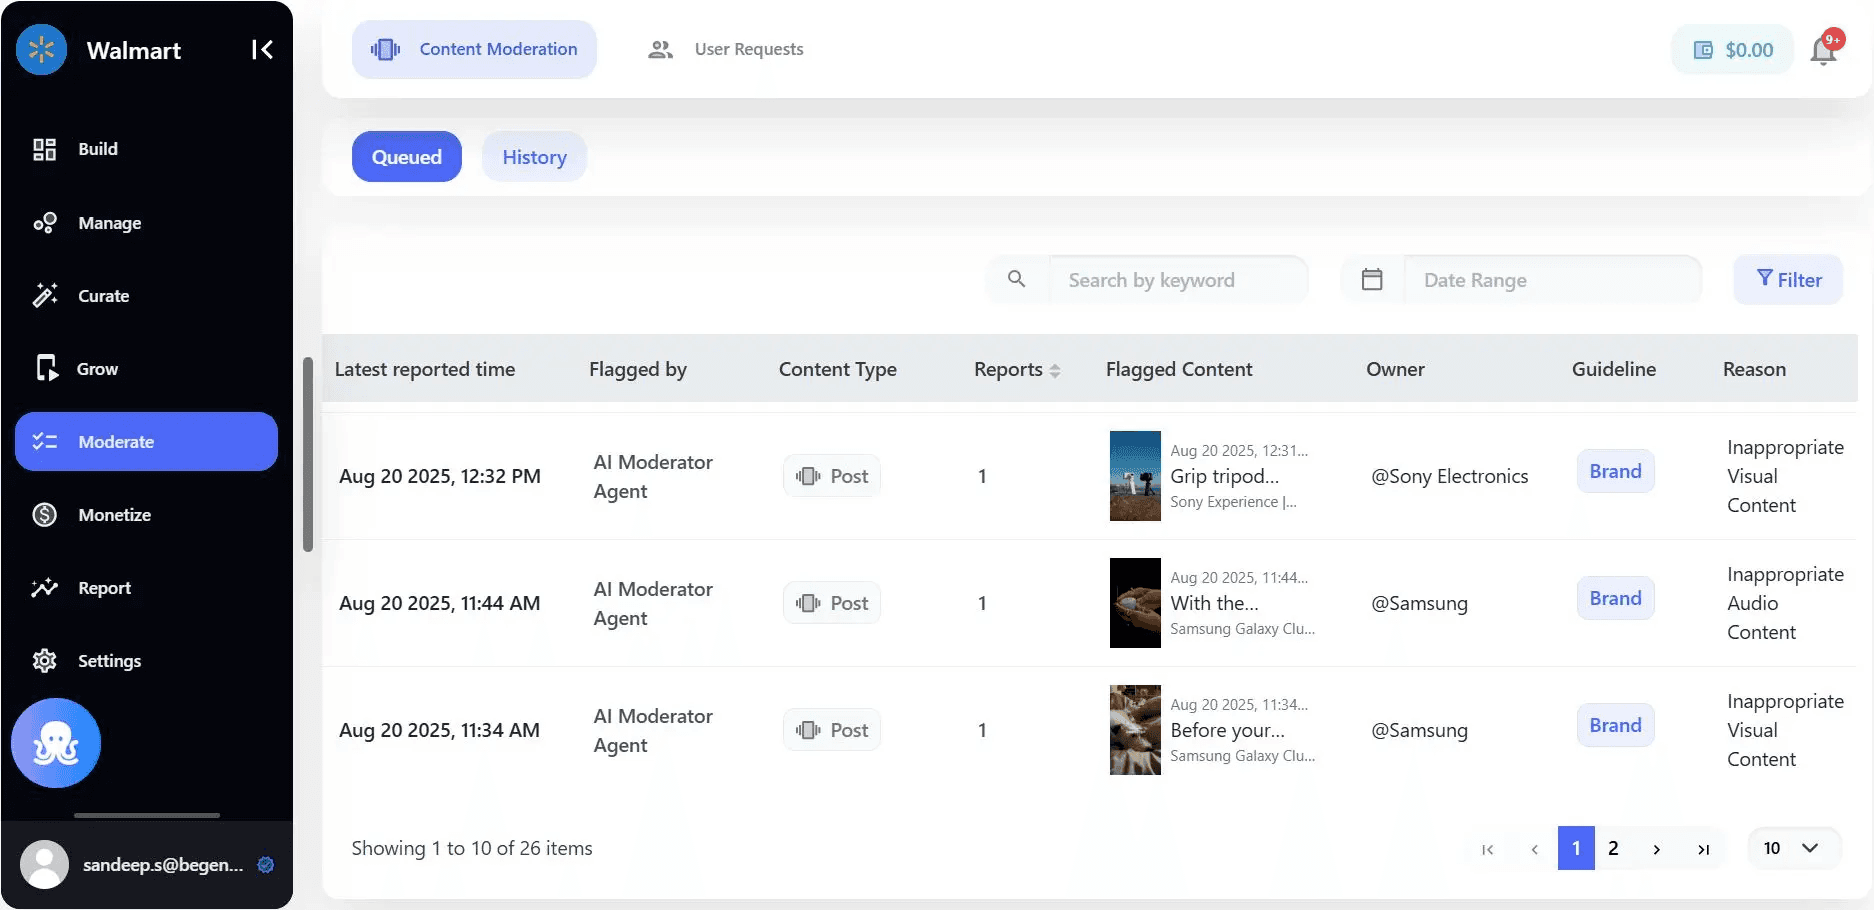
Step 7: Configure Moderation
Moderation protects both the brand and the community as the network scales.
In Moderate, configure:
- Automated moderation rules
- Approval queues
- User-generated content checks
- Audit logs and moderation history
Moderation should be finalized before deployment to prevent unsafe or non-compliant content from going live.
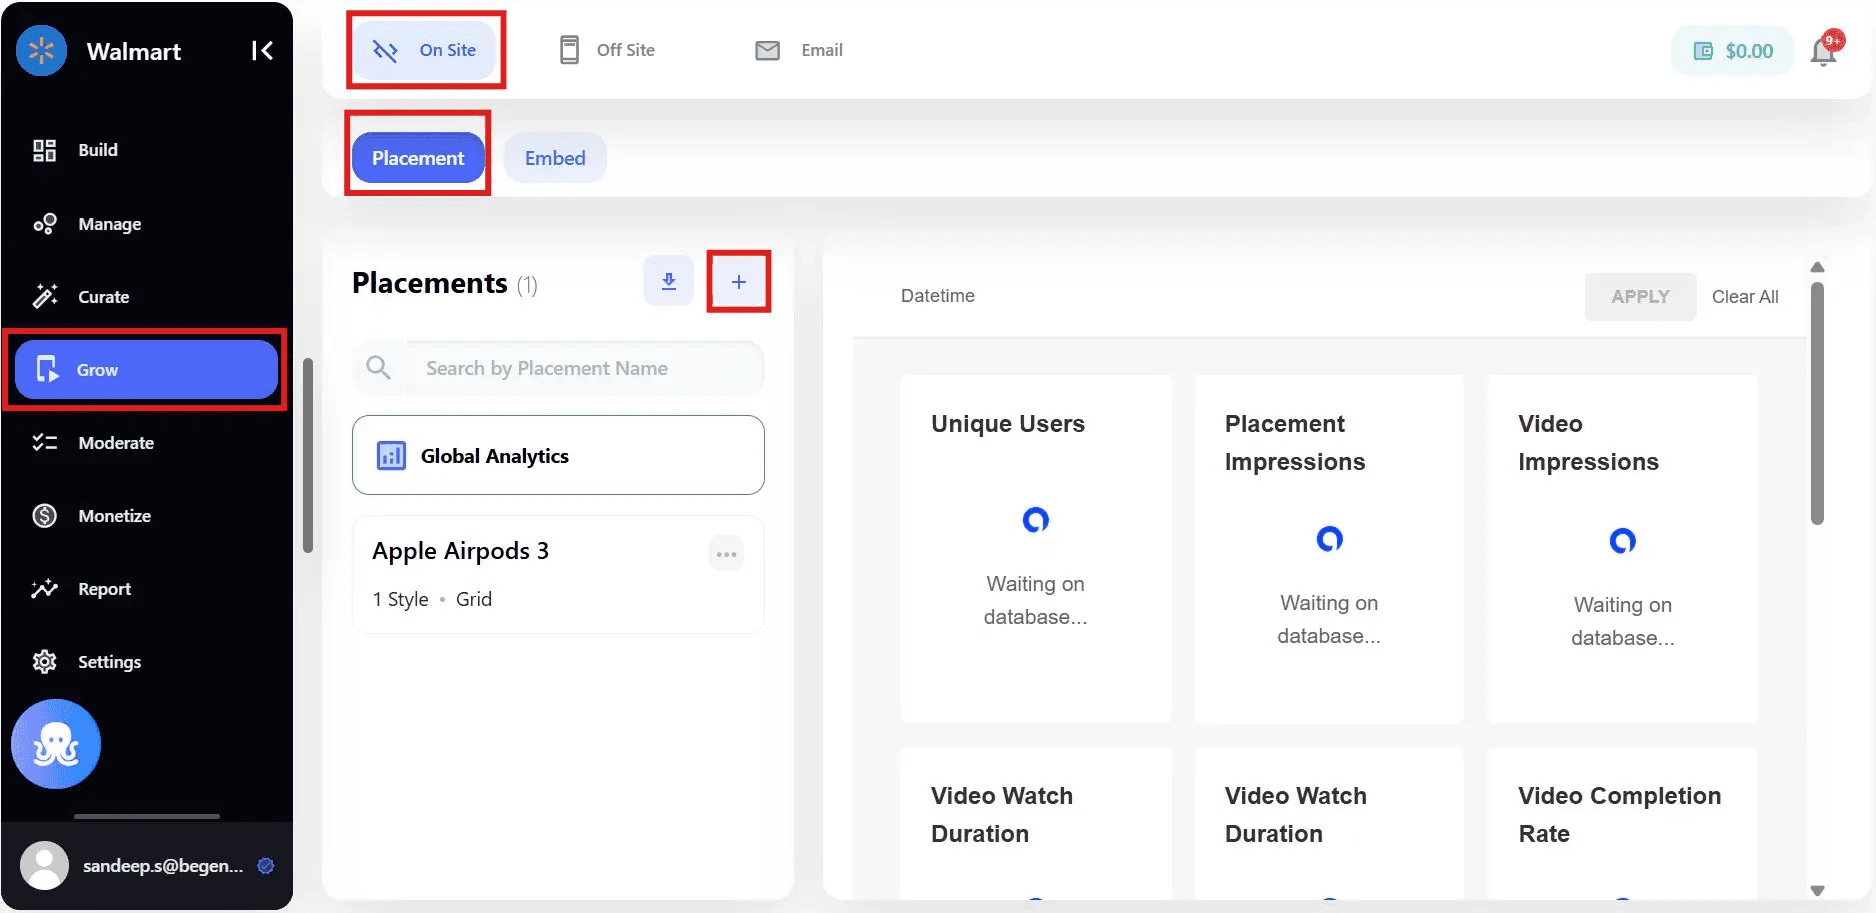
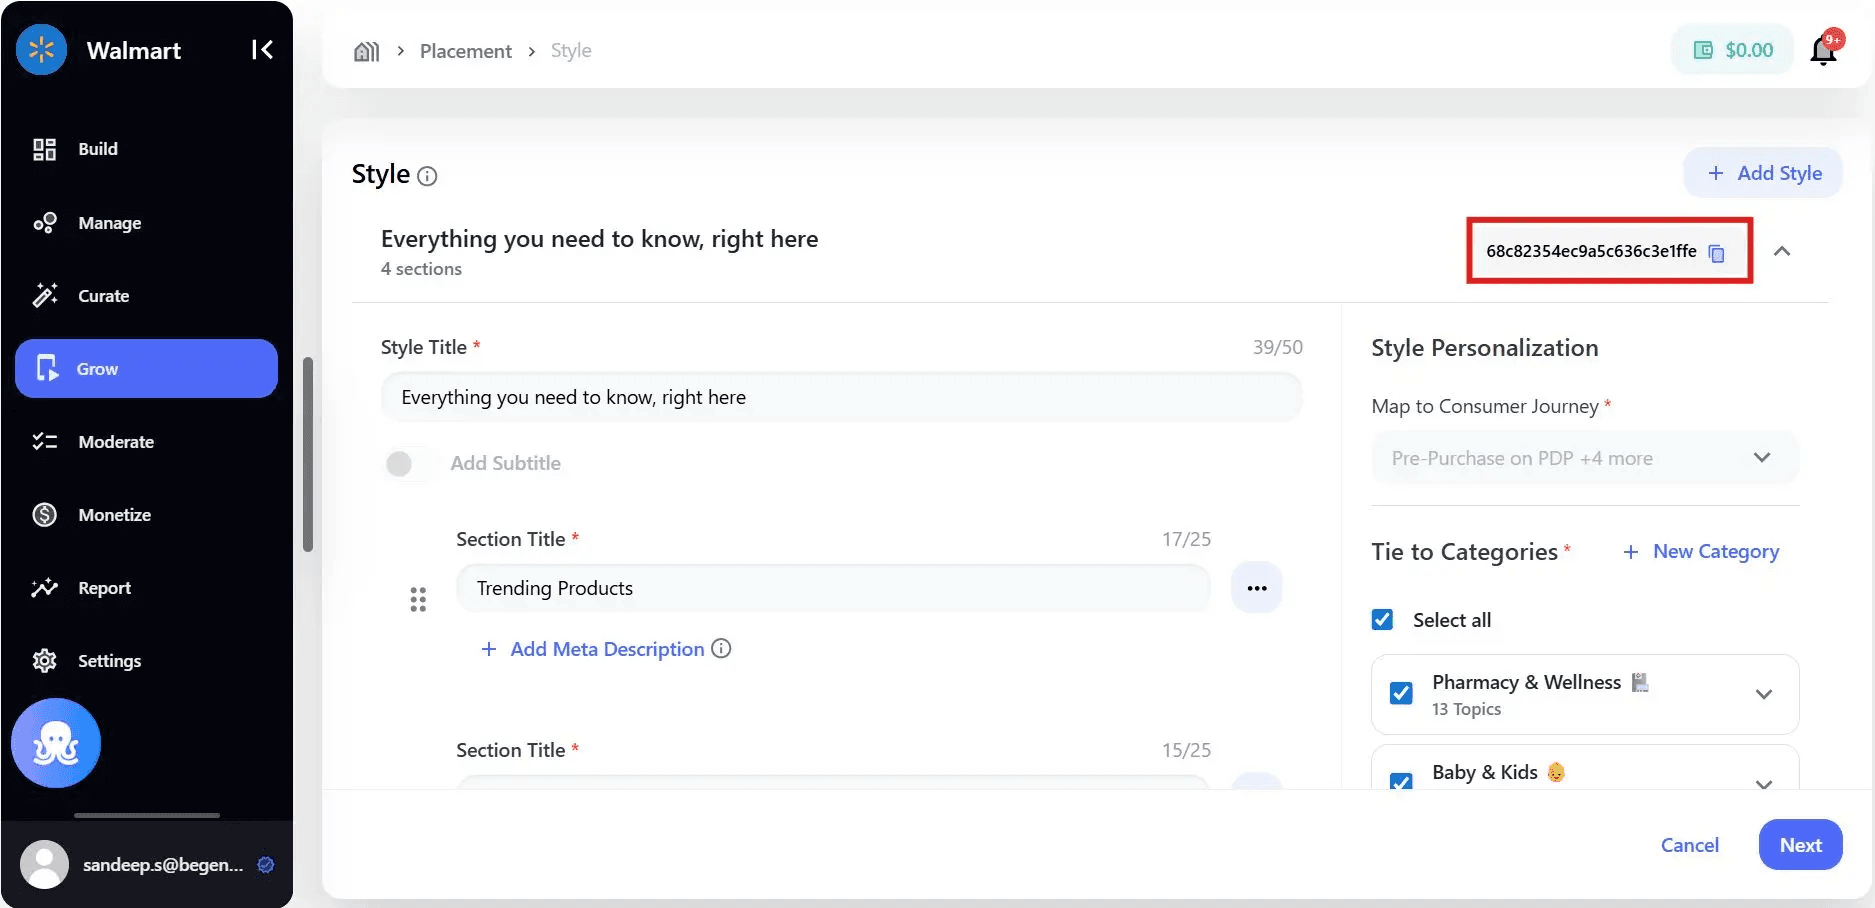
Step 8: Set Up Placements and Environments
Deployment happens through Placements in the Grow module.
Placement configuration includes:
- Placement name
- Layout type (Feed, Grid, Carousel)
- Feed source (Brand, Community, Group)
- Environment (Web, App, Global)
- Active or inactive status
Placements act as reusable deployment units, allowing one configuration to power multiple pages or surfaces.
Step 9: Deploy Across Owned Properties
With placements configured, embed your Community Media Network into:
- Websites
- Product Detail Pages (PDPs)
- Discovery and category pages
- Mobile apps (iOS and Android)
- SDK-based environments
Deployment options include:
- Embed code snippets
- Placement IDs
- Feed personalization parameters
All engagement remains inside your owned ecosystem.
Step 10: Validate and Go Live
Before launch:
- Use live previews (desktop and mobile)
- Validate layouts and feed behavior
- Test moderation and approval workflows
- Confirm environment targeting
Once validated, toggle placements to Active to go live.
Post-Deployment Readiness
After deployment, teams can:
- Monitor engagement and performance in Reports
- Optimize content and placements
- Scale communities and groups
- Activate monetization when ready
Setup and deployment are not one-time tasks, they form the foundation for continuous growth.
Key Takeaways
- Brand Control Center provides an end-to-end framework for CMN setup and deployment
- Communities and groups define structure; placements define distribution
- AI-powered ingestion, curation, and moderation enable scale without loss of control
- Deployment keeps audiences, data, and monetization fully owned by the brand
