How a Brand Can Get Started with Sponsorships in Brand Control Center
Sponsorships unlock a new revenue stream for brands beyond traditional programmatic ads. Instead of relying only on automated demand, brands can now directly monetize their content and partnerships.
Why this matters:
- Monetize premium content directly - Promote selected posts as sponsored and earn based on impressions (CPM).
- Enable brand partnerships - Collaborate with partners (e.g., retail brands, media partners) and showcase their content within your ecosystem.
- Increase visibility with high-impact formats - Use Sponsored Takeovers to dominate placements and drive higher engagement.
- Control distribution & targeting - Choose exactly where (placements) and how (environments) sponsored content appears.
- Track performance transparently - Measure impact using GTM IDs, pixel tracking, and sponsorship-level analytics.
Step-by-Step Guide
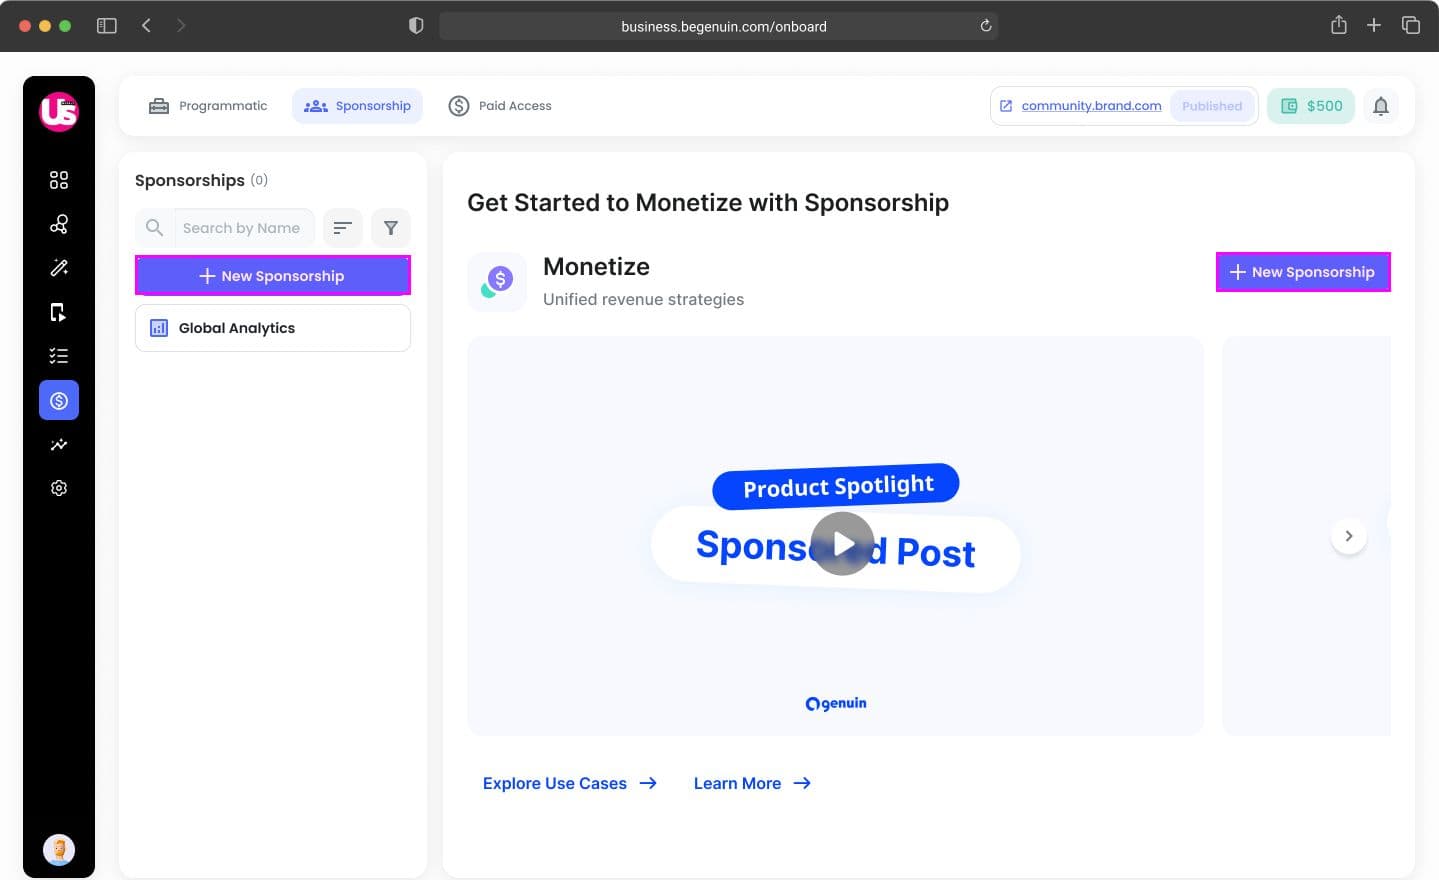
Step 1: Navigate to Sponsorships
Go to: Monetization > Sponsorship
You will see:
- Empty state (if no sponsorships exist)
- List of sponsorships (with filters & CSV download)
- Analytics panel
- CTA: Create New Sponsorship
Step 2: Create a New Sponsorship
Clicking “+ New Sponsorship” will open the configuration window.
A. Basic Information
- Sponsorship Title (mandatory)
- Sponsorship Type:
- Sponsored Post
- Sponsored Takeover
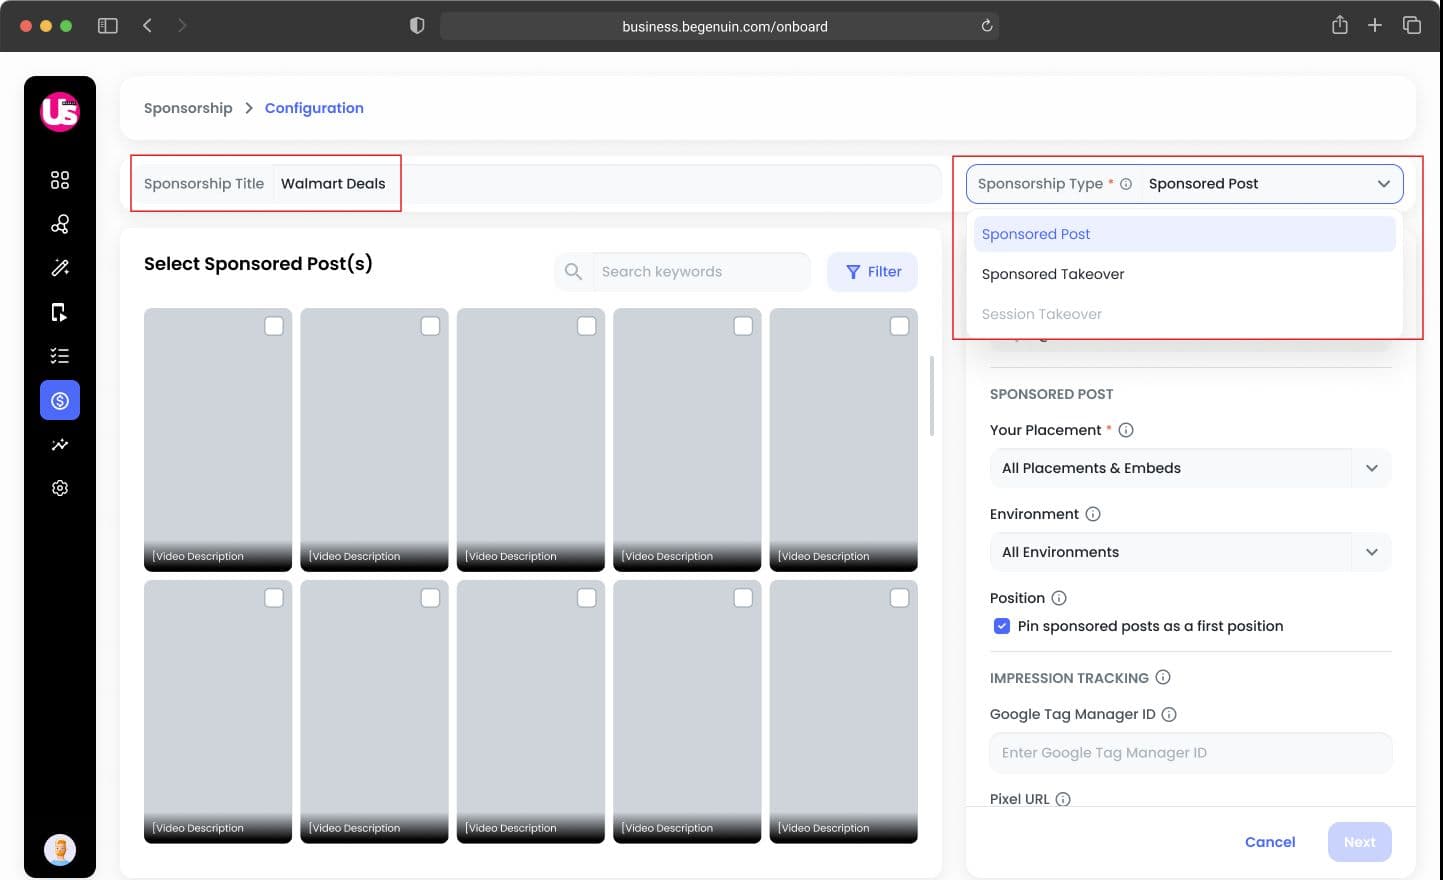
B. Select Posts
Choose from approved posts in the Manage section.
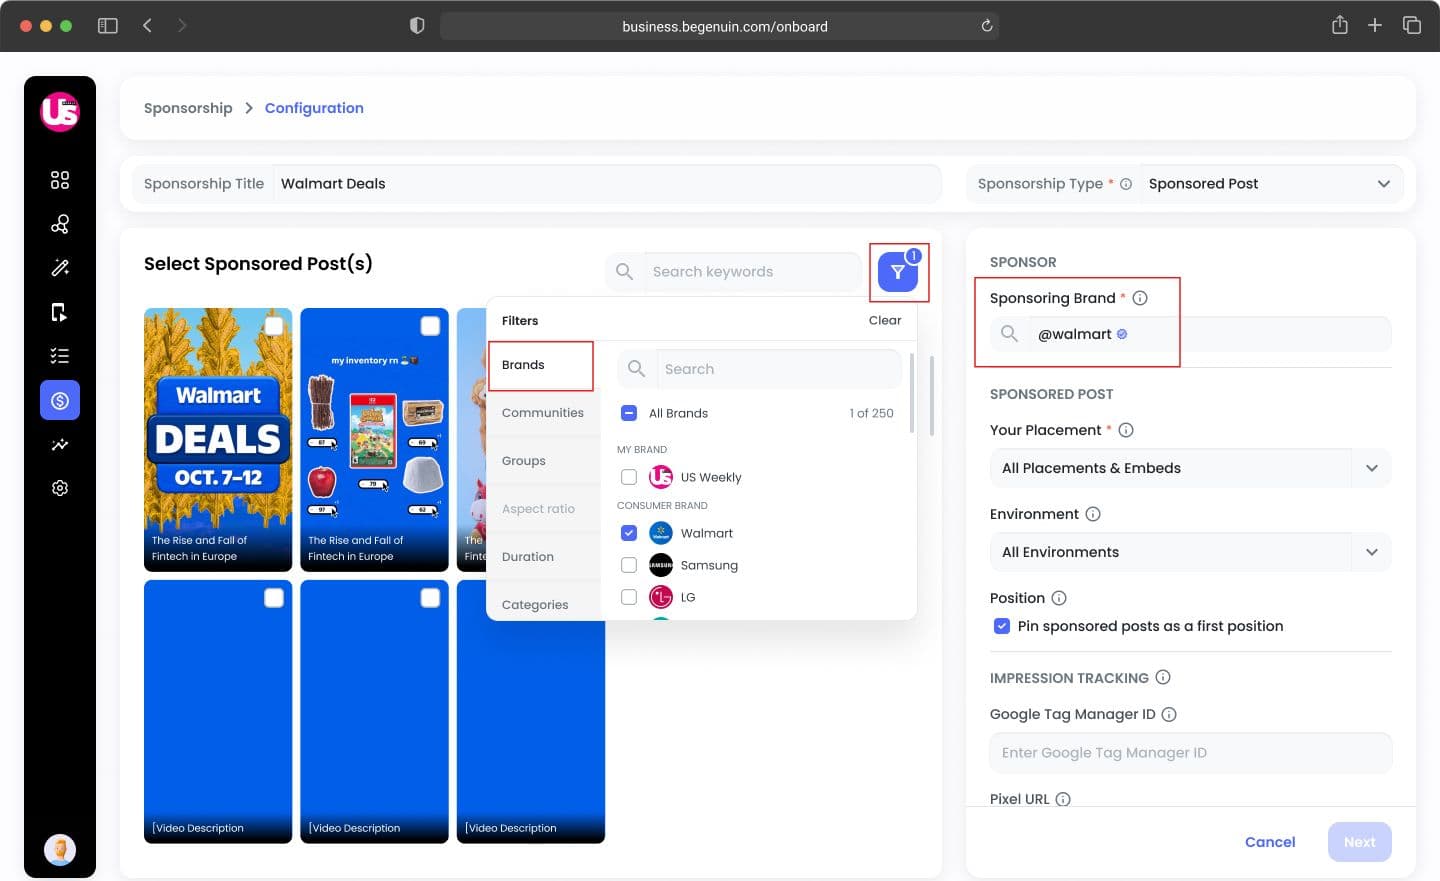
Key capabilities:
- Search by keyword
- Filter by:
- Brand
- Community / Group
- Duration
- Category / Topics
- Excludes:
- Posts marked as House Ads
Sponsoring Brand:
- Tag the brand (for attribution only)
- Only one brand per sponsorship
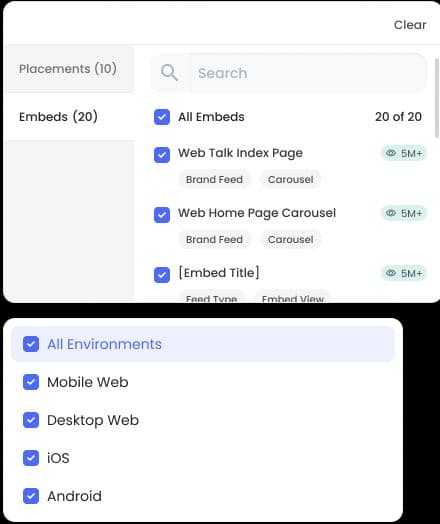
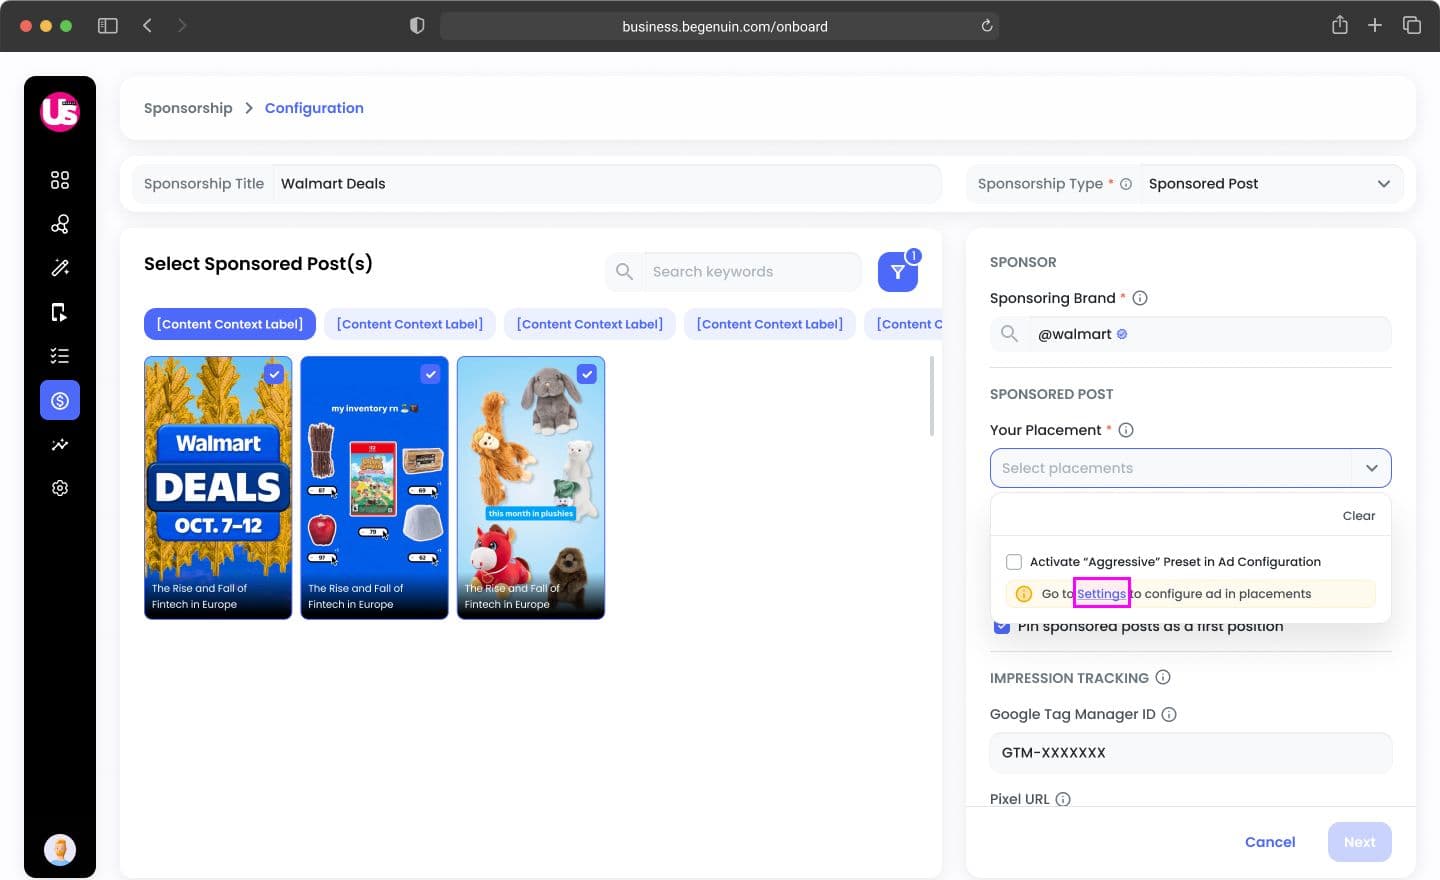
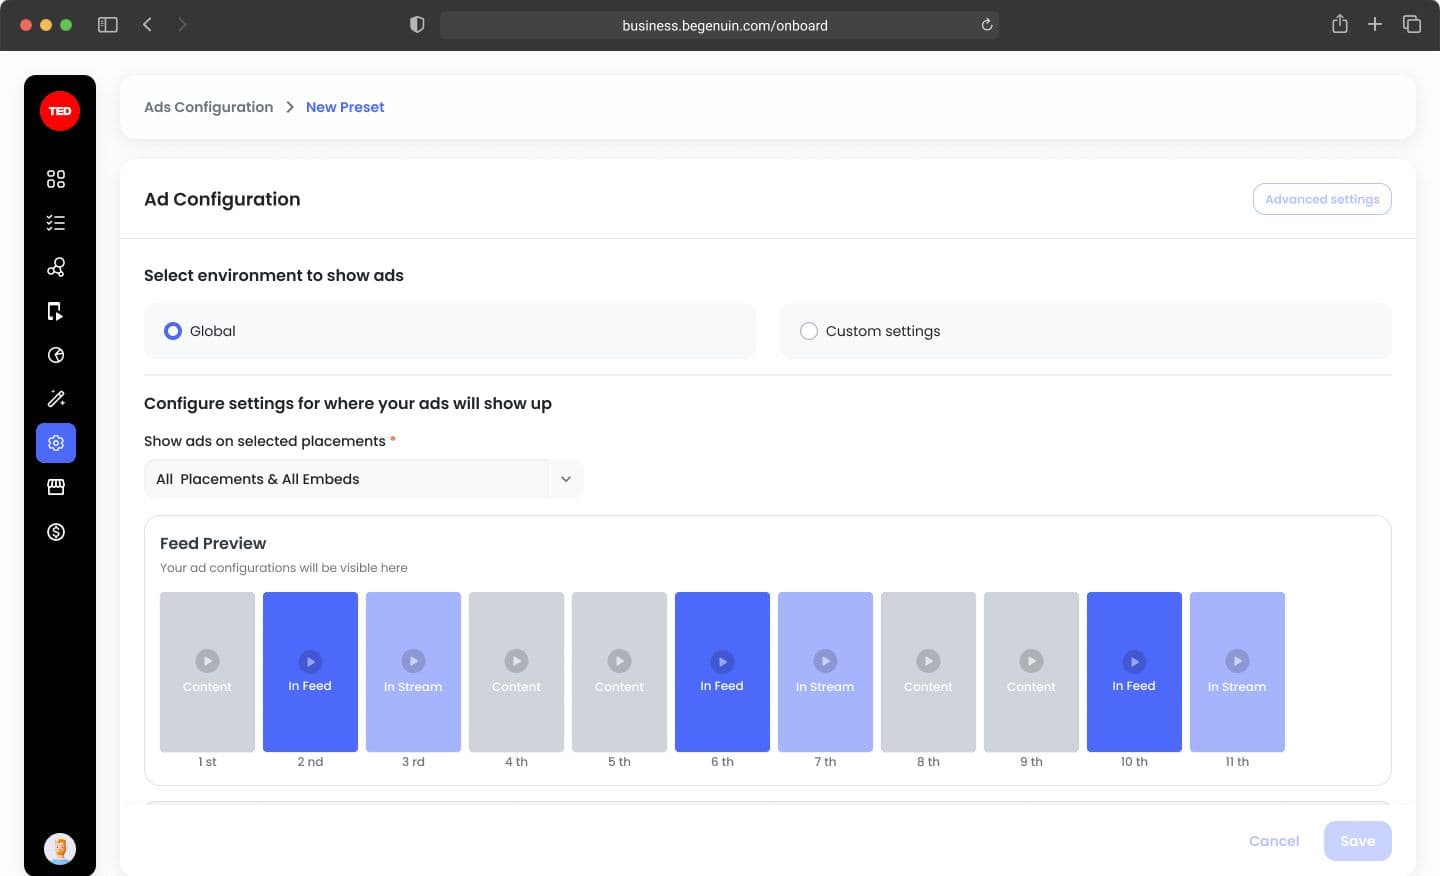
C. Placement & Environment Selection
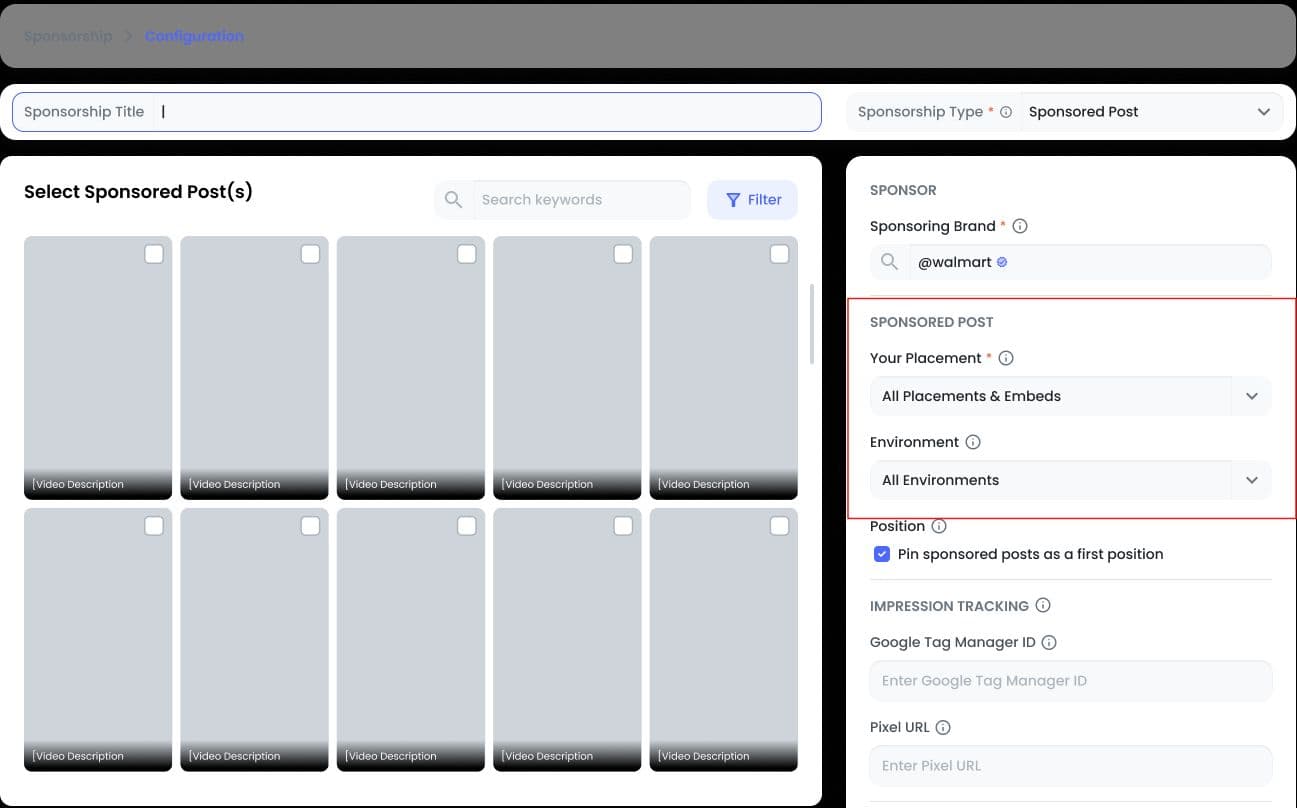
- Placements: Where ads appear (feeds, embeds, etc.)
- Environments:
- Mobile Web
- Desktop Web
- iOS
- Android
Important Logic: Final delivery = Intersection of Ad Config + Sponsorship settings
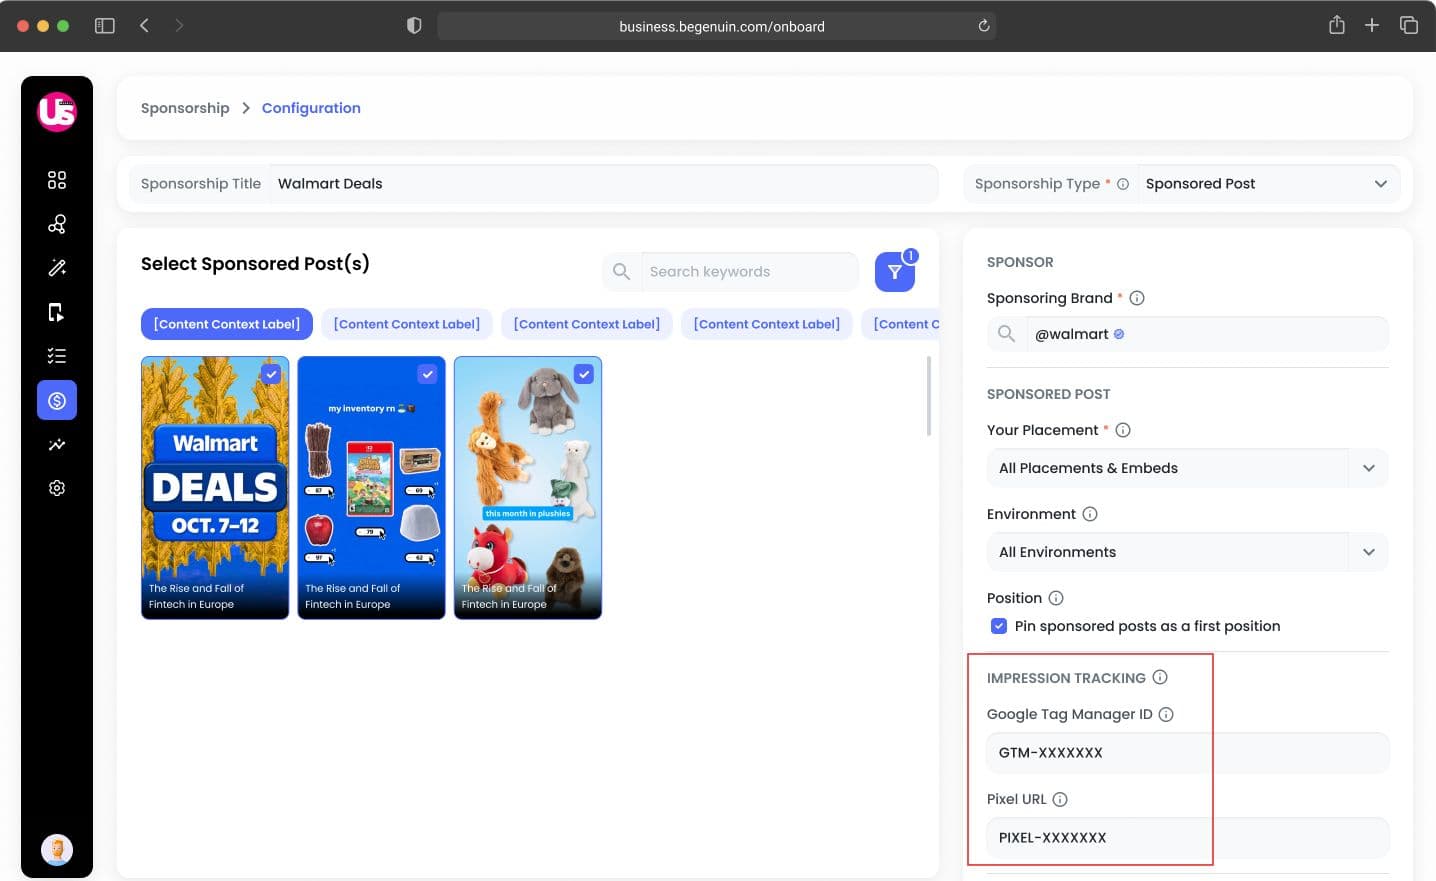
D. Tracking Setup
Add:
- GTM ID (optional)
- Pixel URL (optional)
Available at:
- Sponsorship level
- Post level
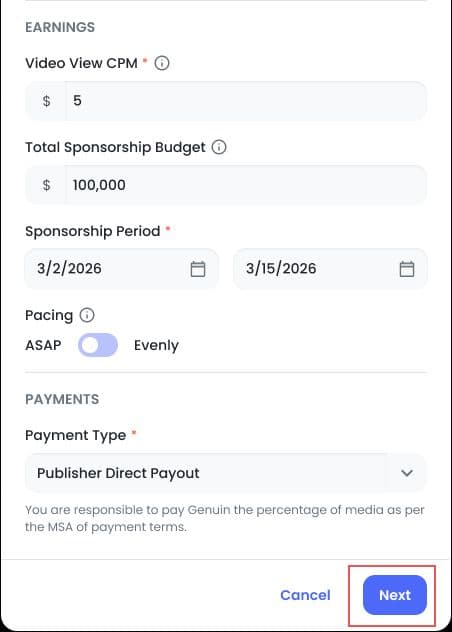
E. Earnings Configuration
- CPM (mandatory):
- Range: $10 – $1000
- 1 impression = 3-second video play
- Budget (optional)
- Sponsorship Period:
- Start Date & Time
- End Date & Time (mandatory)
- Payment Type:
- Publisher Direct Payout
- Others (future)

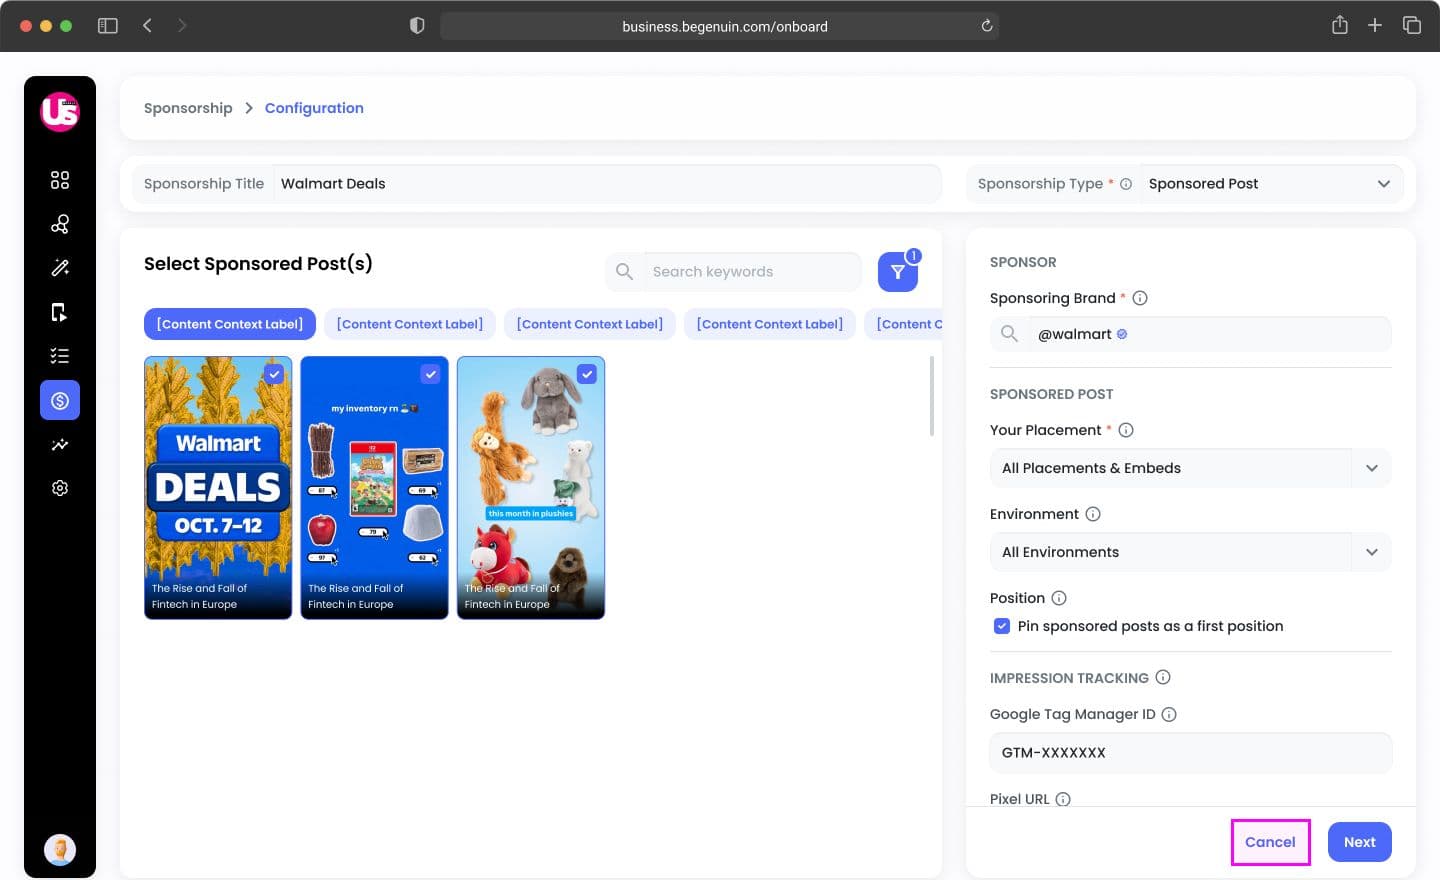
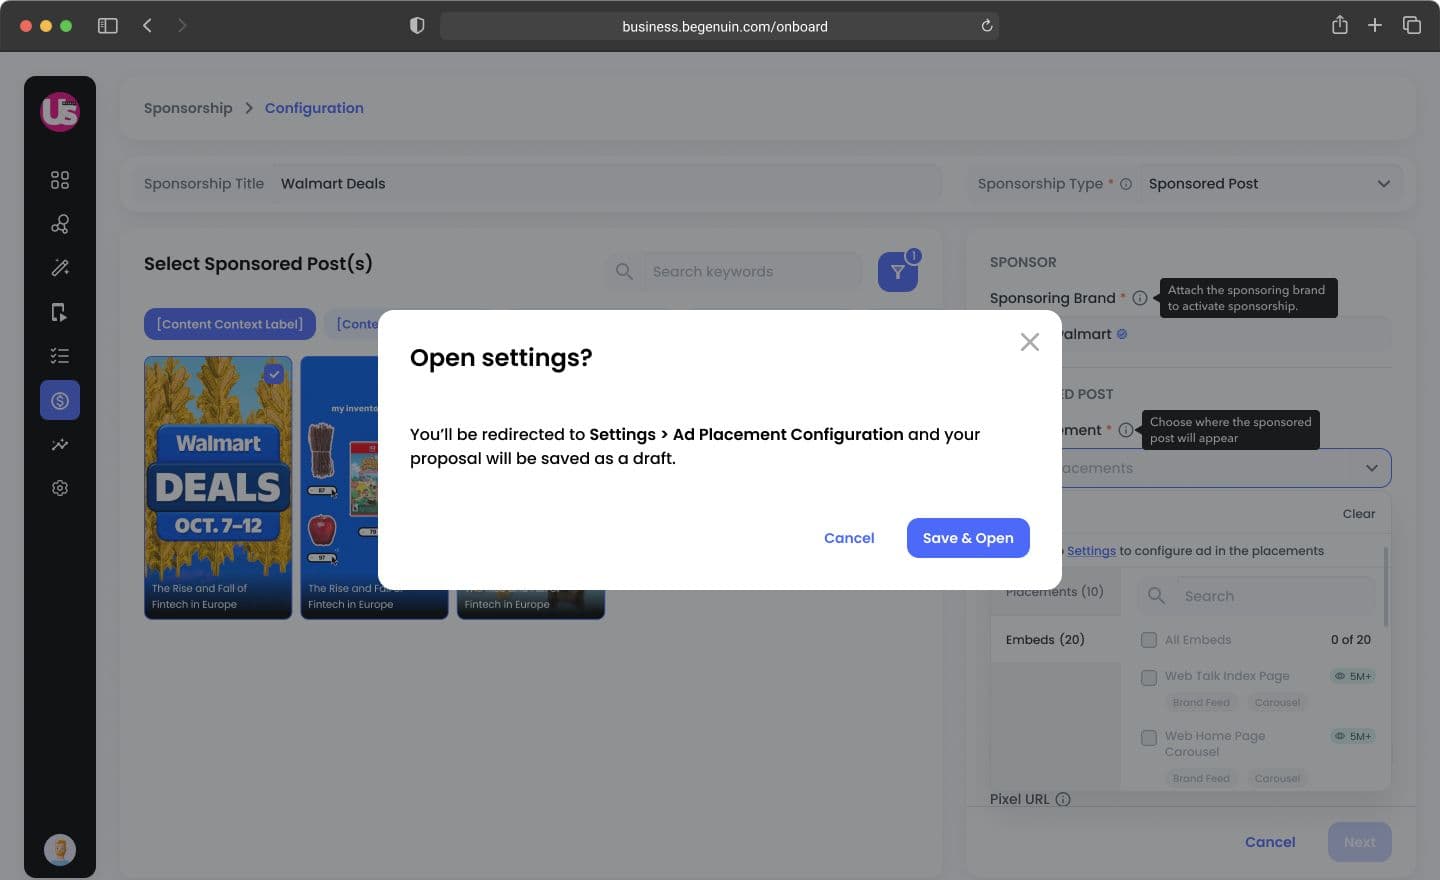
Step 3: Save as Draft
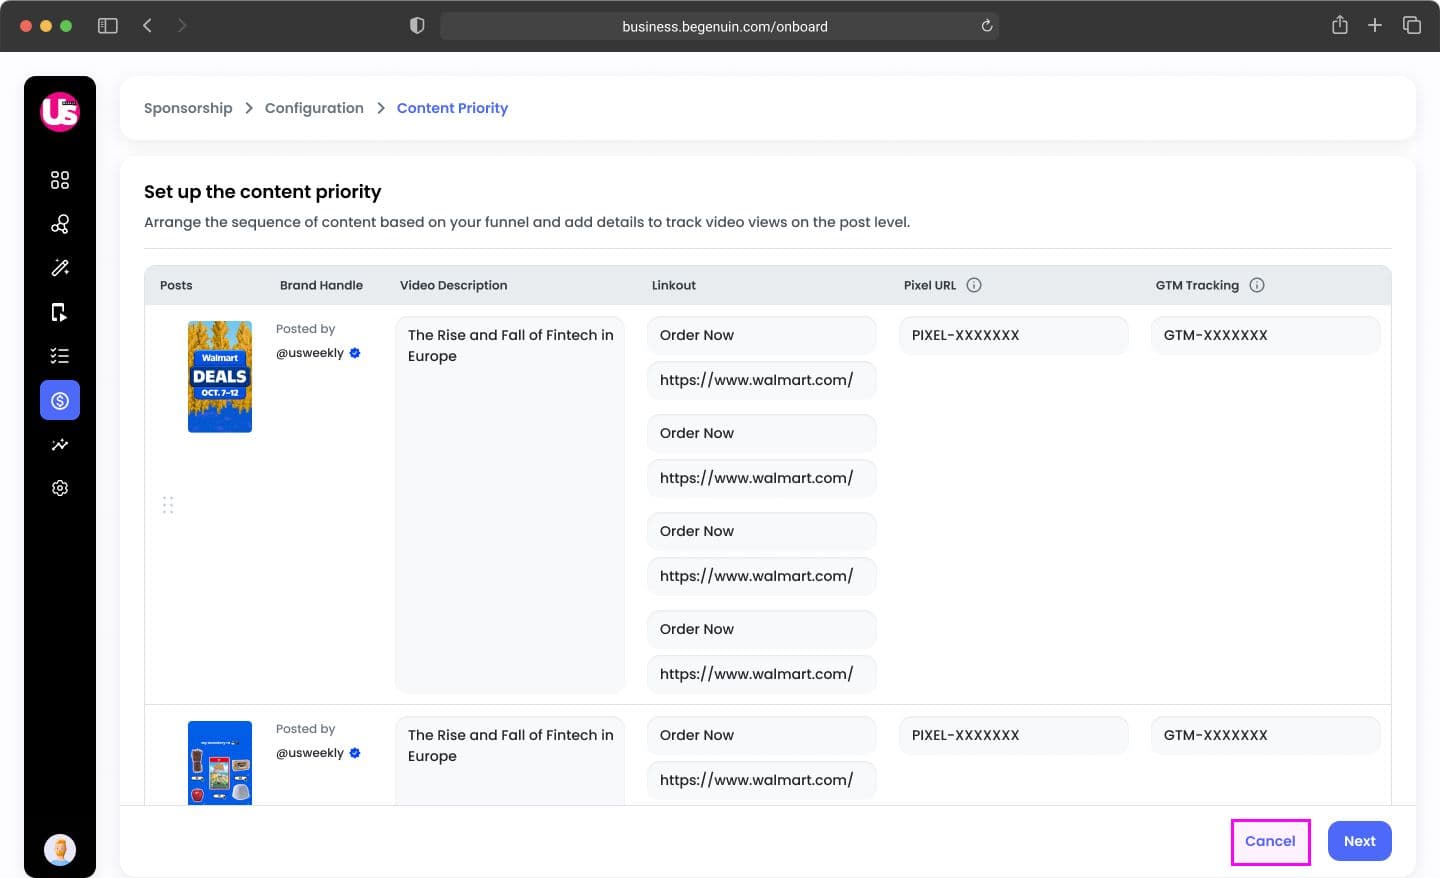
Click Next. Alternatively, click Cancel to save the Sponsorship post as a Draft.
OR
A confirmation window will appear; click the Save as Draft button to confirm the proposal as a draft.
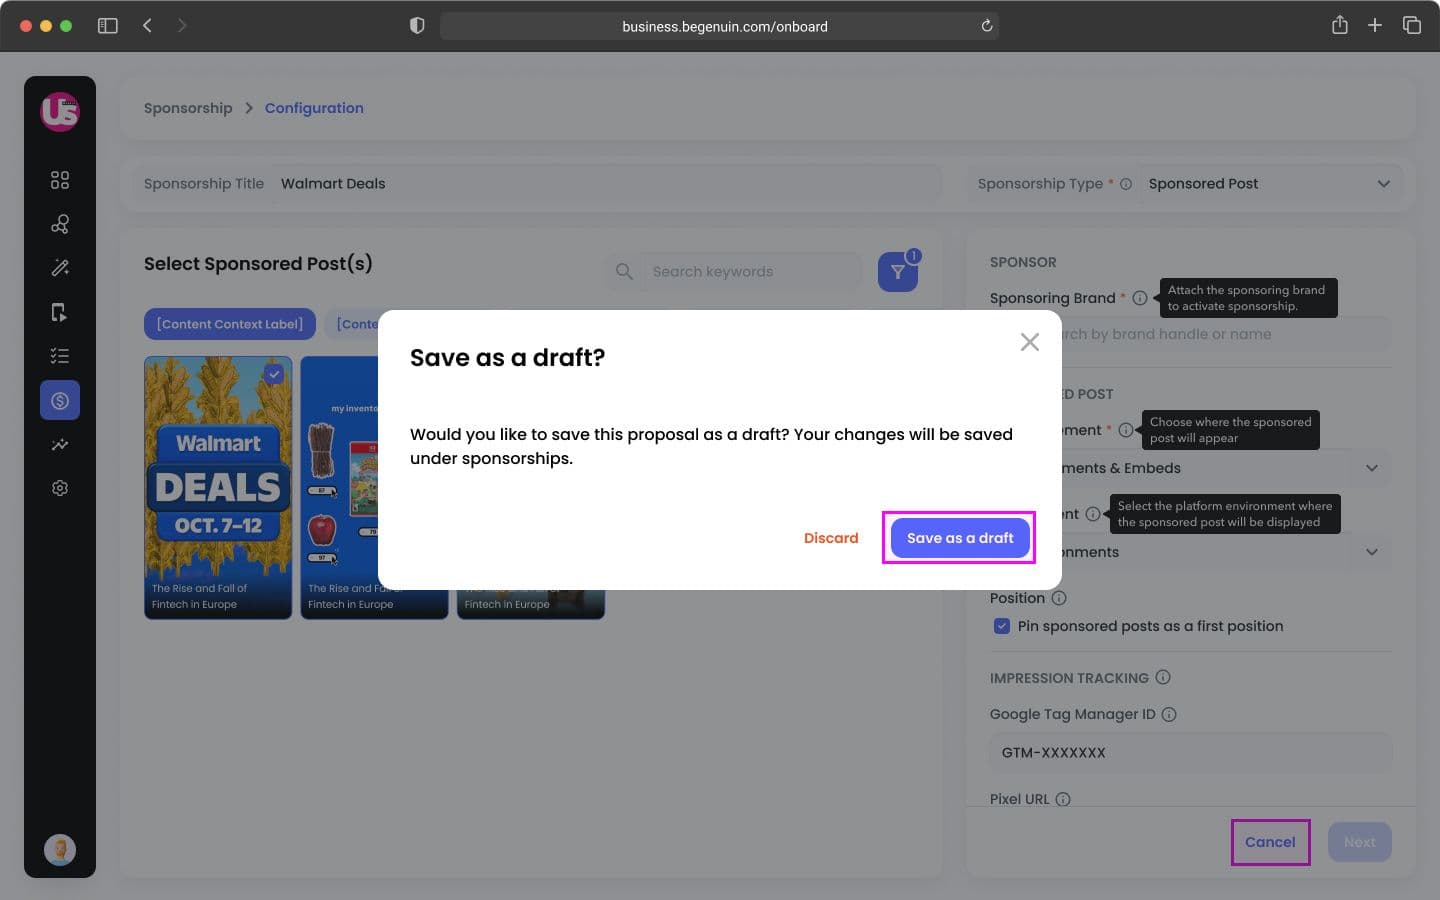
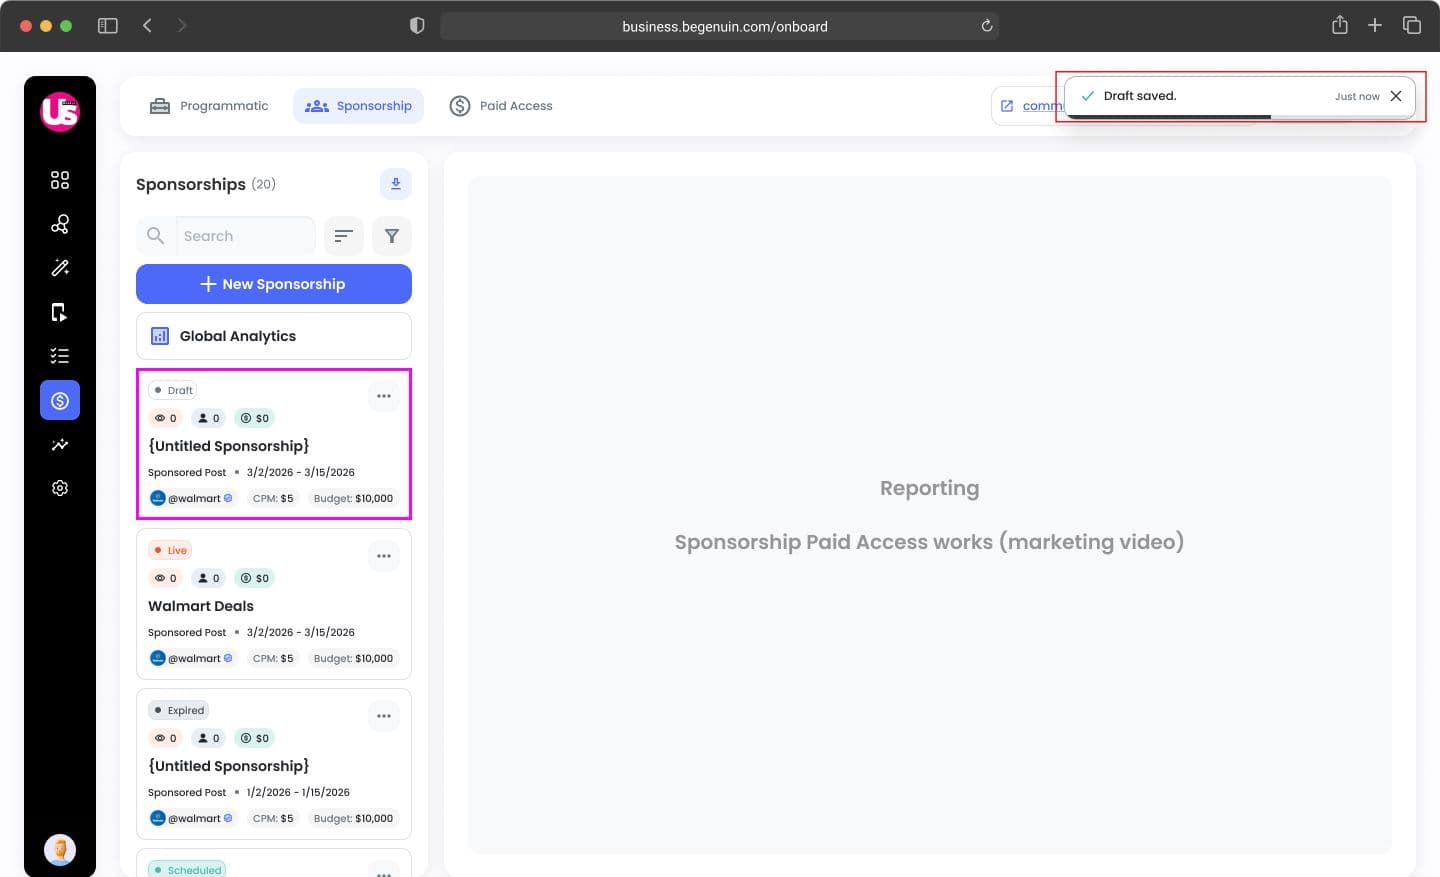
A pop-up confirming "Draft saved" will then appear.
Step 4: Review & Prioritize Posts
You’ll see:
- Post thumbnails
- Metadata preview
Actions:
- Drag & reorder posts
- Move up/down for large lists
- Edit metadata (does NOT change original post)
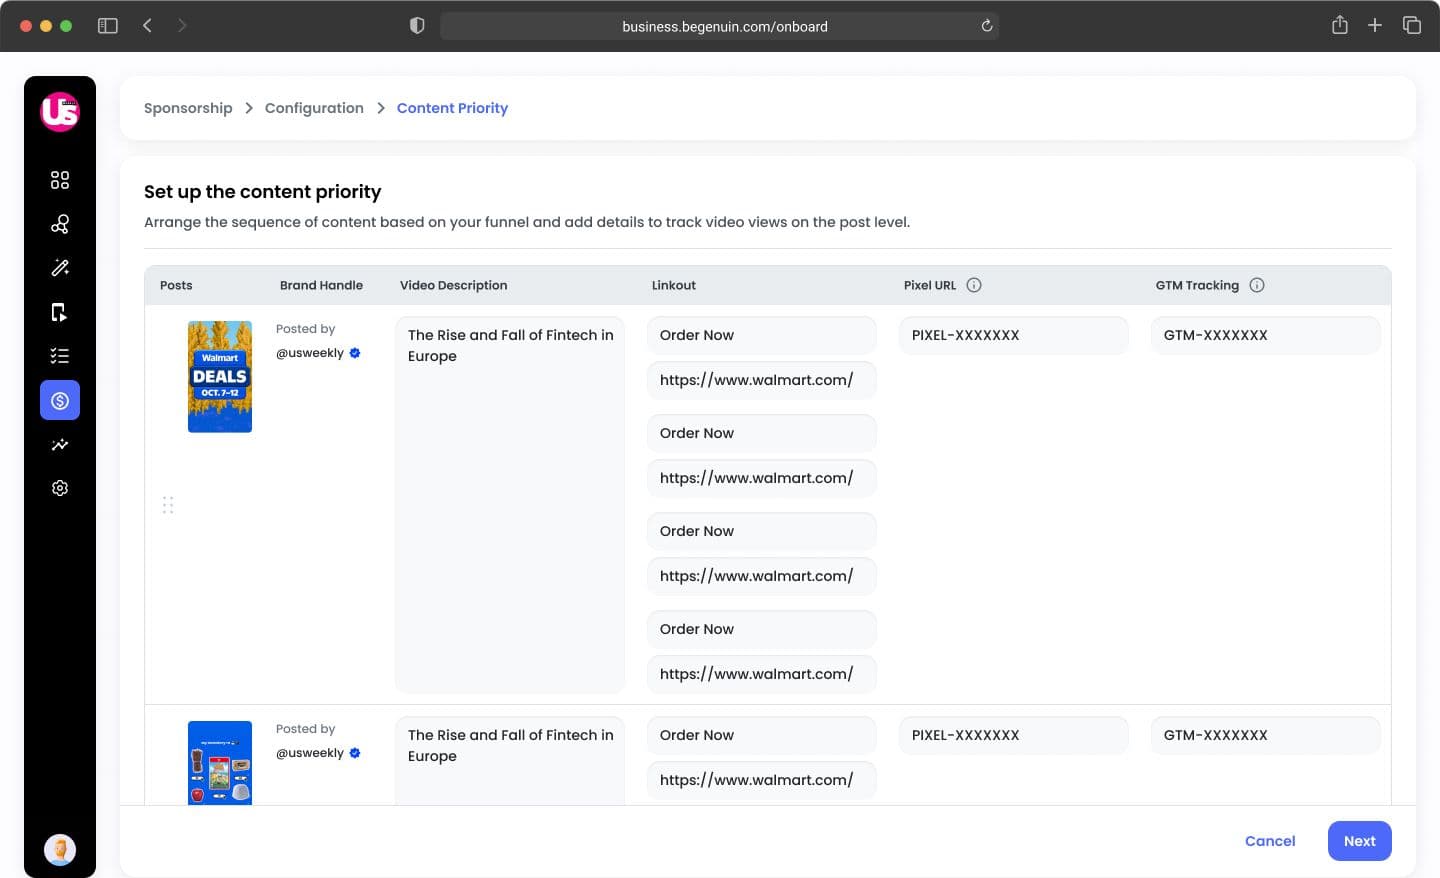
Important: Sponsored posts use a copy of metadata, not the original.
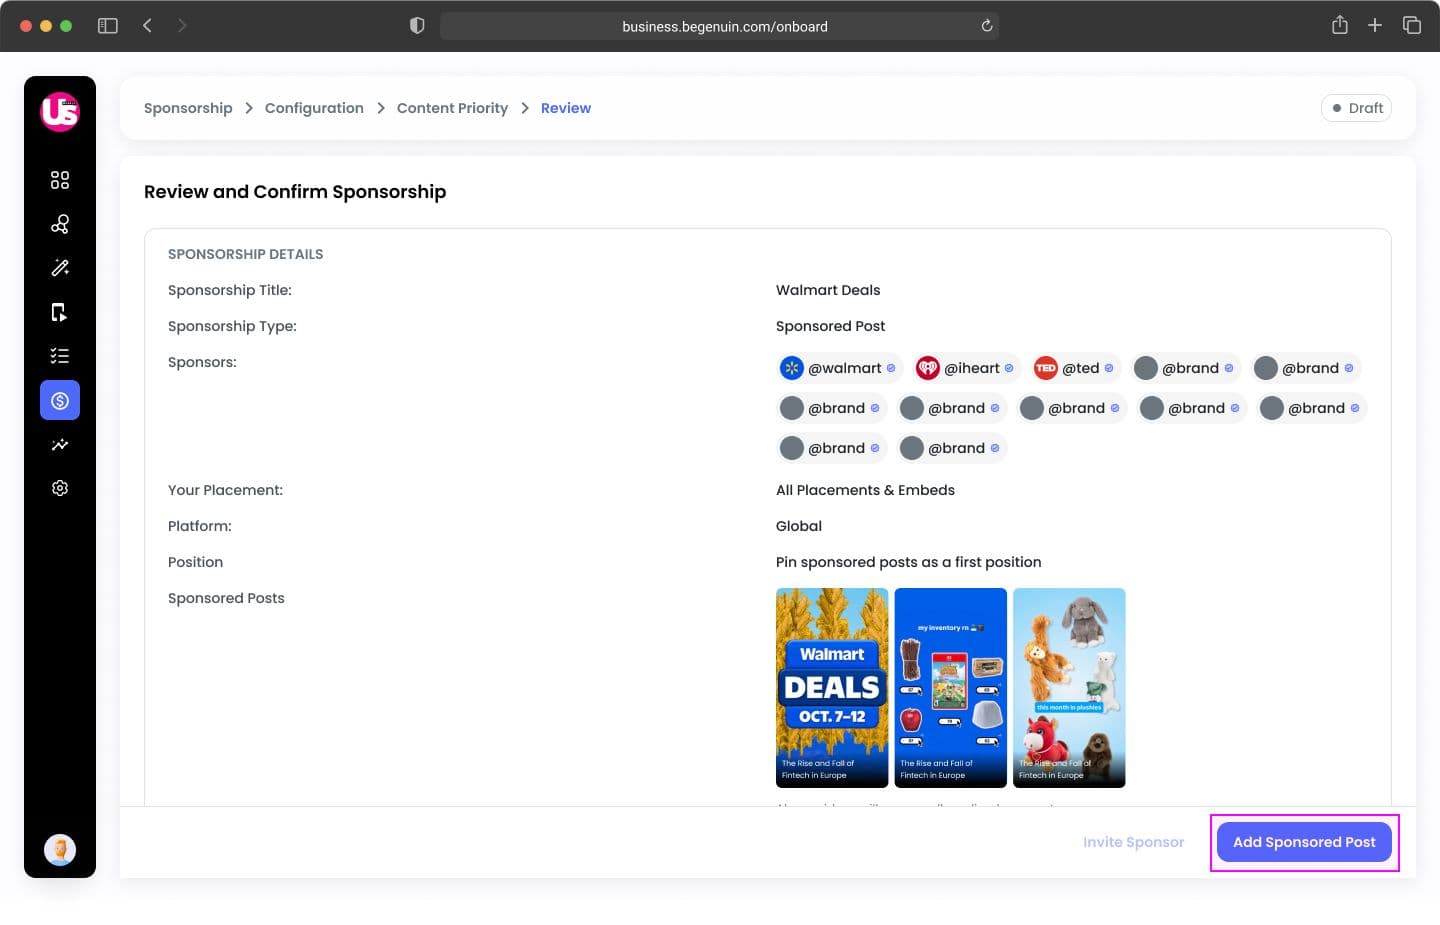
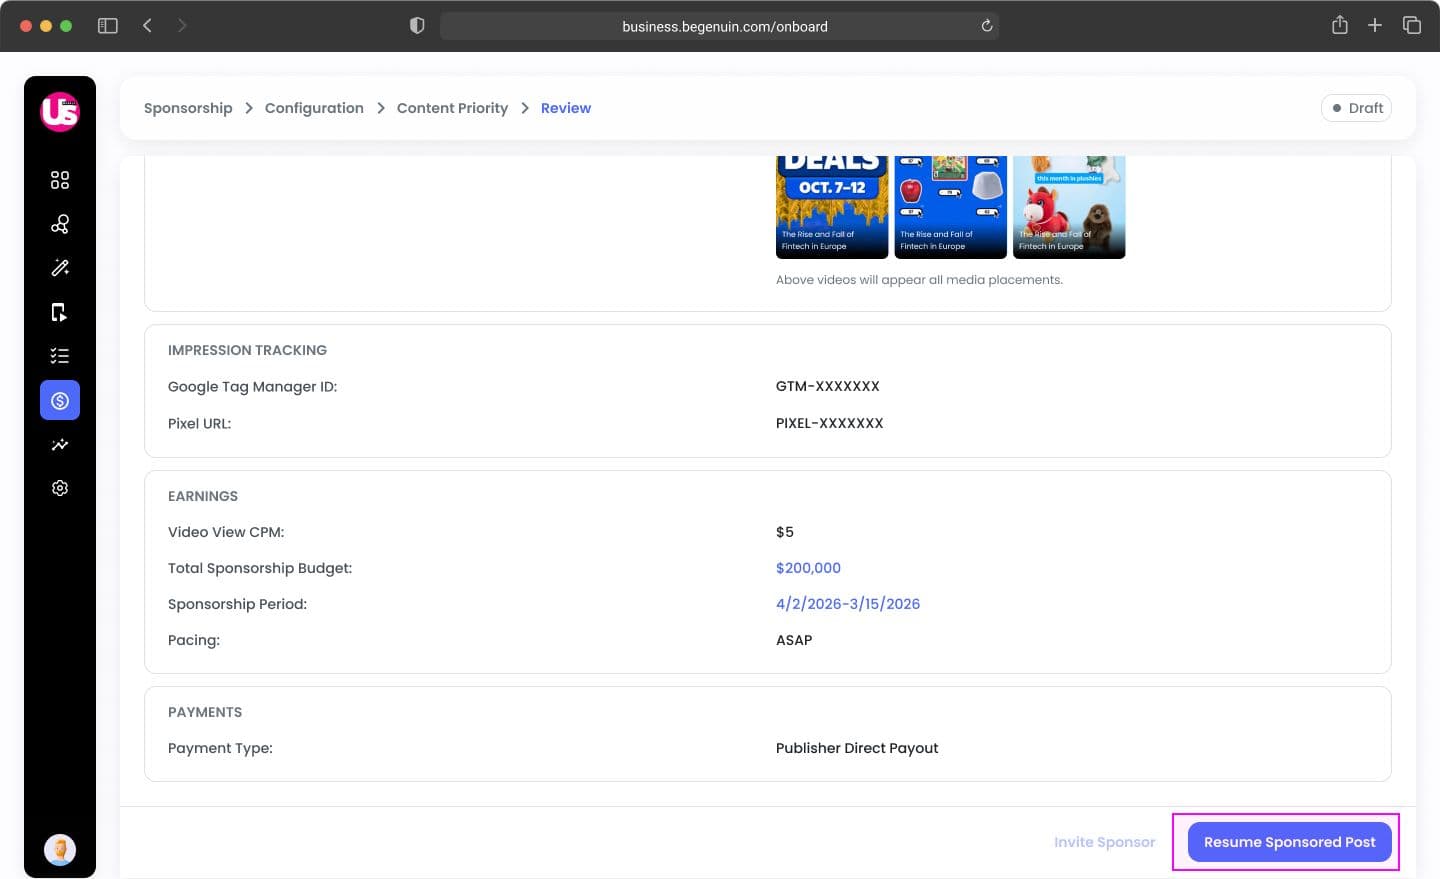
Step 5: Review & Confirm
Final screen shows:
- Configuration summary
- Selected posts preview (3 + “+N more”)
Click: Add Sponsored Post
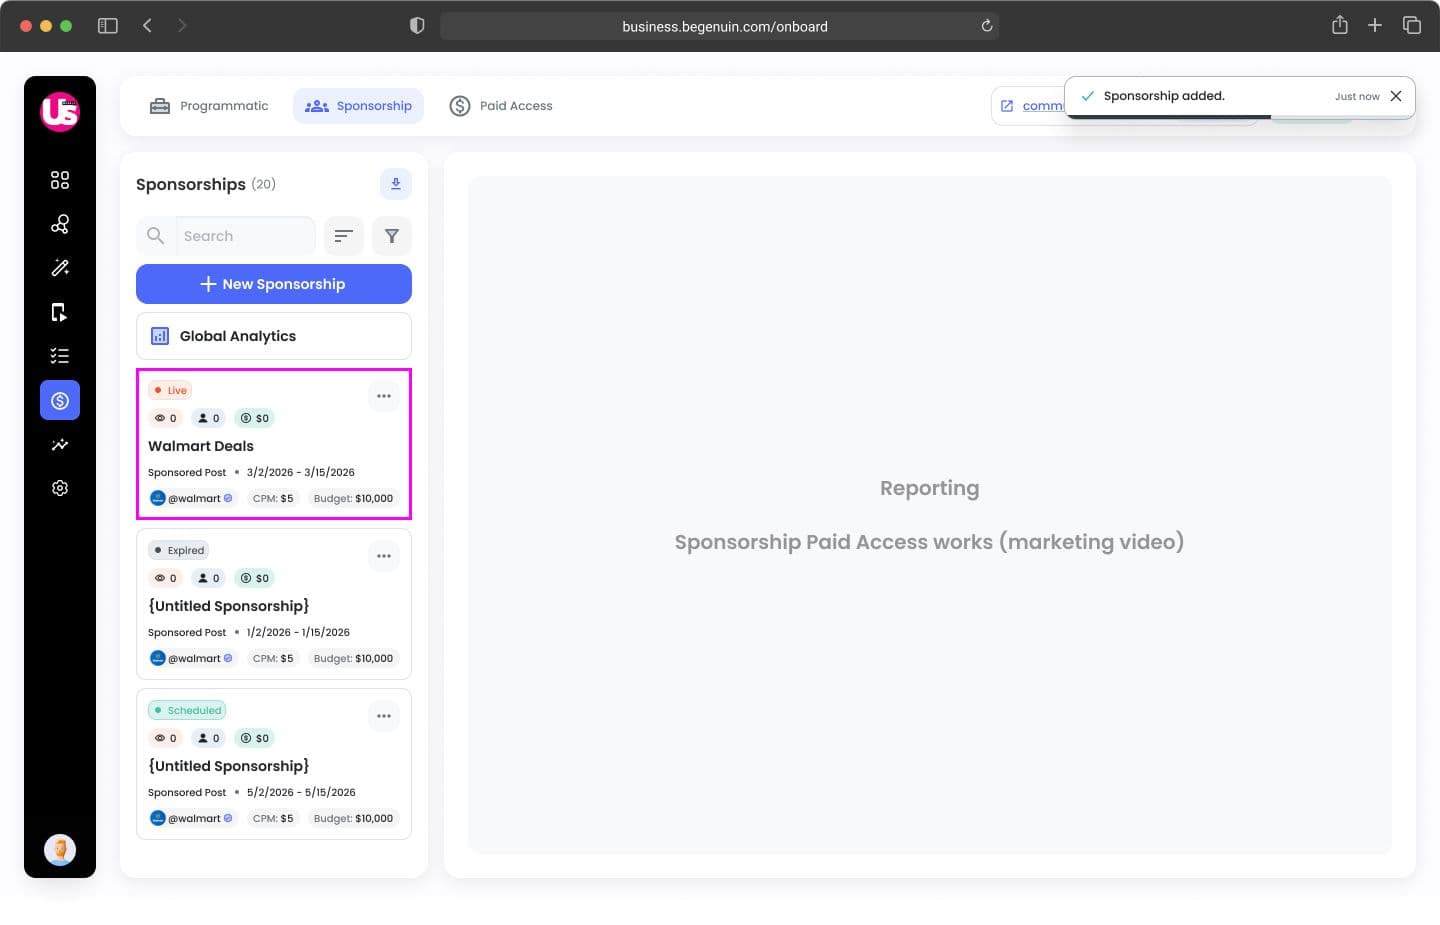
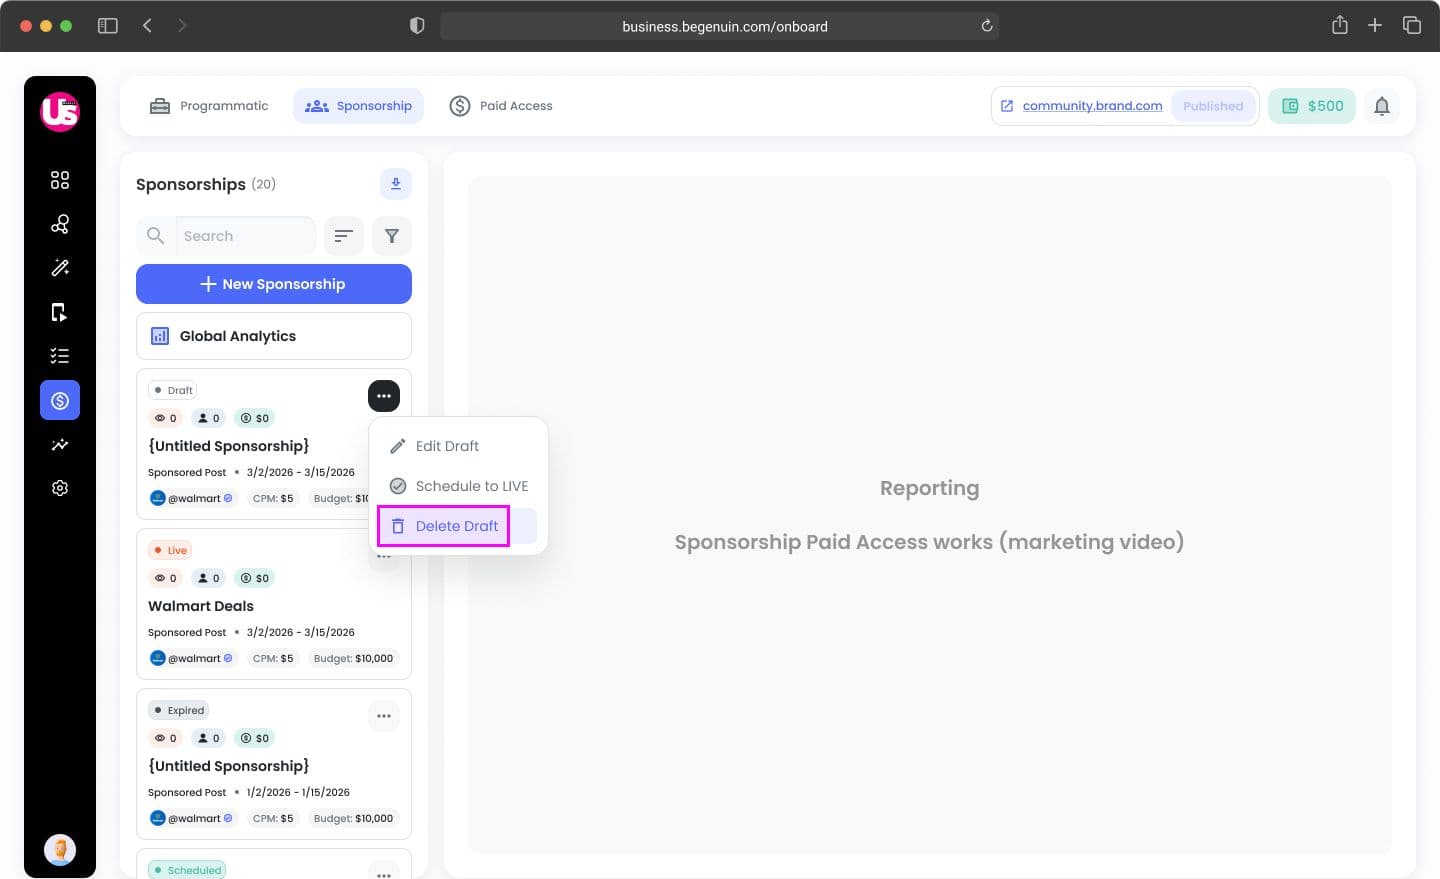
After a Sponsorship is created, a brand has three options to proceed:
- Edit Draft: Modify the existing sponsorship details.
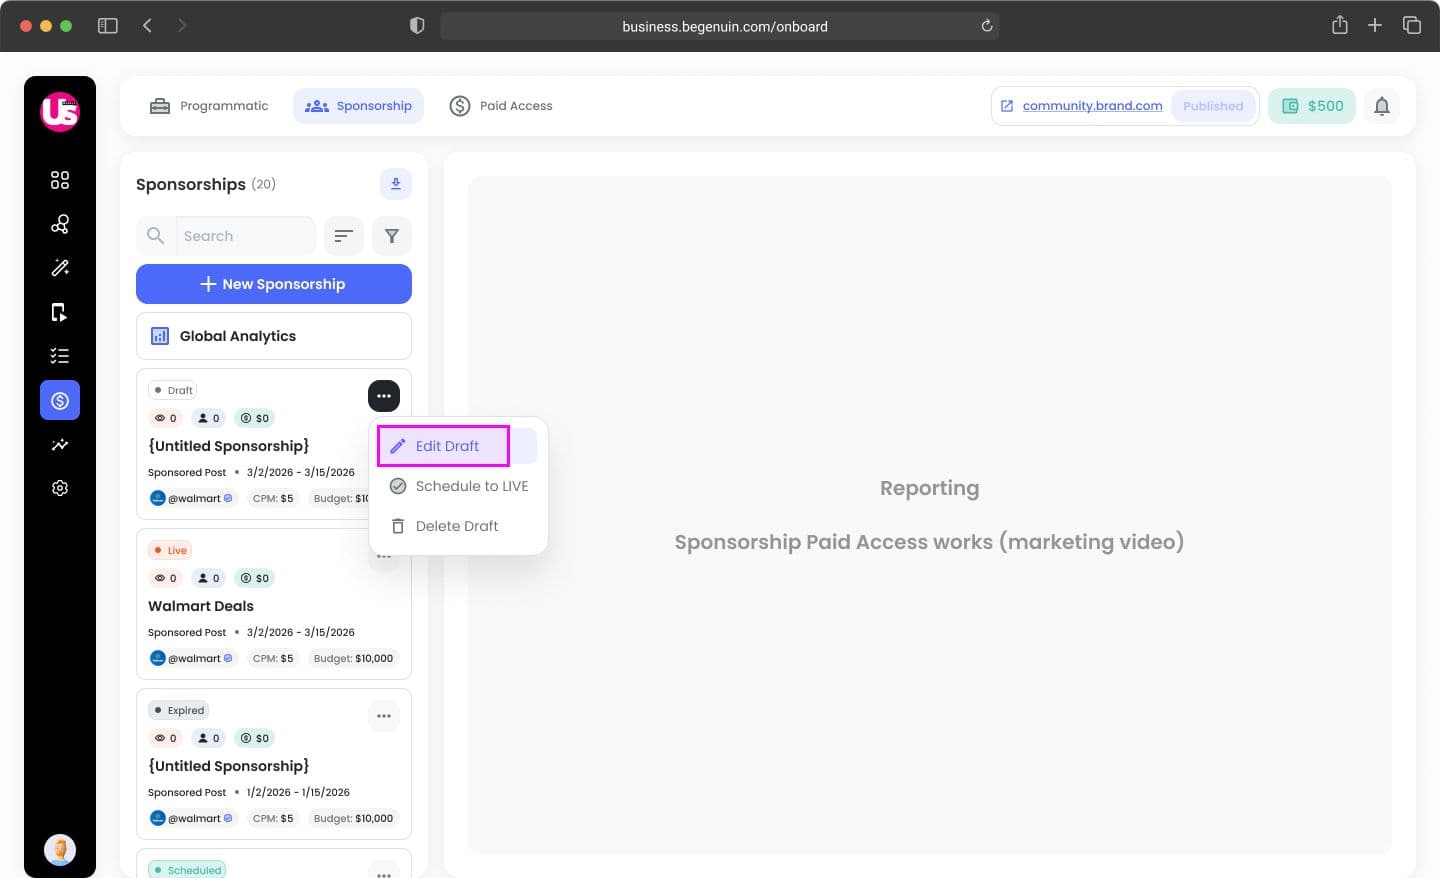
After making the necessary modifications. A confirmation message will then appear.

2. Schedule to Live: Set a time for the sponsorship to become active.
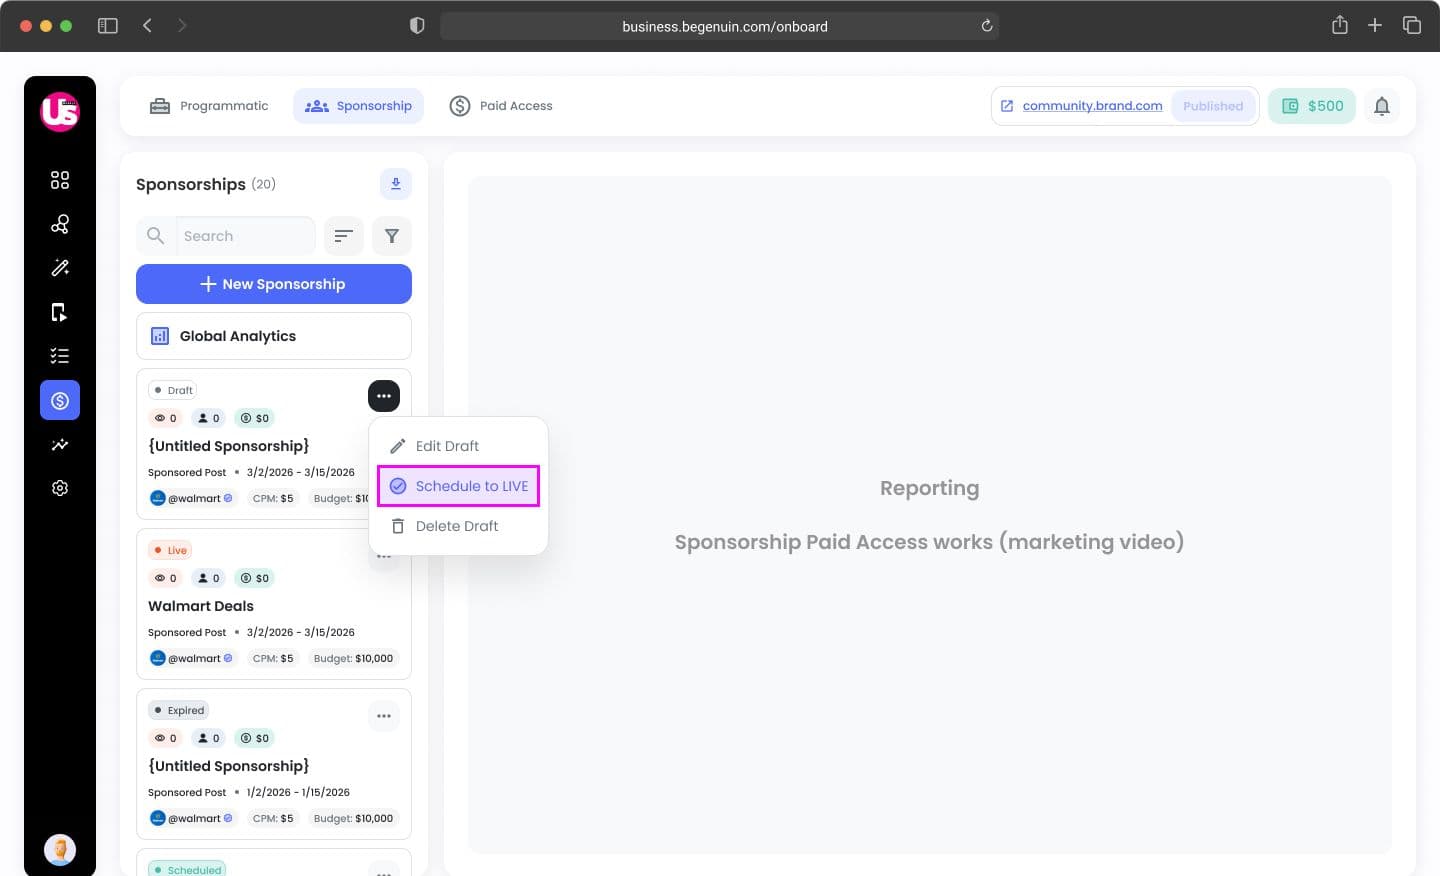
- The sponsorship will be automatically scheduled upon the completion of all mandatory fields.
- Should any required information be absent, a pop-up window will appear, prompting the user to finalize the draft.
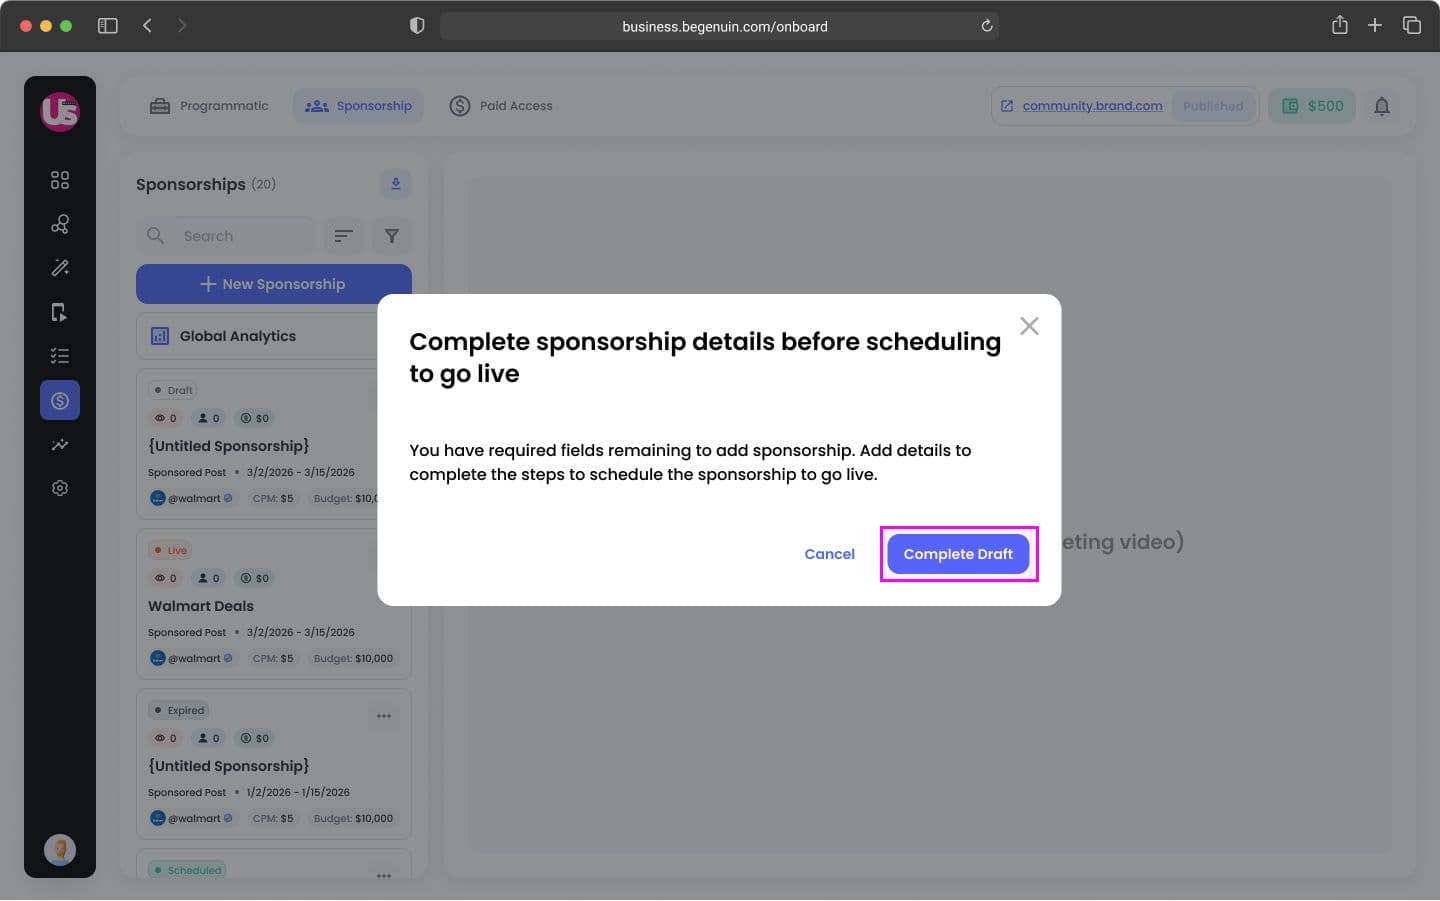
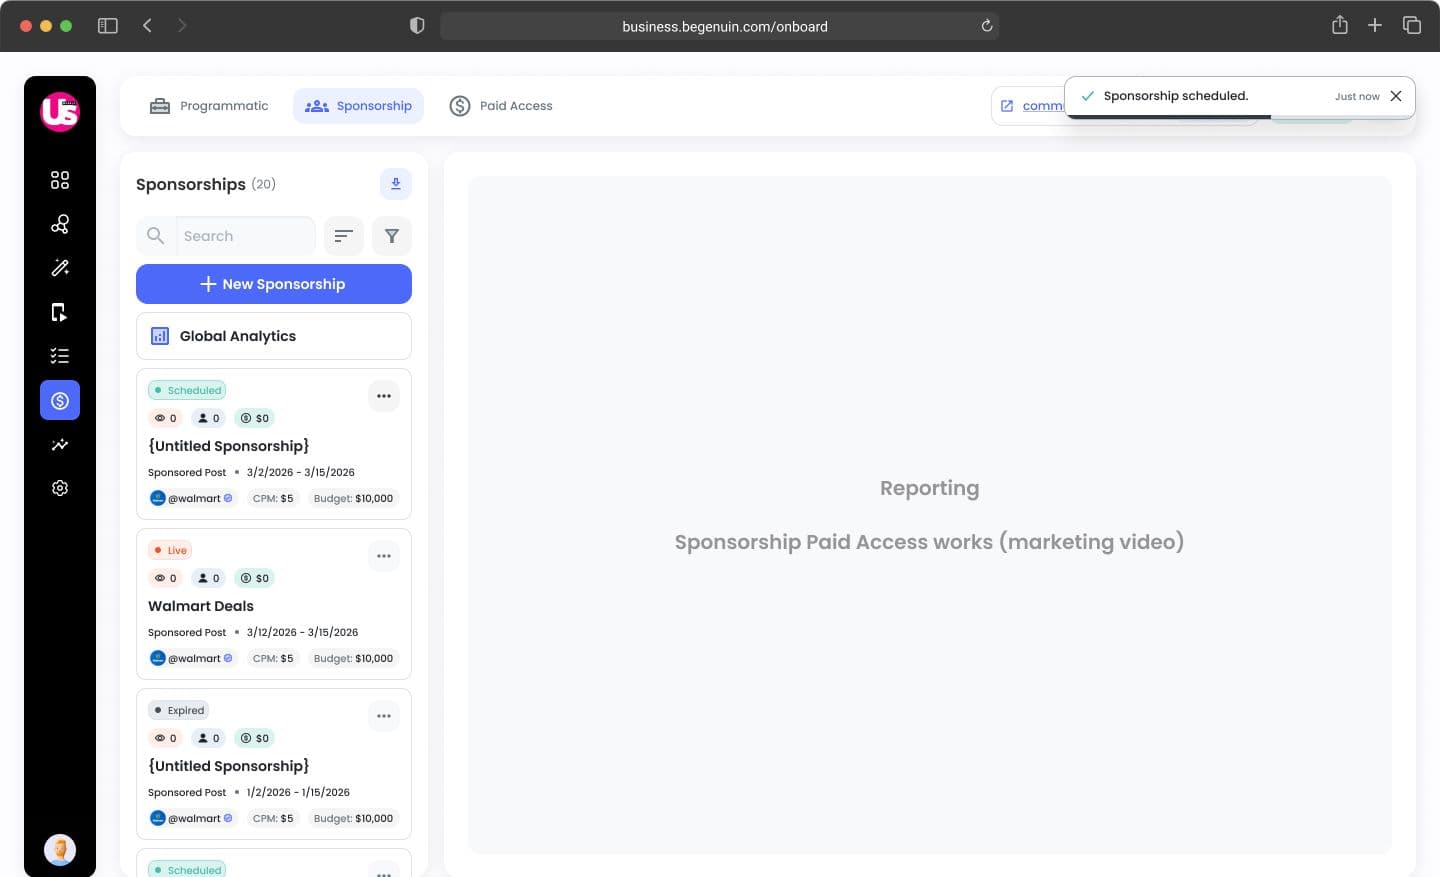
Subsequent to supplying the remaining mandatory details, the sponsorship will be successfully scheduled.
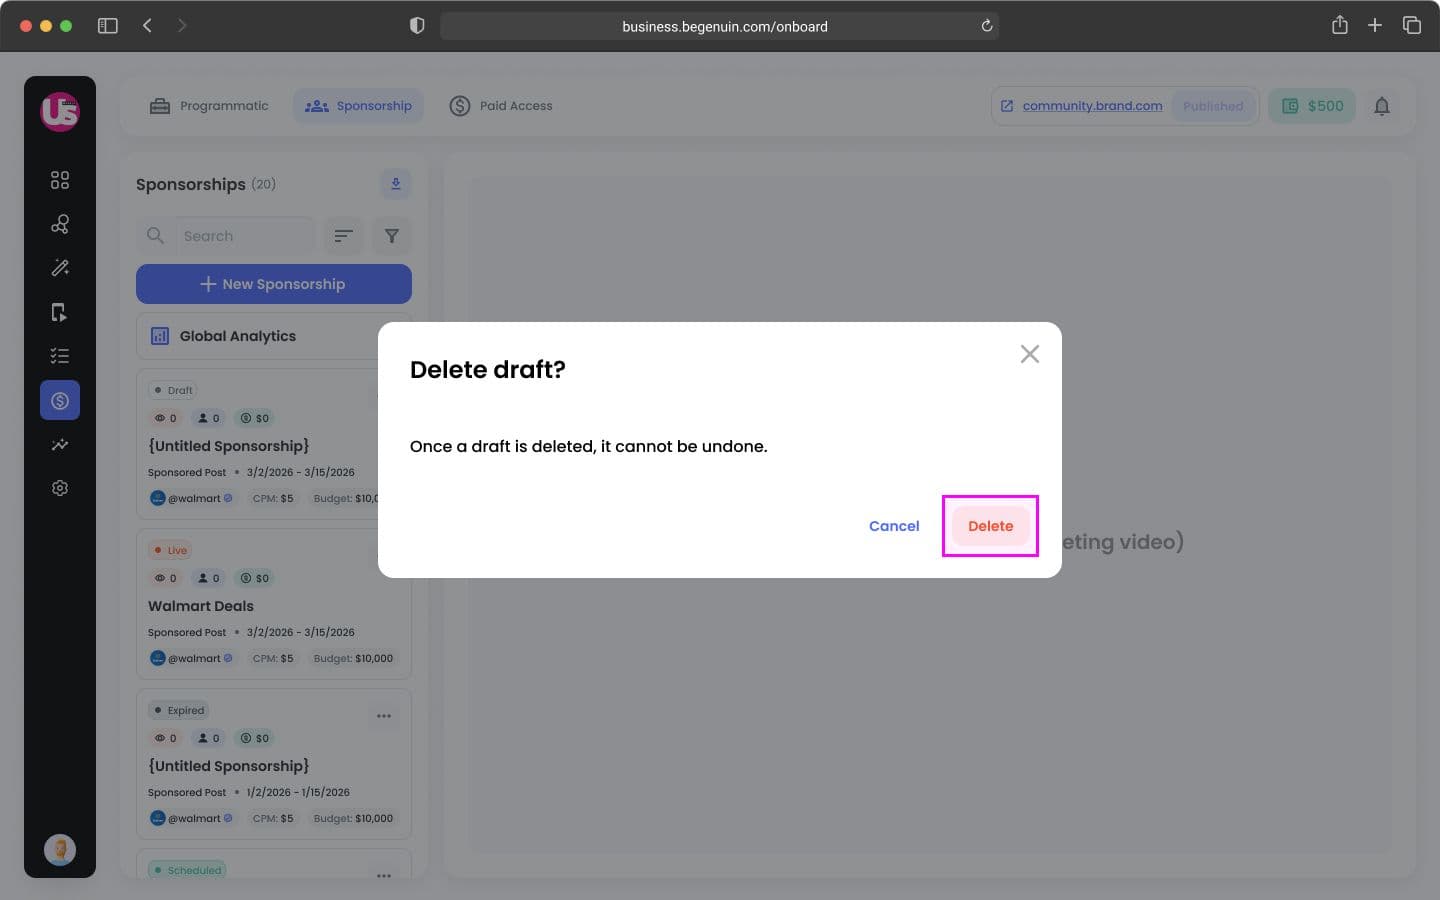
3. Delete Draft: Remove the sponsorship entirely.
A confirmation message will appear in a popup.

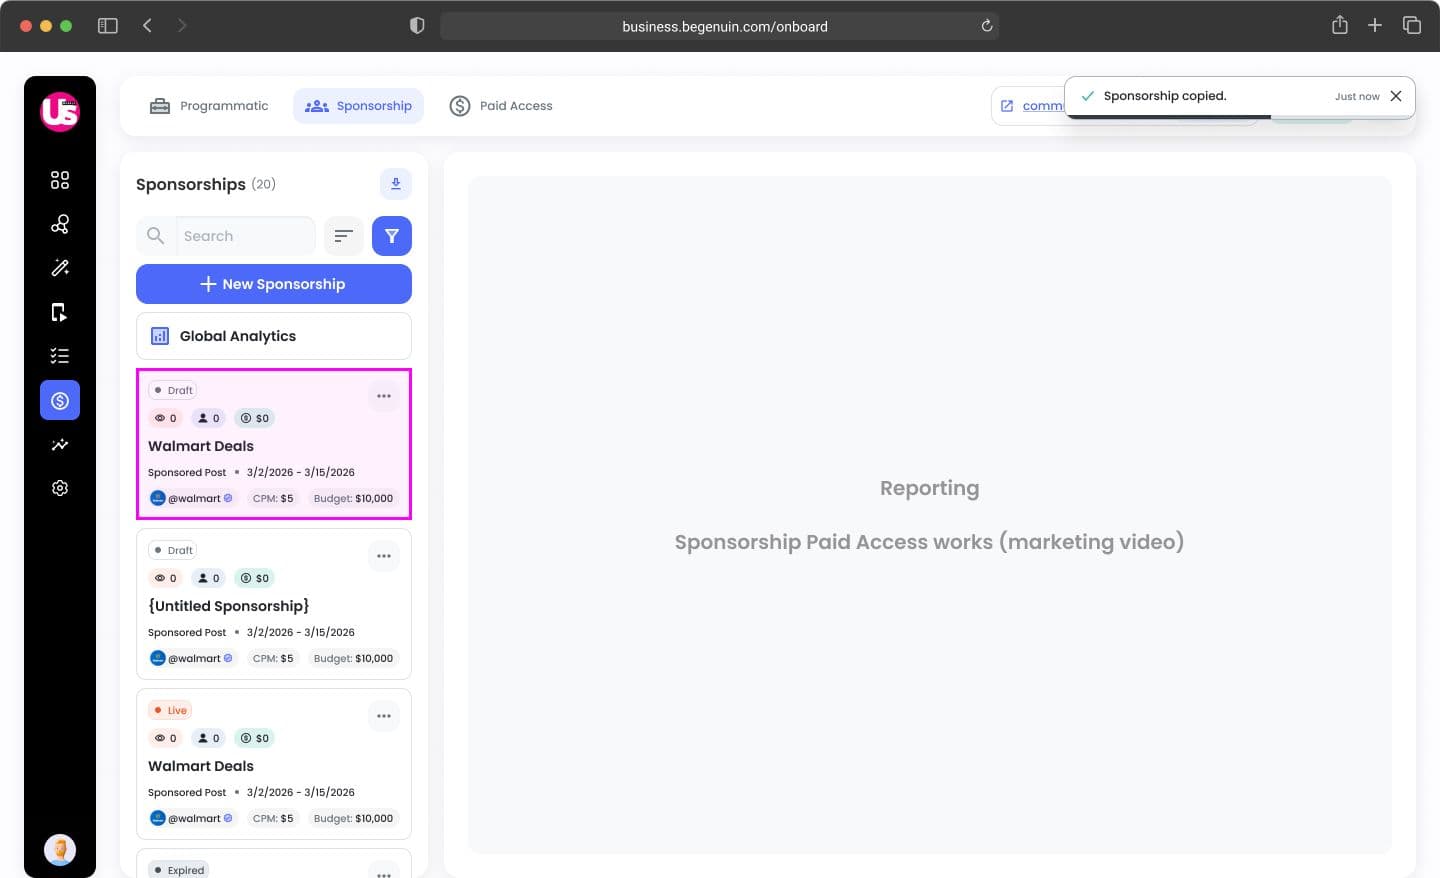
A live sponsorship can be copied into draft mode to be worked on.

A confirmation message, "Sponsorship copied," will then be displayed.
Pause Sponsorship
You can copy a live sponsorship into a draft mode.
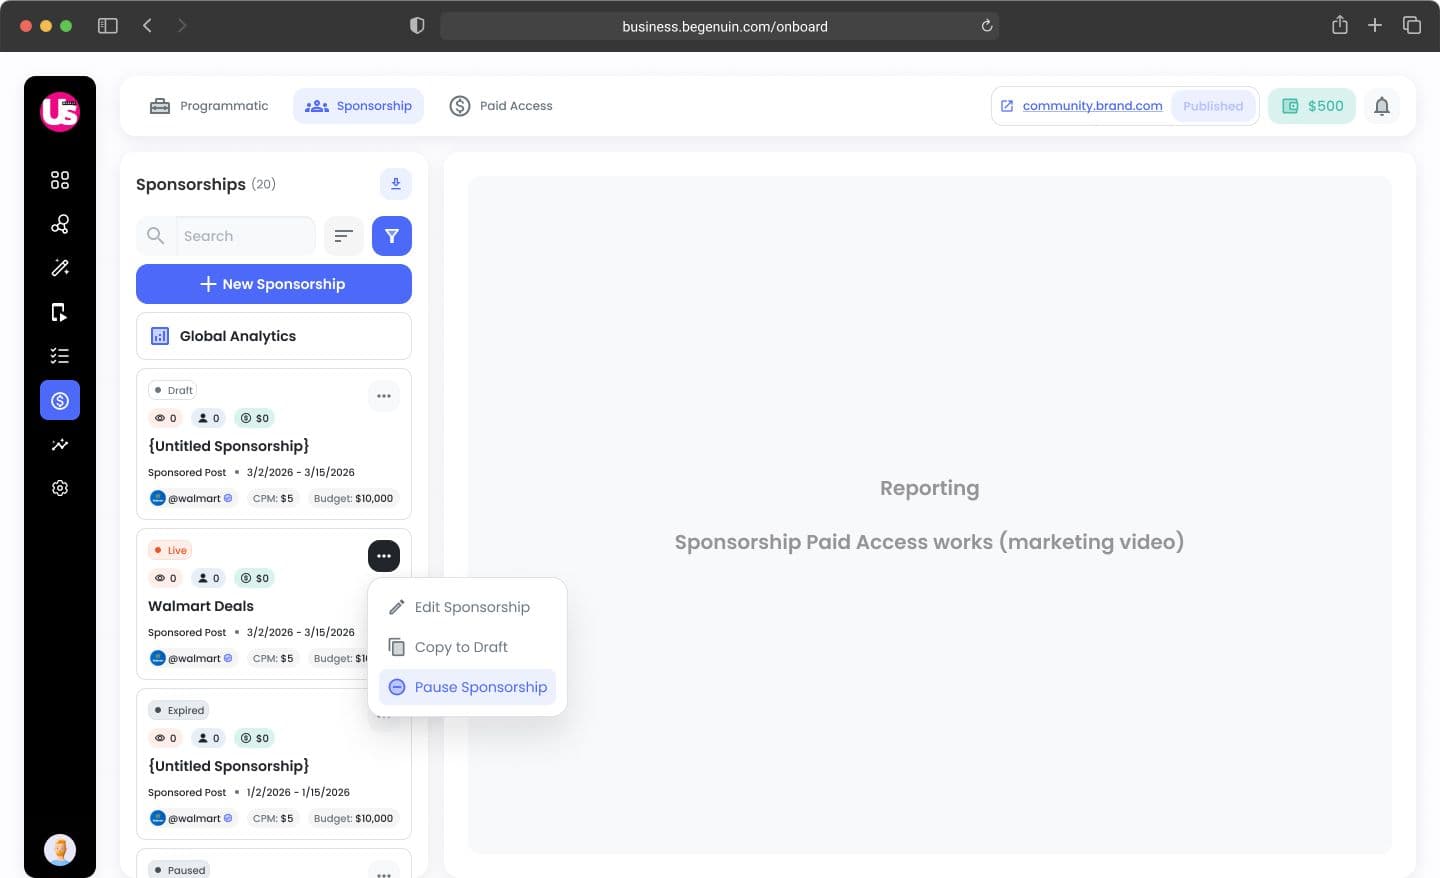
A confirmation window will appear, prompting you to choose whether or not to pause the Sponsorship.

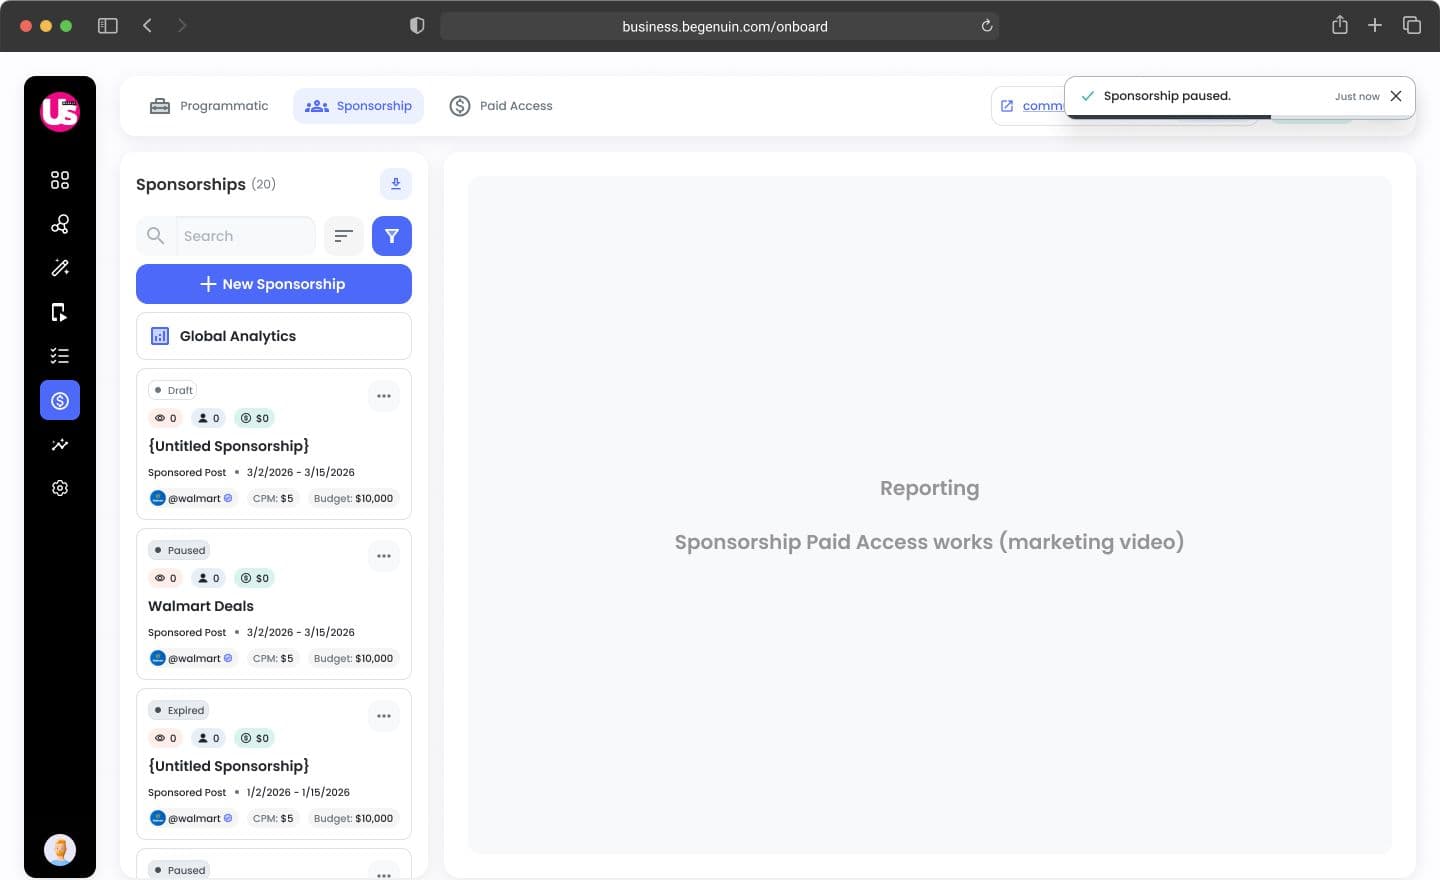
Once the message is confirmed, the status will display as "Sponsorship paused."
Resume Sponsorship
- For sponsorships that are paused or have ended.
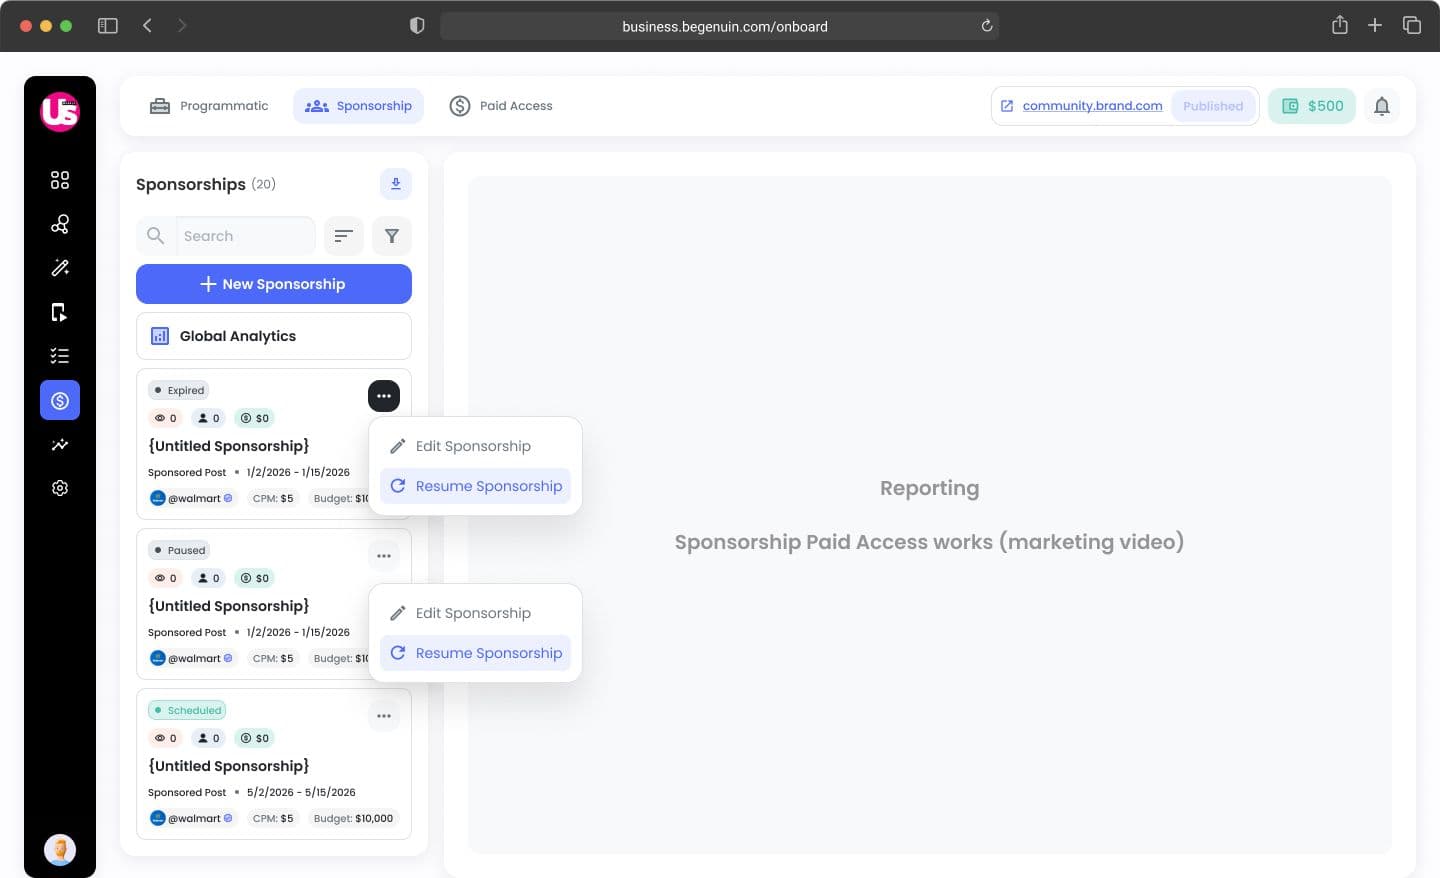
A confirmation window will pop up, allowing you to make your selection based on the specific requirements.
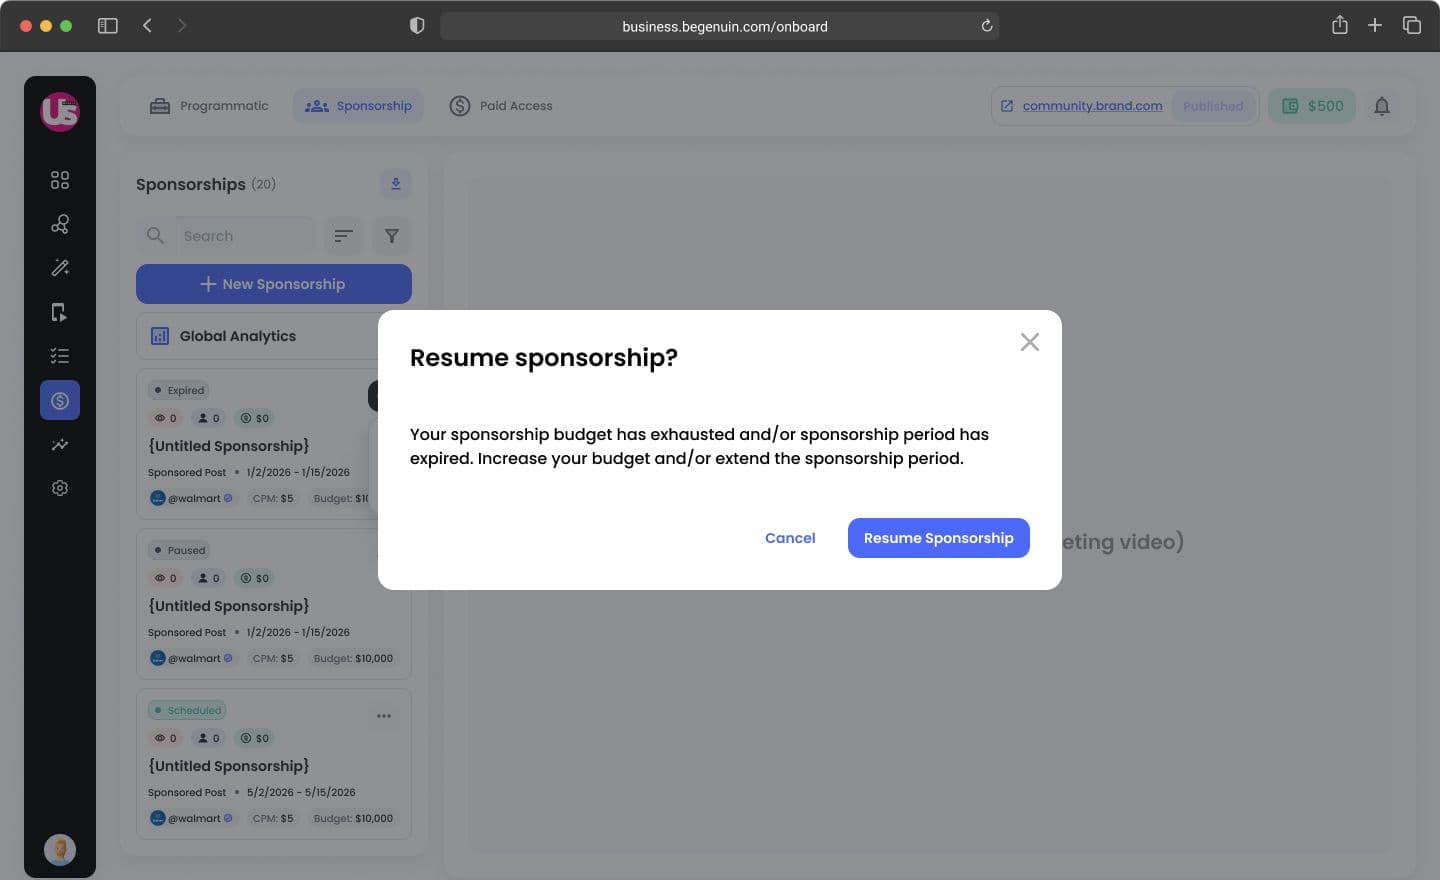
After confirming, select the "Resume Sponsored Post" option.
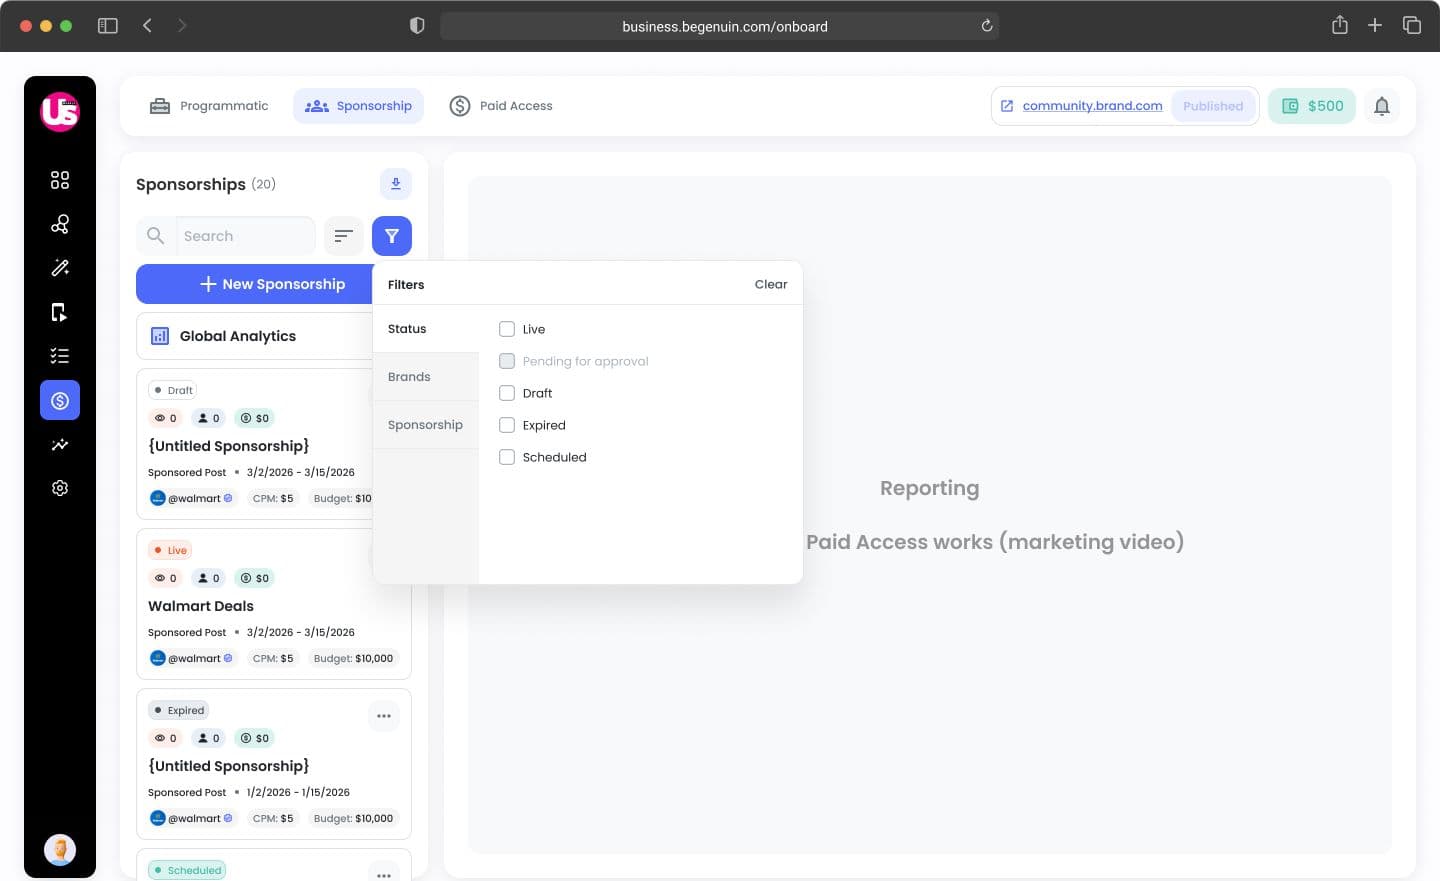
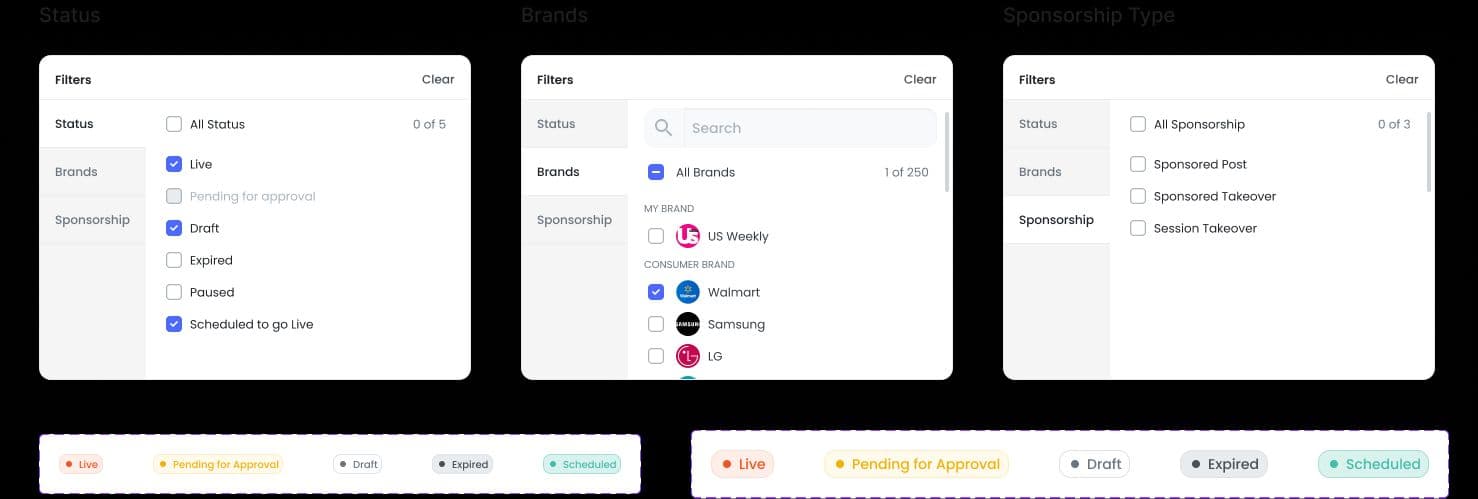
5. Filter and Find Sponsorships
In the Sponsorship tab, users can filter campaigns using the following criteria:
- Status (Draft, Scheduled, Live, Expired)
- Sponsorship Name
- Brand
Note: Sort and view options will not be available in the current phase.
Step 6: Manage Lifecycle
Sponsorship moves through:
| State | Description |
|---|---|
| Draft | Initial setup |
| Scheduled | Ready to go live |
| Live | Active campaign |
| Expired | Ended / paused |
Lifecycle Flow
Draft → Scheduled → Live → Expired
- Auto goes Live at start time
- Ends when:
- End date reached OR
- Budget exhausted
Sponsorship Types Explained
1. Sponsored Post
- Appears within feed placements
- Blends with organic content
- Unlimited posts (current phase)

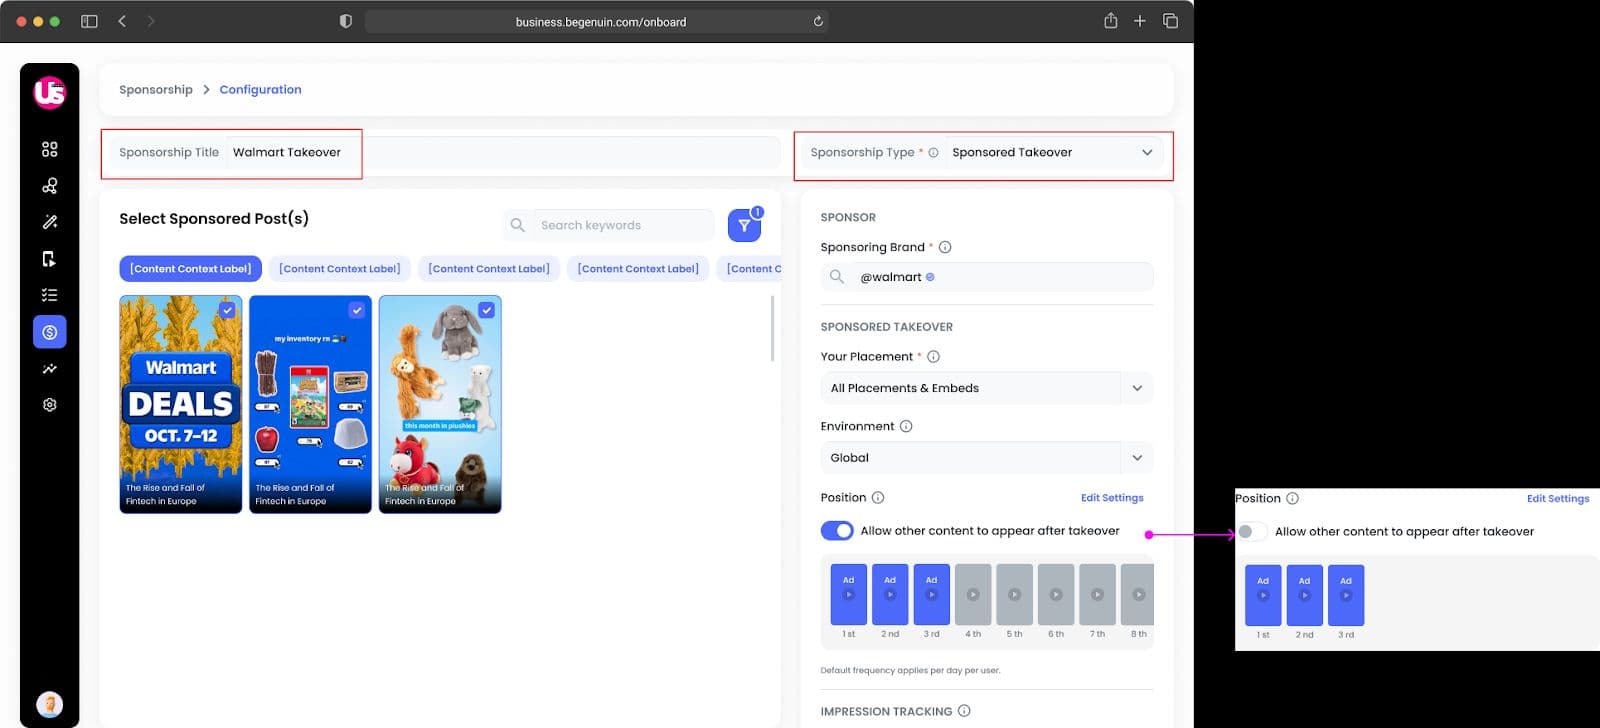
2. Sponsored Takeover
- Entire placement shows sponsored content
Optional toggle: Allow organic content after takeover
Key Logic (Important to Understand)
Ad Delivery Logic
Sponsored content appears only if:
- Placement enabled in Ad Config
- Placement selected in Sponsorship
- Sponsorship is Live
- Budget not exhausted
This allows you to set up sponsorships even if the full Ad Config setup is pending.
However, sponsored ads will only be displayed in placements/embeds that are:
- Part of an active ad preset in Ad Settings, and Specifically chosen within the sponsorship configuration.
Priority Logic (Multiple Sponsorships)
When multiple campaigns compete:
- Higher CPM wins
- Higher remaining budget
- Higher impressions delivered
- First Come First Serve (FCFS)
Example Scenarios
Scenario 1: Brand Partnership Campaign
A media brand partners with a retail brand:
- Selects 10 videos
- Tags sponsoring brand
- Runs campaign for 2 weeks
- Earns revenue per impression
Scenario 2: Product Launch Takeover
A brand launches a new product:
- Uses Sponsored Takeover
- Shows only campaign videos in carousel
- Drives maximum visibility
Scenario 3: Always-On Monetization
- No budget defined
- Only end date set
- Runs continuously and invoices based on CPM
Specs & Limitations
Supported
- Sponsored Posts & Takeover
- CPM-based monetization
- Placement & environment targeting
- Draft - Live lifecycle
- GTM & Pixel tracking
- Metadata customization (non-destructive)
Not Supported Yet
- Session Takeover
- Auction / pacing logic
- Multi-brand campaigns
- Approval workflows
- Internal payment processing
- Email notifications
- House Ads creation (coming soon)
Editing Rules
| Field | Draft/Scheduled | Live |
|---|---|---|
| Title | Yes | Yes |
| Posts | Yes | Yes |
| CPM | Yes | No |
| Budget | Yes | No |
| Start Date | Yes | No |
| End Date | Yes | Yes |
Error Handling
- Missing placements - prompt to configure Ad Settings
- Incomplete draft - cannot schedule
- Invalid dates - must reconfigure
FAQs
1. Does sponsorship change the original post?
No. It creates a copy of metadata for the sponsored version.
2. Can I run multiple sponsorships together?
Yes. Priority is determined by CPM, budget, and delivery metrics.
3. What happens if I don’t set a budget?
Campaign runs until the end date.
4. Why are my sponsored posts not showing?
Check:
- Placement enabled in Ad Config
- Placement selected in sponsorship
- Campaign is Live
5. Can I edit a live sponsorship?
Partially. You cannot edit CPM, budget, or type once live.
Future Enhancements
- House Ads tagging & filtering
- Multi-brand sponsorship campaigns
- Auction & pacing logic
- Approval workflows
- Integrated payments
- Advanced scheduling (time windows)
- Network-based targeting
